


NOTE
Do not press and hold the button. The front panel button doubles as a panic button that activates warning lights
and sirens for deterrence cameras if held for 3 seconds.
4.8
Connecting Cameras to the Local Area Network (LAN)
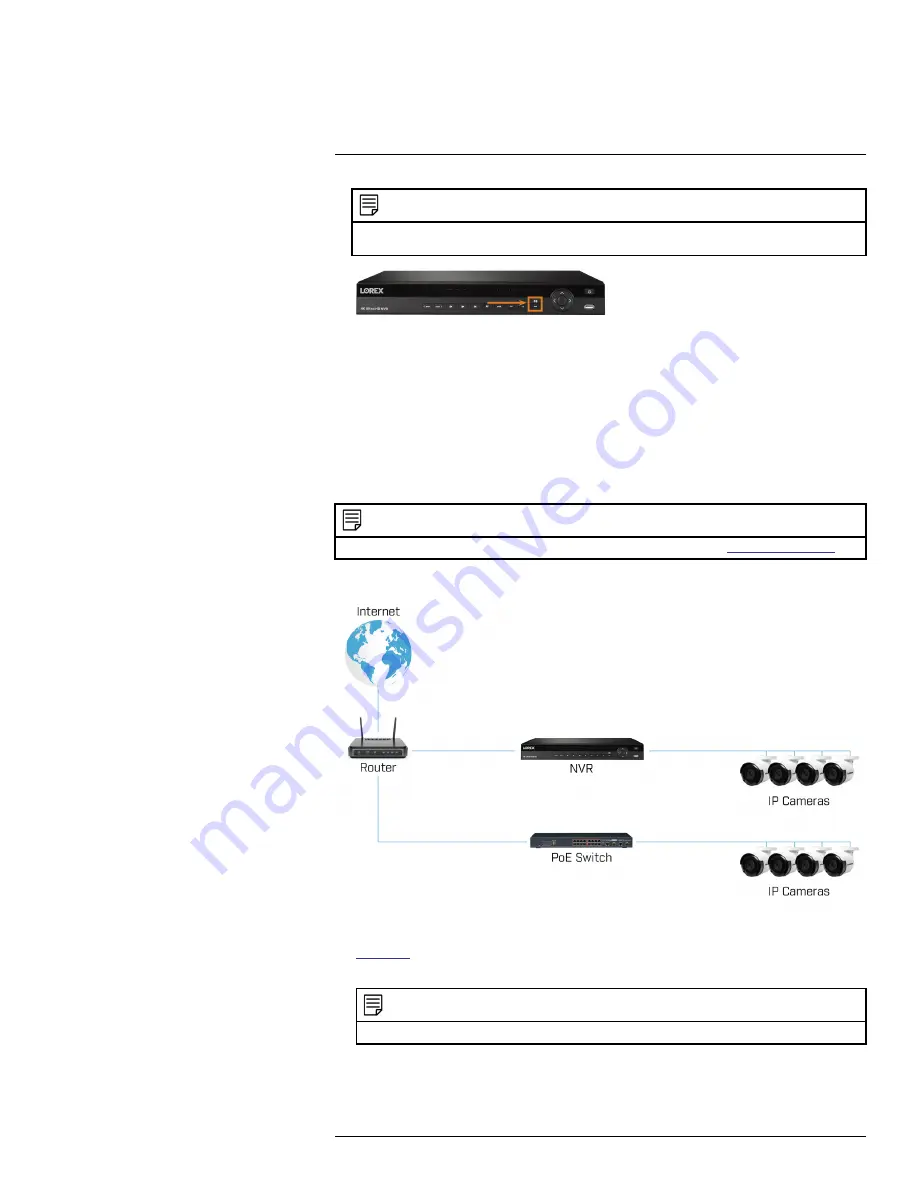
For flexibility, you may also connect IP cameras to the same Local Area Network (LAN) as the
NVR instead of connecting them directly to NVR. This is accomplished by connecting the cam-
eras to the same router as the NVR.
For these installations, an external PoE switch (sold separately) or power adapter (sold separately)
must be used to provide power to each IP camera. You also must add the cameras on the NVR be-
fore they will show a picture on the monitor or be recorded by the NVR.
Follow the steps below to connect the cameras to the NVR over the LAN.
NOTE
Compatible with Lorex HD IP cameras. For a list of compatible cameras, please visit
Step 1 of 2 — Option A: Connecting cameras to your local network using a PoE switch:
1. Connect an Ethernet cable from the LAN port on an external PoE switch (sold separately on
) to your router using a CAT5e or higher Ethernet cable. Connect the power cable to
the PoE switch and to a power outlet or surge protector.
NOTE
Terminology may vary depending on the model of PoE switch you have.
2. Connect the IP cameras to the PoE switch using the Ethernet extension cables. The PoE switch
will provide power and video transmission the same way as your NVR.
#LX400113; r. 3.0/56326/56332; en-US
10