


Using the Main Menu
15
15.1.3
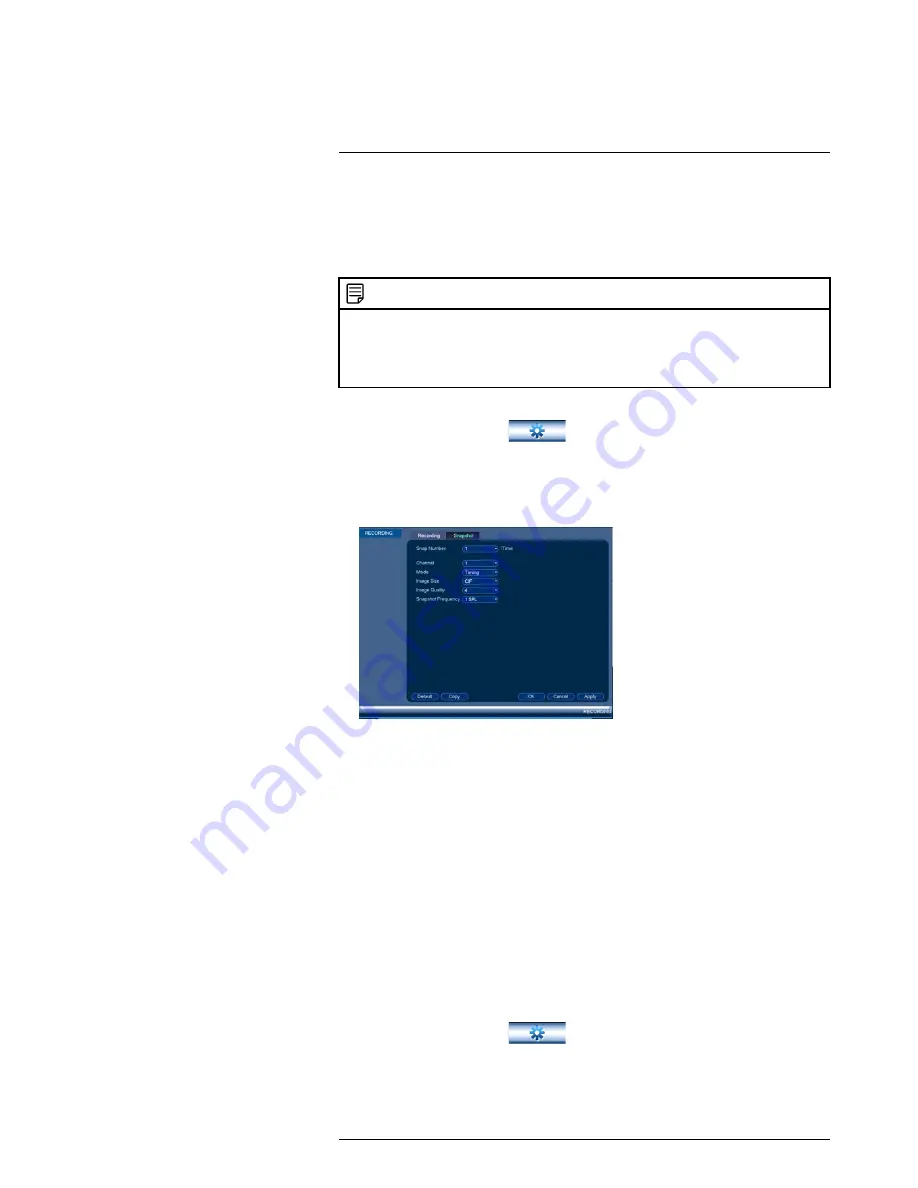
Configuring Snapshot Recording Settings
The system can be set to record snapshot images when a camera detects motion. These
snapshots can be viewed through the Search menu or can be attached to email alerts
and push notifications. The Snapshot tab in the Recording menu controls the quality and
recording parameters for each camera.
NOTE
In order to enable Snapshot recording, the following menu options must be configured:
•
The Snapshot schedule must be enabled for times that you would like to save snapshots. See
15.3.14
Configuring the Snapshot Schedule
, page 63.
•
Snapshot recording must be enabled for motion detection in the Event menu. See .15.3.7
Configur-
ing Motion Detection
, page 56.
To configure snapshot recording settings:
1. From the Main Menu, click
and select
Recording>Snapshot
.
2. Under
Snap Number
, select the number of snapshots the system will take when the
snapshot button is pressed.
3. Configure the following settings for snapshots saved automatically from motion de-
tection or the snapshot schedule:
•
Channel
: Select the channel you would like to configure.
•
Mode
: Select
Timing
for the system to take snapshots according to the snapshot
schedule (see 15.3.14
Configuring the Snapshot Schedule
, page 63) Select
Trig-
ger
for the system to take snapshots only when triggered by motion detection
(snapshot must be enabled in the Motion Detect menu (see 15.3.7
Configuring
Motion Detection
, page 56).
•
Image Size
: Select the resolution for snapshots.
•
Image Quality
: Select the snapshot image quality between
1
(lowest) and
6
(highest)
•
Snapshot Frequency
: Select the number of snapshots (up to 7) the system will
take each time.
4. Click
OK
to save changes.
15.1.4
Creating Custom Channel Names
You can assign custom names to your cameras. For example, you can name your cam-
eras based on their location (e.g. hallway or front door).
To create custom channel names:
1. From the Main Menu, click
and select
Channel Name
.
#LX400060; r.30328/35049; en-US
47
Summary of Contents for LHV16212
Page 1: ...Instruction Manual LHV2000 Series...
Page 2: ......
Page 3: ...Instruction Manual LHV2000 Series LX400060 r 30328 35049 en US iii...
Page 10: ......
Page 175: ......