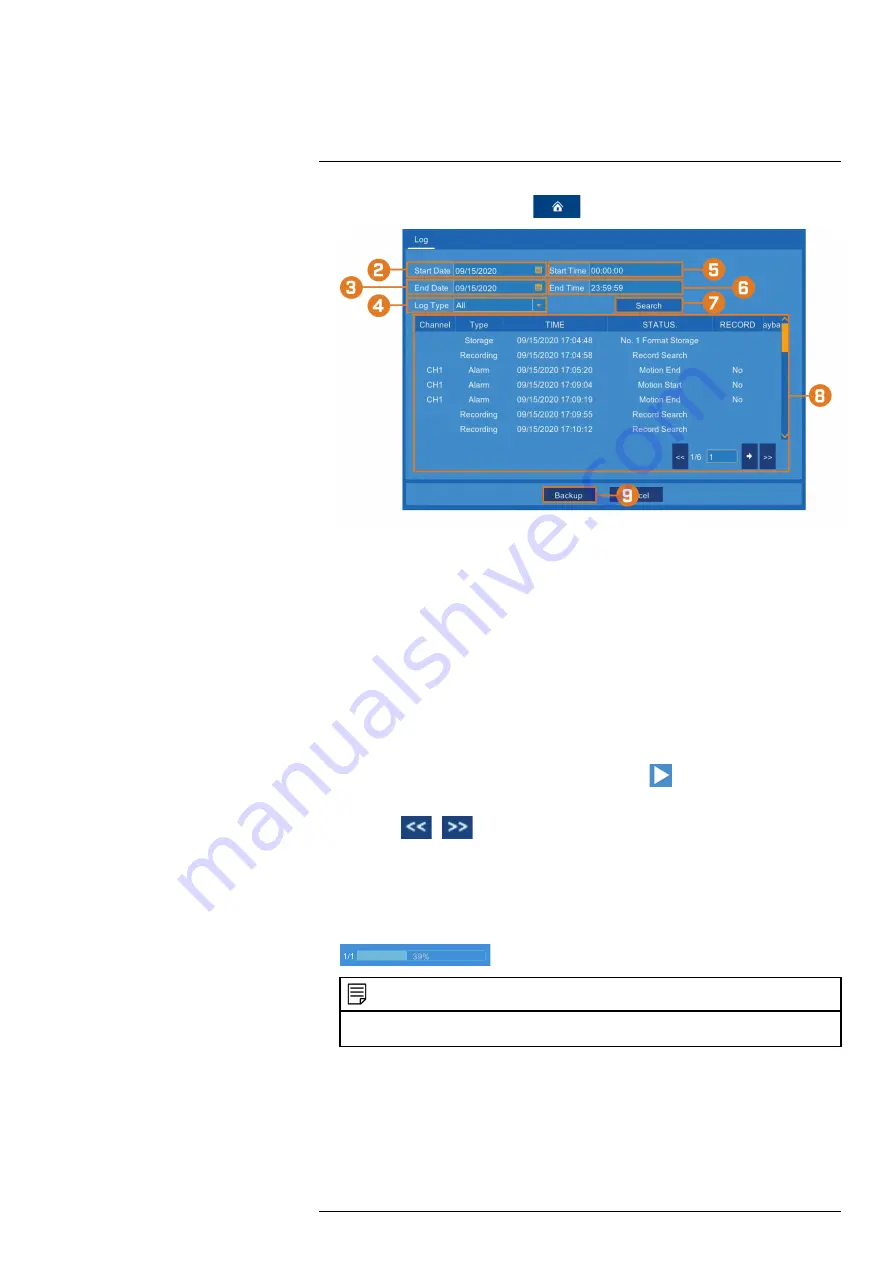
1. From the live viewing screen, click
>
System
>
Log
.
2. Click the field next to
Start Date
to choose the starting date for your search from the on-
screen calendar.
3. Click the field next to
End Date
to choose the end date for your search from the on-screen
calendar.
4. Select the type of events you would like to search for from the dropdown next to
Log Type
,
or select
All
to see the entire system log for the selected time period.
5. Click the field next to
Start Time
to enter the starting time for your search (24-hour format).
The search will begin at this time on the start date.
6. Click the field next to
End Time
to enter the starting time for your search (24-hour format).
The search will end at this time on the end date.
7. Click
Search
.
8. Browse system log events from your search period:
•
Video events can be played back instantly by clicking
in the
Playback
column.
Right-click to return to your search results.
•
Use the
/
buttons in the bottom-right corner of the menu to move between pa-
ges of system log events.
9. Click
Backup
to create a backup of the system log for your search period.
10. The backup drive menu appears. Navigate to the folder you want the backup file to be saved
in, then click
OK
to begin. The progress bar at the bottom of the window shows you the
progress of the backup.
NOTE
For more details on using the backup drive menu, including a full overview of buttons and their functions,
see 9.3
, page 31.
13.4
Advanced Menu
Perform firmware upgrades, manage system events and warnings, load default settings, and
save/load current system settings.
#LX400115; r. 3.0/57178/57178; en-US
58


