


66/113
IP Address: IP address about current connection.
Sub Mask: Sub mask about current connection.
Default Gateway: Default gateway about current connection.
Link Speed: Show current transmit rate and receive rate.
Throughout: Display transmits and receive throughput in unit of Mbps.
Link Quality: Display connection quality based on signal strength and TX/RX
packet error rate.
Signal Strength 1: Receive signal strength 1, user can choose to display as
percentage or dBm format.
Signal Strength 2: Receive signal strength 2, user can choose to display as
percentage or dBm format.
Signal Strength 3: Receive signal strength 3, user can choose to display as
percentage or dBm format.
HT: Display current HT status in use, containing BW, GI, MCS, SNR0, and SNR1
value. (Show the information only for 802.11n wireless card.)
2.12
SoftAP(Only Windows7 support)
2.12.1
SoftAP(Only Window7 support)
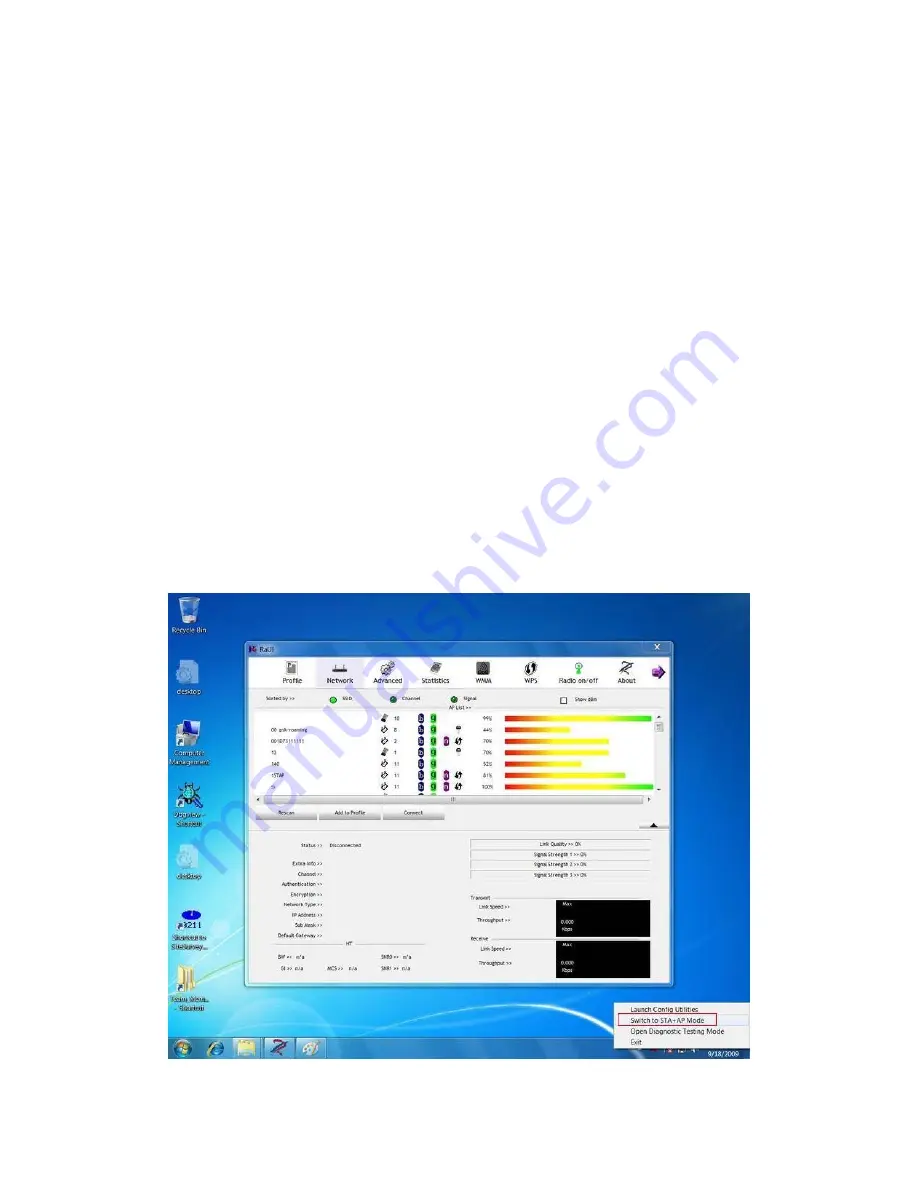
Windows 7 allows wireless device to be in both station (STA) and AP mode.
According to following steps, you can open or close AP function.
Click "Switch to STA+AP mode" item in RaUI system tray menu as shown in Figure
2-12-1.
Figure 2-12-1 Switch to STA+AP Mode
Summary of Contents for LP-7617
Page 1: ...1 113 Wireless LAN USB Adapter User Manual 1 0 2010...
Page 14: ...14 113 Double click WLAN AutoConfig Manage the AutoConfig properties in the dialog box...
Page 17: ...17 113 Double click the Network and Sharing Center icon...
Page 21: ...21 113 Figure 2 1 5 Profile page Figure 2 1 6 Network page Figure 2 1 7 Advance page...
Page 22: ...22 113 Figure 2 1 8 Statistics page Figure 2 1 9 WMM page Figure 2 1 10 WPS page...
Page 28: ...28 113 The Add Profile will appear...
Page 30: ...30 113 Now the profile which the user set appears in the profile list Click Activate...
Page 37: ...37 113 Click Add to Profile...
Page 39: ...39 113 Next you will see the new profile in the profile list Click Activate...
Page 78: ...78 113 The Auth Encry function will appear as below...
Page 80: ...80 113 Click OK The dialog box will appear as below...
Page 82: ...82 113 Auth Encry function appears...
Page 87: ...87 113 Click 8021X and the setting page will appear...
Page 89: ...89 113 2 Click OK The dialog box should appear as below...
Page 93: ...93 113 3 Click OK The dialog box should appear as the image below...
Page 98: ...98 113 2 Click OK The dialog box should appear as the image below...
Page 99: ...99 113 3 If the connection is successful the dialog box will appear as the image below...
Page 101: ...101 113 Press Connect button show Auth Encry window authentication mode is WAPI PSK...
Page 102: ...102 113 Key type is Hex enter 1234567890...
Page 103: ...103 113 You can also connect AP with WAPI CERT authentication mode...
Page 104: ...104 113 Select user certificate...
Page 105: ...105 113 Select authentication server certificate...
Page 111: ...111 113 It can t add the profile in Network page...


