


25/113
Additionally, the small icon will change color to reflect current wireless network
connection status. The status is shown as follows:
: Indicates the connected and signal strength is good.
: Indicates the connected and signal strength is normal.
: Indicates that it is not yet connected.
: Indicates that a wireless NIC can not be detected.
: Indicates that the connection and signal strength is weak.
2.2
Profile
2.2.1
Profile
The Profile List keeps a record of your favorite wireless settings at home, office, and
other public hot-spots. You can save multiple profiles, and activate the correct one at
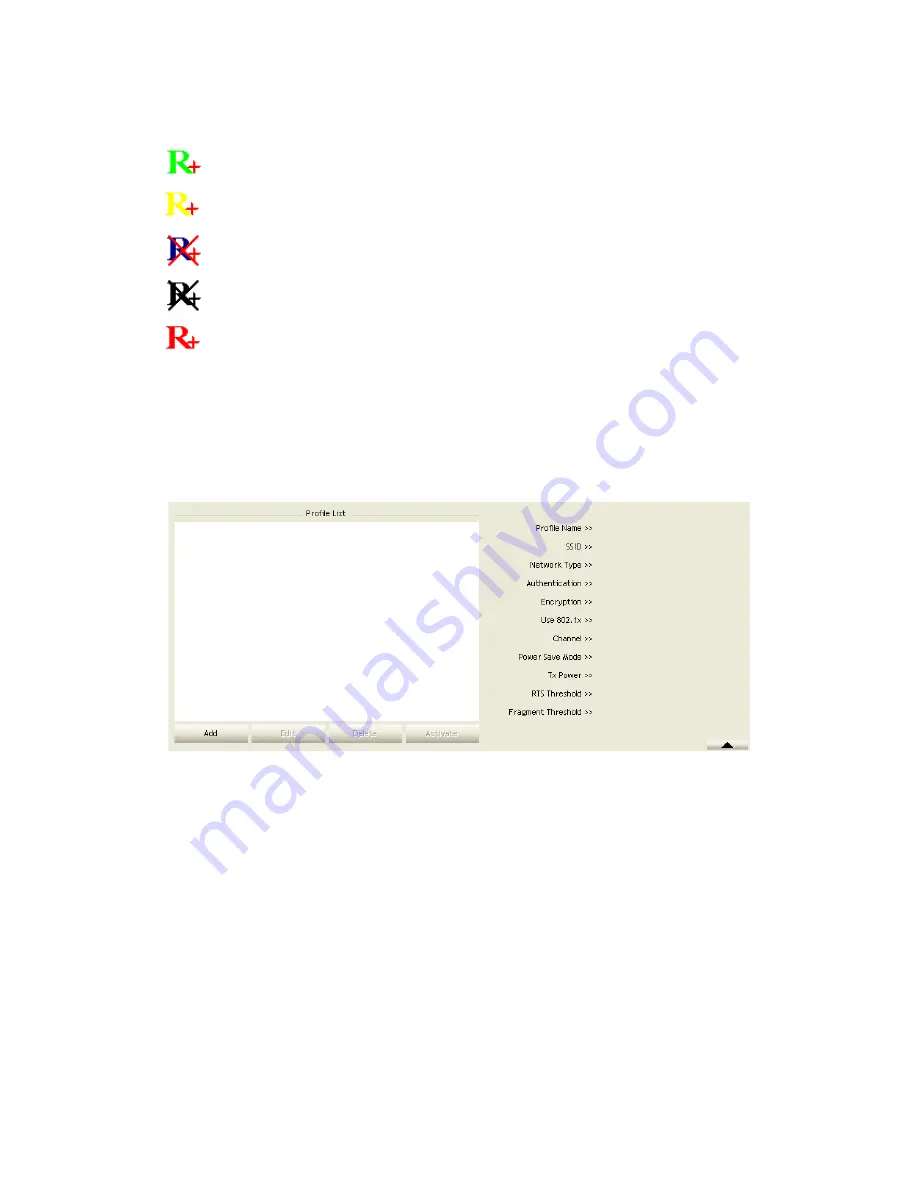
your preference. Figure 2-2-1 shows the basic profile section.
Figure 2-2-1 Profile function
Definition of each field:
Profile Name: Name of profile, preset to PROF* (* indicate 1, 2, 3...).
SSID: The access point or Ad-hoc name.
Network Type: Indicates the networks type, including infrastructure and Ad-Hoc.
Authentication: Indicates the authentication mode used.
Encryption: Indicates the encryption Type used.
Use 802.1x: Shows if the 802.1x feature is used or not.
Cannel: Channel in use for Ad-Hoc mode.
Power Save Mode: Choose from CAM (Constantly Awake Mode) or Power Saving
Mode.
Tx Power: Transmitting power, the amount of power used by a radio transceiver to
send the signal out.
RTS Threshold: Users can adjust the RTS threshold number by sliding the bar or
Summary of Contents for LP-7617
Page 1: ...1 113 Wireless LAN USB Adapter User Manual 1 0 2010...
Page 14: ...14 113 Double click WLAN AutoConfig Manage the AutoConfig properties in the dialog box...
Page 17: ...17 113 Double click the Network and Sharing Center icon...
Page 21: ...21 113 Figure 2 1 5 Profile page Figure 2 1 6 Network page Figure 2 1 7 Advance page...
Page 22: ...22 113 Figure 2 1 8 Statistics page Figure 2 1 9 WMM page Figure 2 1 10 WPS page...
Page 28: ...28 113 The Add Profile will appear...
Page 30: ...30 113 Now the profile which the user set appears in the profile list Click Activate...
Page 37: ...37 113 Click Add to Profile...
Page 39: ...39 113 Next you will see the new profile in the profile list Click Activate...
Page 78: ...78 113 The Auth Encry function will appear as below...
Page 80: ...80 113 Click OK The dialog box will appear as below...
Page 82: ...82 113 Auth Encry function appears...
Page 87: ...87 113 Click 8021X and the setting page will appear...
Page 89: ...89 113 2 Click OK The dialog box should appear as below...
Page 93: ...93 113 3 Click OK The dialog box should appear as the image below...
Page 98: ...98 113 2 Click OK The dialog box should appear as the image below...
Page 99: ...99 113 3 If the connection is successful the dialog box will appear as the image below...
Page 101: ...101 113 Press Connect button show Auth Encry window authentication mode is WAPI PSK...
Page 102: ...102 113 Key type is Hex enter 1234567890...
Page 103: ...103 113 You can also connect AP with WAPI CERT authentication mode...
Page 104: ...104 113 Select user certificate...
Page 105: ...105 113 Select authentication server certificate...
Page 111: ...111 113 It can t add the profile in Network page...


