60/113
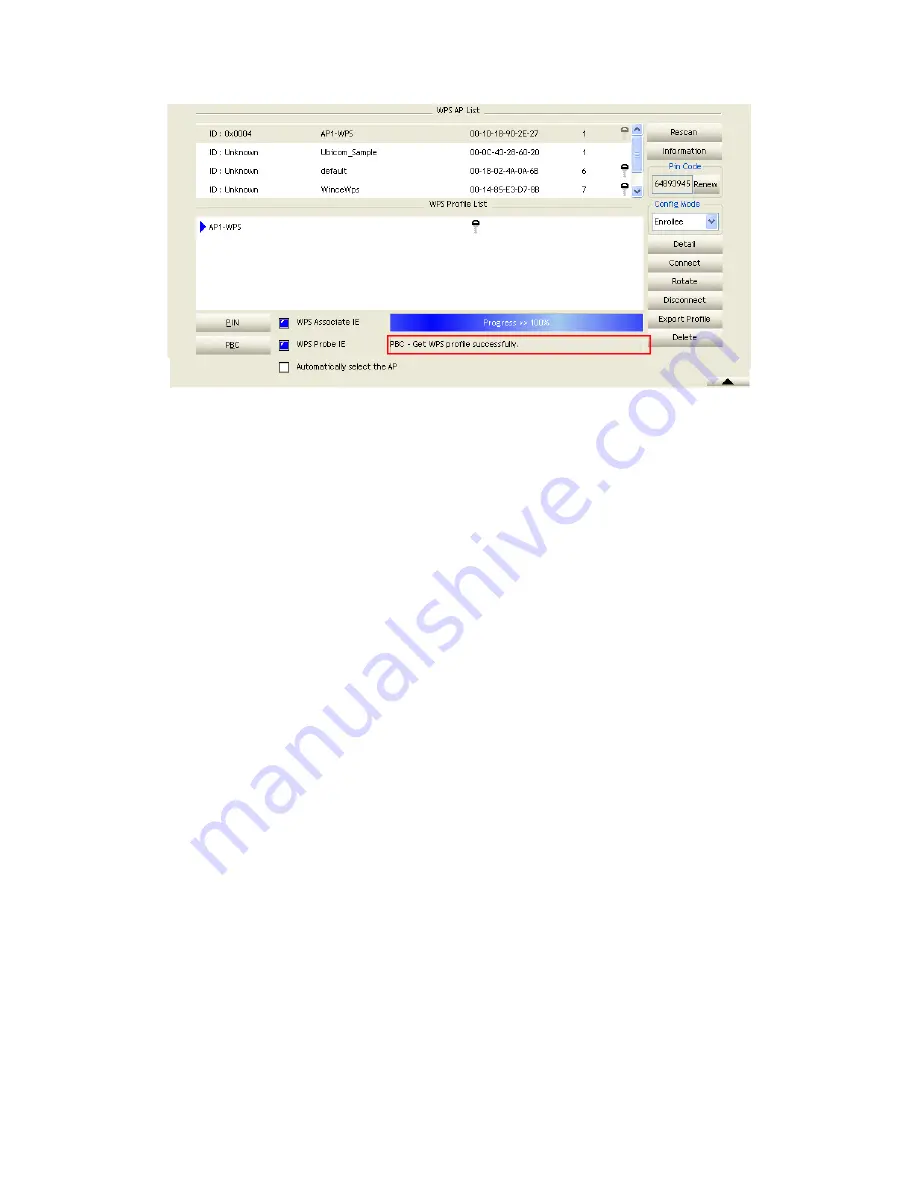
Describe "WPS Status Bar" - “PBC - xxx" as follow:
A successful PBC Configuration:
Start PBC connection ~> Scanning AP ~> Begin associating to WPS AP ~>
Associated to WPS AP ~> Sending EAPOL-Start ~> Sending EAP-Rsp (ID) ~>
Receive EAP-Rsp (Start) ~> Sending M1 ~> Received M2 ~> Sending M3 ~>
Received M4 ~> Sending M5 ~> Received M6 ~> Sending M7 ~> Received M8 ~>
Sending EAP-Rsp (Done) ~> Configured ~> WPS status is disconnected ~> WPS
status is connected successfully-SSID
No PBC AP available:
Scanning AP ~> No PBC AP available ~> Scanning AP ~> No PBC AP available
~>...
Too Many PBC AP available:
Scanning AP ~> Too Many PBC AP available ~> Scanning AP ~> Too Many PBC
AP available ~>...
WPS configuration doesn't complete after
two-minute connection
:
WPS EAP process failed.
When Errors occur within
two-minutes of establishing a connection
, the WPS status
bar might report "WPS EAP process failed".
Error messages might be:
1. Receive EAP with wrong NONCE.
2. Receive EAP without integrity.
3. An inappropriate EAP-FAIL received.
Describe "Multiple PBC session overlaps" as follow:
Dual bands:
AP1 is a G-Band AP using PBC mode. (ID = 0x0004)
AP2 is a A-Band AP using PBC mode. (ID = 0x0004)
They have the same UUID-E.
STA would regard these two APs as a dual-radio AP and select one band to connect.
Different UUID-E :
AP1 is a G-Band AP using PBC mode. (ID = 0x0004)
AP2 is a G-Band AP using PBC mode. (ID = 0x0004)
Summary of Contents for LP-7617
Page 1: ...1 113 Wireless LAN USB Adapter User Manual 1 0 2010...
Page 14: ...14 113 Double click WLAN AutoConfig Manage the AutoConfig properties in the dialog box...
Page 17: ...17 113 Double click the Network and Sharing Center icon...
Page 21: ...21 113 Figure 2 1 5 Profile page Figure 2 1 6 Network page Figure 2 1 7 Advance page...
Page 22: ...22 113 Figure 2 1 8 Statistics page Figure 2 1 9 WMM page Figure 2 1 10 WPS page...
Page 28: ...28 113 The Add Profile will appear...
Page 30: ...30 113 Now the profile which the user set appears in the profile list Click Activate...
Page 37: ...37 113 Click Add to Profile...
Page 39: ...39 113 Next you will see the new profile in the profile list Click Activate...
Page 78: ...78 113 The Auth Encry function will appear as below...
Page 80: ...80 113 Click OK The dialog box will appear as below...
Page 82: ...82 113 Auth Encry function appears...
Page 87: ...87 113 Click 8021X and the setting page will appear...
Page 89: ...89 113 2 Click OK The dialog box should appear as below...
Page 93: ...93 113 3 Click OK The dialog box should appear as the image below...
Page 98: ...98 113 2 Click OK The dialog box should appear as the image below...
Page 99: ...99 113 3 If the connection is successful the dialog box will appear as the image below...
Page 101: ...101 113 Press Connect button show Auth Encry window authentication mode is WAPI PSK...
Page 102: ...102 113 Key type is Hex enter 1234567890...
Page 103: ...103 113 You can also connect AP with WAPI CERT authentication mode...
Page 104: ...104 113 Select user certificate...
Page 105: ...105 113 Select authentication server certificate...
Page 111: ...111 113 It can t add the profile in Network page...


