10
Knowing Your DVD Recorder
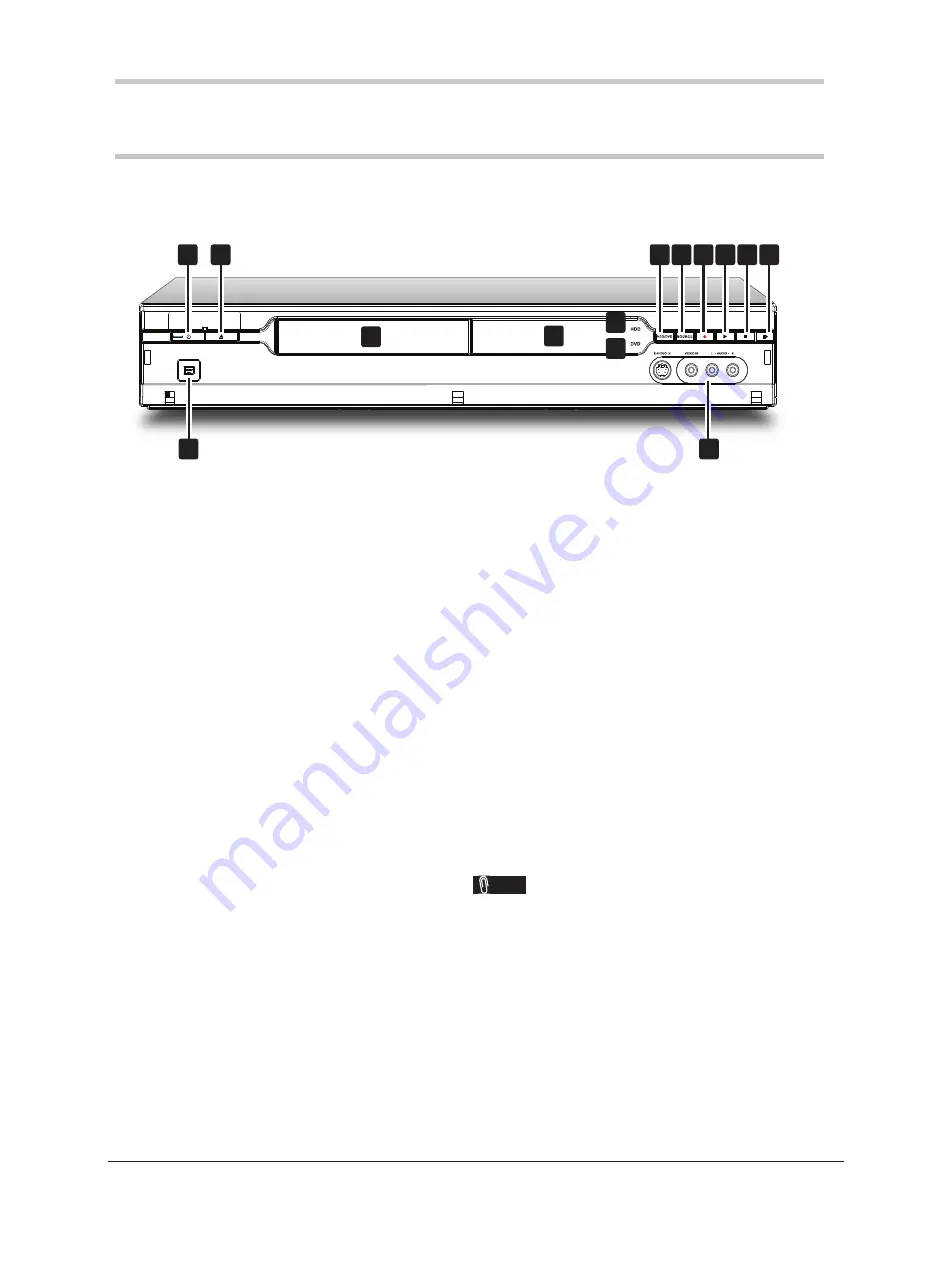
Front-Panel Connections
1
7 8 9 10 11 12
2
3
5
6
4
13
14
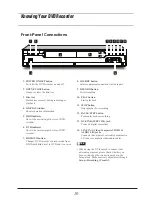
1. POWER ON/OFF button
Switches the DVD recorder on and off
2. OPEN/CLOSE button
Opens or closes the disc tray
3. Disc tray
Holds discs securely during recording or
playback
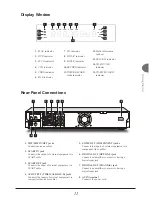
4. DISPLAY window
Shows operation information
5. HDD indicator
Shows the current target device of DVD
recorder
6. DVD indicator
Shows the current target device of DVD
recorder
7. HDD/DVD button
Changes DVD recorder’s current mode from
HDD (hard disk drive) to DVD and vice versa
8. SOURCE button
Selects equipment connected via line inputs
9. RECORD button
Starts recording
10. PLAY button
Starts playback
11. STOP button
Stops playback or recording
12. PAUSE/STEP button
Pauses playback or recording
13. DV-LINK (IEEE 1394) jack
Connects digital camcorder
14. LINE IN (S-Video/Composite VIDEO &
AUDIO L/R) jacks
Connects the outputs of external equipment via
S-Video or composite video/audio cables
Note
• When using the S-Video jack to connect your
external equipment, please check whether you
have switched on the connection mode in the
Setup menu. Make necessary adjustment through
Setup
Recording
Front AV
.


