


33
Wireless-G PrintServer for USB 2.0
Chapter 8: Bi-Admin Management
The Bi-Admin Management Utility
•
Configure
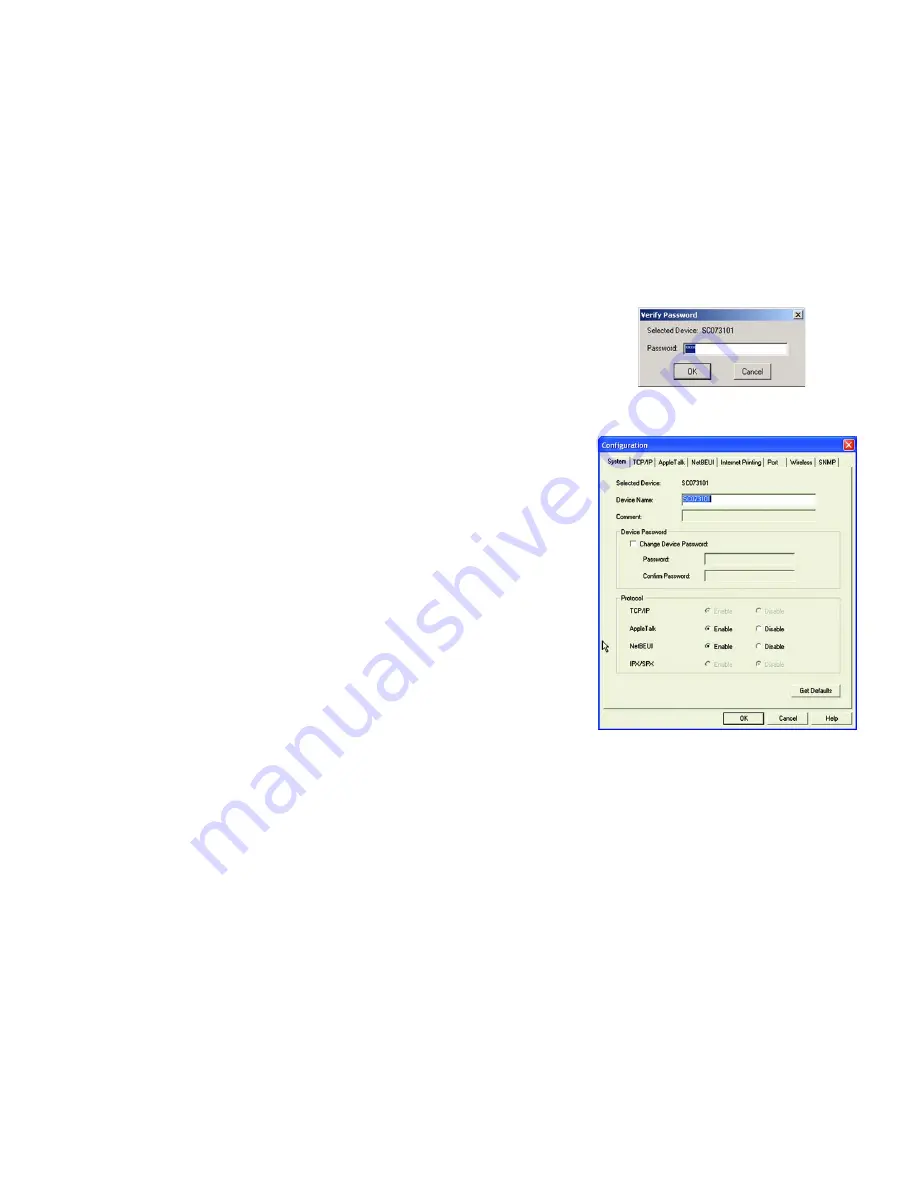
. You may configure the PrintServer with this option. If you click this option, a
Verify Password
screen will appear. Make sure that you enter the password in the field before you click OK, or else an
Incorrect Password message will appear. If the message appears, click
OK
. Enter the correct password in the
field provided, and click
OK
again.
After the password has been successfully entered, the
Configuration
screen will appear, as shown in Figure
8-12. It displays eight tabs: System, TCP/IP, AppleTalk, NetBEUI, Internet Printing, Port, Wireless, and SNMP.
The tabs will be described below.
System
•
Device Name
. Enter the Device Name in the field provided.
•
Comment
. Enter any comments in the
Comment
field.
•
Device Password
. To change the password, select
Change Device Password
, enter the new password
in the
Password
field, and then re-enter the password in the
Confirm Password
field.
•
Protocol
. Select the protocol you want to use for your network: TCP/IP, AppleTalk, NetBEUI, IPX/SPX.
Click the
Get Defaults
button if you want to cancel your changes and use the default settings.
When finished making your changes on this tab, click the
OK
button to save these changes, or click the
Cancel
button to undo your changes. For more information, click the
Help
button.
Figure 7-11: Verify Password
Figure 7-12: Configuration - System


