14
Connecting the Camera to the
Network using the LAN cable
without the Broadband Router
Assigning the Static IP Address to
the Camera
1. Follow steps 1-6 as shown [Connecting the
Camera to a Computer using the Cross Cable]
on page 11.
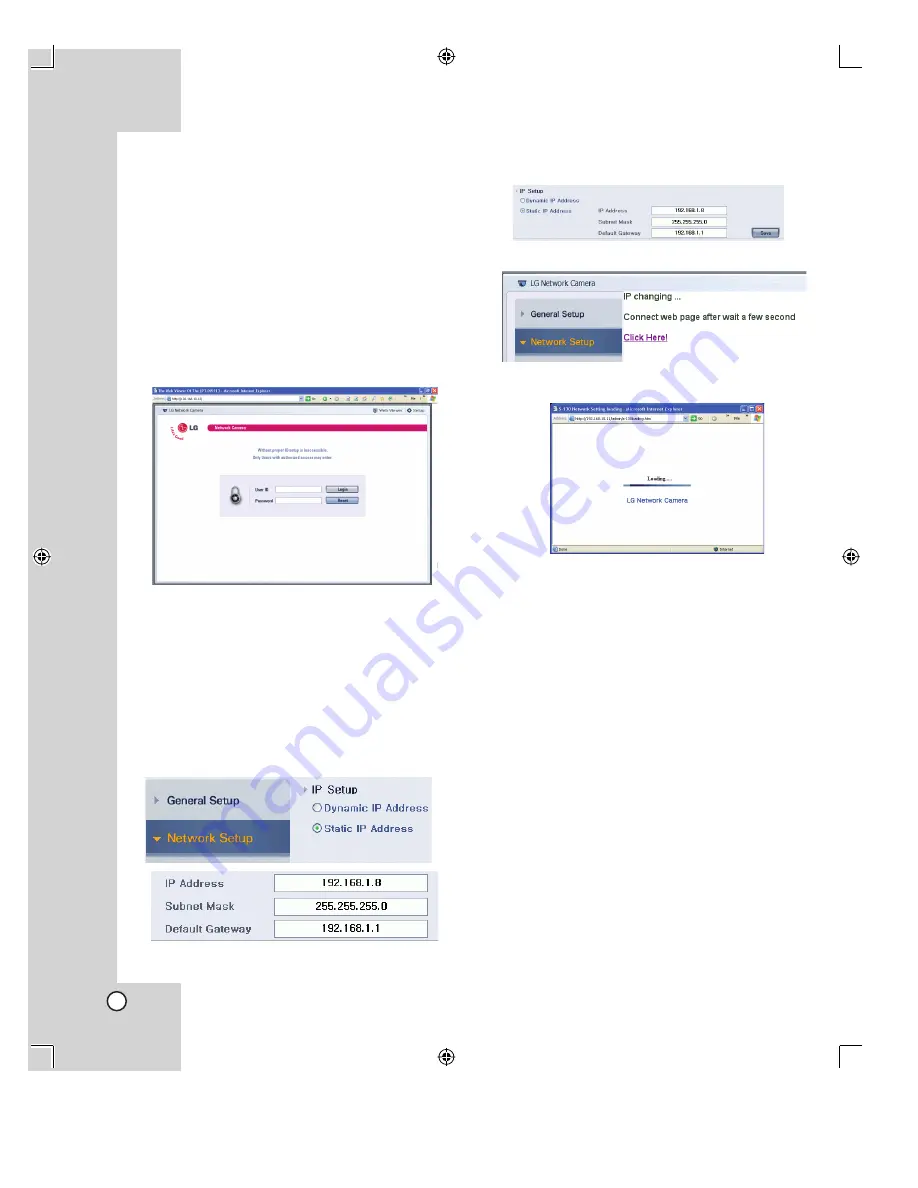
2. Click the [Setup] icon on the home page.
The login page appears.
3. Enter the user ID and password of administrator,
then click Login.
The user ID [admin] and the password [admin]
are set at the factory for the administrator. You
can change them in the [General Setup] menu
(see page 20)
4. Select [Network Setup] option.
5. Select [Static IP Address] and enter the IP
Address, Subnet Mask and Default Gateway of
the camera.
6. Click [Save] icon of the IP Setup option to save
the settings.
7. Click [Click Here!].
The Network Setting loading page is displayed.
After a few seconds, the changed home page
of the camera is displayed. In case of using the
cross cable, the changed home page may not
displayed but, the new IP address of the camera
is changed correctly.
8. Disconnect the cross cable from the computer
and the camera.
9. Connect the camera to the network using the
LAN cable (Straight cable).
10. Connect the computer to the network using the
LAN cable (Straight cable).
11. Set the network configuration of the computer.
12. Start the web browser on the computer and enter
the assigned IP address of the camera.
The home page of the camera is displayed.
13. For more detail using the home page of the
camera, refer to [Setup configuration] and
[Operating].
Notes:
• You will use the two IP address for this connection.
• Do not use the same IP address in the network.
• The static IP means the globally unique static IP.
Summary of Contents for LPT-DW113M
Page 44: ...P NO MFL30580181 ...


