Use
To
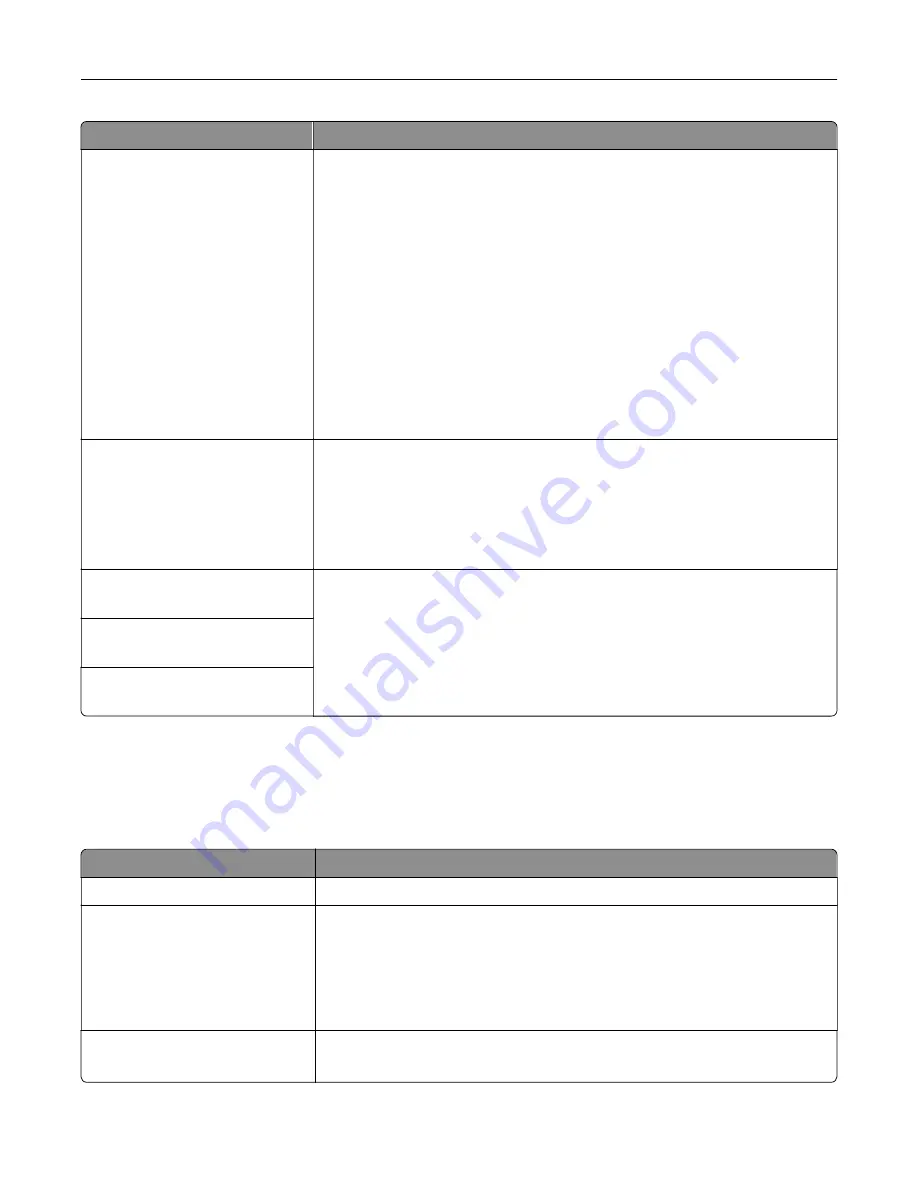
USB Buffer
Disabled
Auto
3K to [maximum size allowed]
Set the size of the USB input buffer.
Notes:
•
Auto is the factory default setting.
•
Disabled turns off job buffering. Any jobs already buffered in the printer
hard disk are printed before normal processing resumes.
•
The USB buffer size value can be changed in 1KB increments.
•
The maximum size allowed depends on the amount of memory in the
printer, the size of the other link buffers, and whether Resource Save is
enabled or disabled.
•
To increase the maximum size range for the USB Buffer, disable or
reduce the size of the parallel, serial, and network buffers.
•
The printer automatically restarts when the setting is changed from the
printer control panel. The menu selection is then updated.
Mac Binary PS
On
Off
Auto
Set the printer to process Macintosh binary PostScript print jobs.
Notes:
•
Auto is the factory default setting.
•
On processes raw binary PostScript print jobs.
•
Off filters print jobs using the standard protocol.
ENA Address
yyy.yyy.yyy.yyy
Set the network address, netmask, and gateway information for an external print
server.
Note:
This menu is available only when the printer is attached to an external
print server through the USB port.
ENA Netmask
yyy.yyy.yyy.yyy
ENA Gateway
yyy.yyy.yyy.yyy
Security menu
Set Date and Time menu
Use
To
Current Date and Time
View the current date and time settings for the printer.
Manually Set Date and Time
Enter the date and time.
Notes:
•
Date/Time is set in YYYY-MM-DD HH:MM:SS format.
•
Manually setting the date and time sets “Enable NTP” (Network Time
Protocol) to On.
Time Zone
Select the time zone.
Note:
GMT is the factory default setting.
Understanding the printer menus
67
Summary of Contents for CS310 Series
Page 102: ...2 Open the top door 2 1 3 Remove the toner cartridges 1 2 Maintaining the printer 102...
Page 107: ...16 Insert the waste toner bottle 17 Insert the right side cover Maintaining the printer 107...
Page 111: ...2 Open the top door 2 1 3 Remove the toner cartridges 1 2 Maintaining the printer 111...
Page 124: ...Below the fuser In the fuser access door 3 Close the front door Clearing jams 124...


