7.
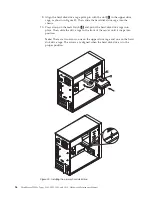
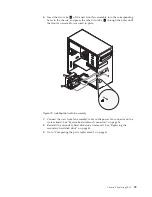
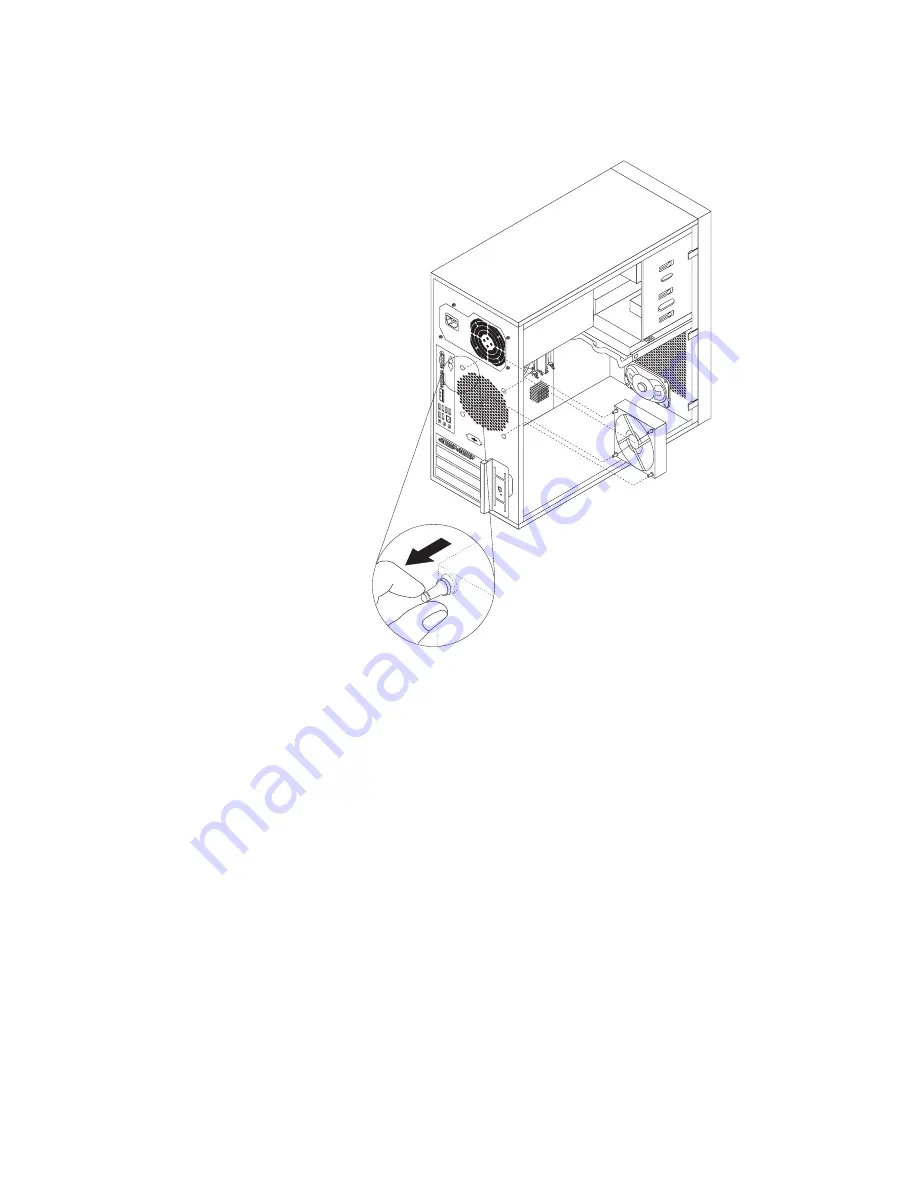
Carefully pull on the tips of the rubber mounts until the new rear fan assembly
is secured in place.
8.
Connect the new rear fan assembly cable to the system fan connector on the
system board. See “System-board internal connectors” on page 26.
9.
Go to “Completing the parts replacement.”
Completing the parts replacement
After completing the installation or replacement for all parts, you need to reinstall
the server cover and reconnect cables.
To reinstall the server cover and reconnect cables to your server, do the following:
1.
Make sure that all components have been reassembled correctly and that no
tools or loose screws are left inside your server. See “Internal components” on
page 26 for the locations of various components in your server.
2.
If you have removed the front bezel, reinstall it. See “Removing and reinstalling
the front bezel” on page 34.
3.
Make sure that the cables are routed correctly before reinstalling the server
cover. Keep cables clear of the hinges and sides of the server chassis to avoid
interference with reinstalling the server cover.
4.
Position the server cover on the chassis so that the rail guides on the bottom of
the server cover engage the rails on the chassis. Then, slide the cover to the
front of the server until it snaps into position.
Figure 34. Installing the rear fan assembly
Chapter 6. Replacing FRUs
61
Summary of Contents for ThinkServer TS200v
Page 1: ......
Page 2: ......
Page 3: ...ThinkServer TS200v Types 0981 0992 1008 and 1010 Hardware Maintenance Manual ...
Page 28: ...22 ThinkServer TS200v Types 0981 0992 1008 and 1010 Hardware Maintenance Manual ...
Page 34: ...28 ThinkServer TS200v Types 0981 0992 1008 and 1010 Hardware Maintenance Manual ...
Page 84: ...78 ThinkServer TS200v Types 0981 0992 1008 and 1010 Hardware Maintenance Manual ...
Page 107: ......
Page 108: ...Part Number XXXXXX Printed in USA 1P P N XXXXXX ...

