


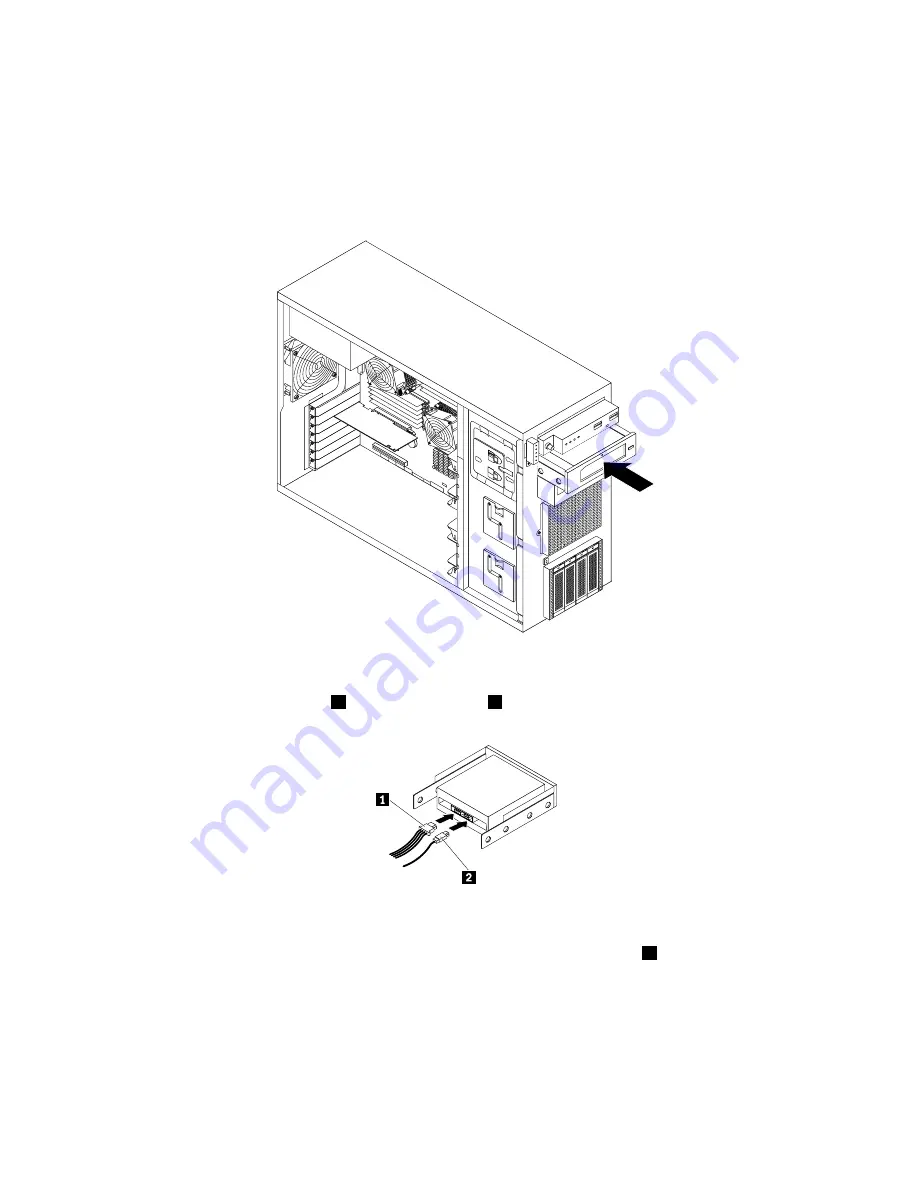
6. Slide the new RDX drive into the optical drive bay from the front until it snaps into position.
Note:
You do not need to remove the front bezel when replacing an RDX drive. However, if you are
installing an RDX drive, you need to remove the front bezel first, and then gain access to the protective
shields to remove them. The following illustration shows only the situation in which the front bezel has
been removed.
Figure 95. Installing the RDX drive
7. Connect the 4-pin power cable
1
and the signal cable
2
to the rear of the RDX drive.
Figure 96. Connecting cables to the rear of the RDX drive
8. If necessary, connect the USB connector on the other end of the signal cable
2
to the internal USB
Type A connector on the system board. See “System board components” on page 48.
9. Do one of the following:
• If you are installing an RDX drive, save the removed EMI-protective shield from the chassis and
plastic shield from the front bezel in the event that you later remove the drive and need the shields to
cover the drive bay.
156
ThinkServer TD340 User Guide and Hardware Maintenance Manual
Summary of Contents for ThinkServer TD340
Page 16: ...4 ThinkServer TD340 User Guide and Hardware Maintenance Manual ...
Page 18: ...6 ThinkServer TD340 User Guide and Hardware Maintenance Manual ...
Page 94: ...82 ThinkServer TD340 User Guide and Hardware Maintenance Manual ...
Page 224: ...212 ThinkServer TD340 User Guide and Hardware Maintenance Manual ...
Page 238: ...226 ThinkServer TD340 User Guide and Hardware Maintenance Manual ...
Page 239: ......
Page 240: ......