


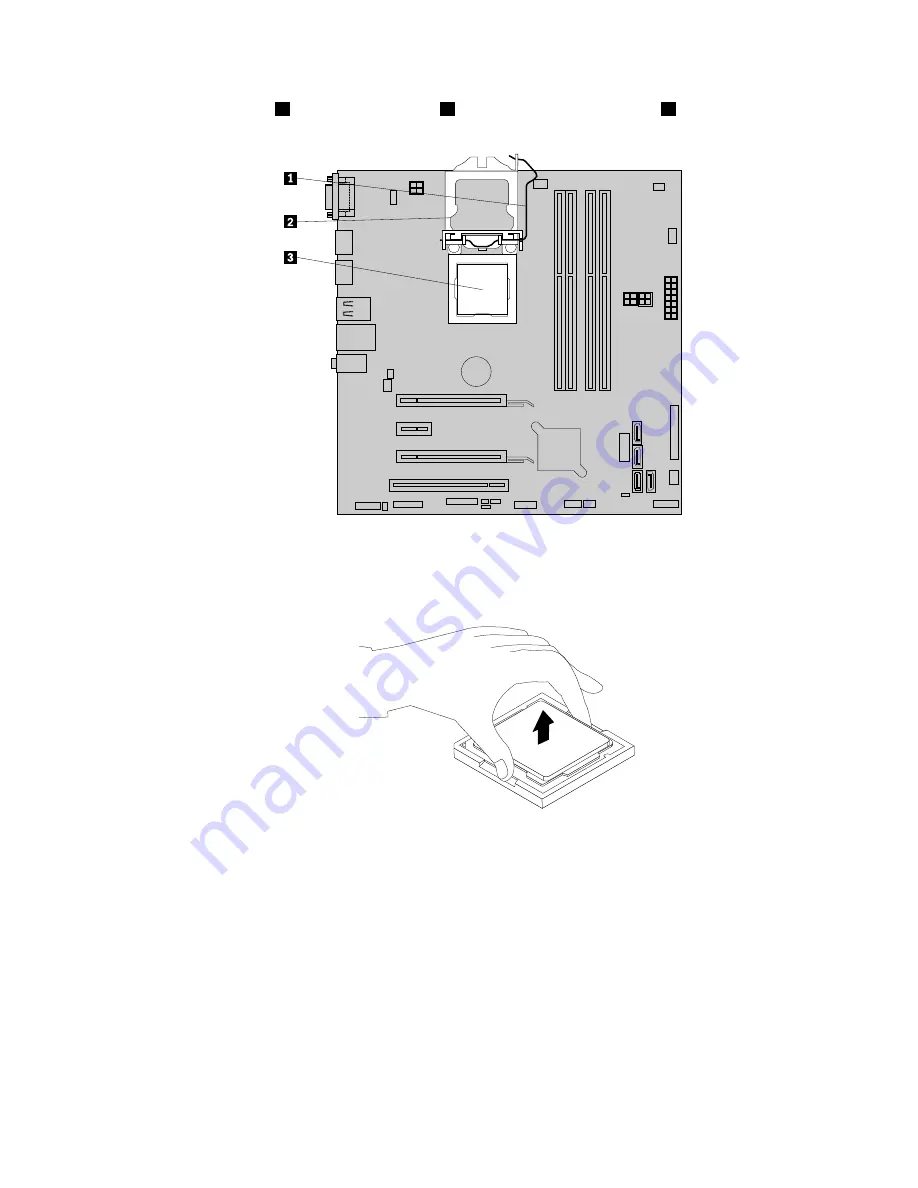
7. Lift the small handle
1
and open the retainer
2
to access the microprocessor
3
.
Figure 158. Accessing the microprocessor
8. Carefully lift the microprocessor straight up and out of the microprocessor socket.
Figure 159. Removing the microprocessor
Notes:
• Your microprocessor and socket might look different from the one illustrated.
• Touch only the edges of the microprocessor. Do not touch the gold contacts on the bottom of
the microprocessor.
• Do not drop anything onto the microprocessor socket while it is exposed. The socket pins must be
kept as clean as possible.
9. Ensure that the small handle is in the raised position and the microprocessor retainer is fully open.
10. Remove the protective cover that protects the gold contacts of the new microprocessor.
Chapter 9
.
Replacing FRUs (machine types: 10A2, 10A3, 10A8, 10A9, 10AH, 10AJ, 10AM, and 10AN)
195
Summary of Contents for ThinkCentre M83
Page 6: ...iv ThinkCentre M83 and M93 p Hardware Maintenance Manual ...
Page 8: ...vi ThinkCentre M83 and M93 p Hardware Maintenance Manual ...
Page 15: ...Chapter 1 Safety information 7 ...
Page 19: ...Chapter 1 Safety information 11 ...
Page 20: ...1 2 12 ThinkCentre M83 and M93 p Hardware Maintenance Manual ...
Page 21: ...1 2 Chapter 1 Safety information 13 ...
Page 26: ...1 2 18 ThinkCentre M83 and M93 p Hardware Maintenance Manual ...
Page 27: ...1 2 Chapter 1 Safety information 19 ...
Page 30: ...22 ThinkCentre M83 and M93 p Hardware Maintenance Manual ...
Page 34: ...26 ThinkCentre M83 and M93 p Hardware Maintenance Manual ...
Page 40: ...32 ThinkCentre M83 and M93 p Hardware Maintenance Manual ...
Page 74: ...66 ThinkCentre M83 and M93 p Hardware Maintenance Manual ...
Page 100: ...92 ThinkCentre M83 and M93 p Hardware Maintenance Manual ...
Page 166: ...158 ThinkCentre M83 and M93 p Hardware Maintenance Manual ...
Page 306: ...298 ThinkCentre M83 and M93 p Hardware Maintenance Manual ...
Page 307: ......
Page 308: ......


