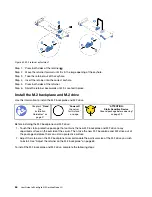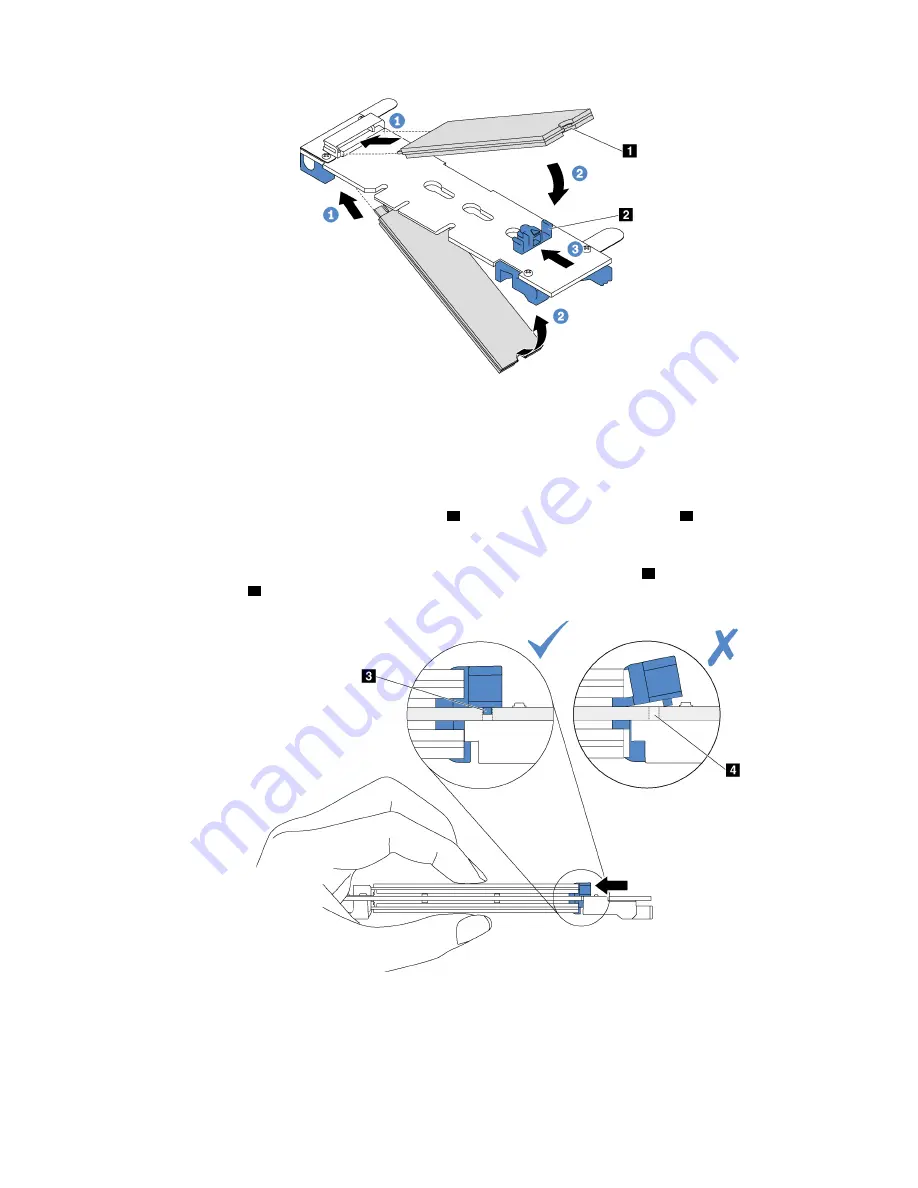
Figure 33. M.2 drive installation
Step 1. Insert the M.2 drive at an angle of approximately 30 degrees into the connector.
Note:
If your M.2 backplane supports two M.2 drives, insert the M.2 drives into the connectors at
both sides.
Step 2. Rotate the M.2 drive down until the notch
1
catches on the lip of the retainer
2
.
Step 3. Slide the retainer forward (toward the connector) to secure the M.2 drive into place.
Attention:
When sliding the retainer forward, ensure that the two nubs
3
on the retainer enter the
small holes
4
on the M.2 backplane. Once they enter the holes, you will hear a soft “click” sound.
Figure 34. Instruction for sliding the retainer
.
Hardware replacement procedures
65
Summary of Contents for ThinkAgile MX Certified Node 2U
Page 1: ...User Guide for ThinkAgile MX Certified Node 2U Machine Type 7Z20 ...
Page 4: ...ii User Guide forThinkAgile MX Certified Node 2U ...
Page 14: ...10 User Guide forThinkAgile MX Certified Node 2U ...
Page 38: ...34 User Guide forThinkAgile MX Certified Node 2U ...
Page 94: ...90 User Guide forThinkAgile MX Certified Node 2U ...
Page 98: ...94 User Guide forThinkAgile MX Certified Node 2U ...
Page 100: ...96 User Guide forThinkAgile MX Certified Node 2U ...
Page 103: ......
Page 104: ......

