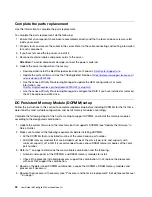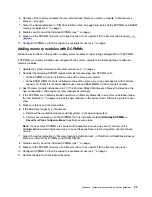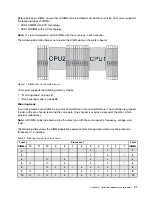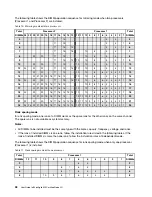
To install a hot-swap drive, complete the following steps:
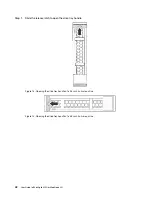
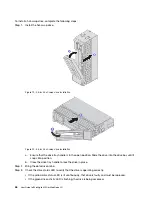
Step 1. Install the hot-swap drive.
Figure 19. 2.5-inch hot-swap drive installation
Figure 20. 3.5-inch hot-swap drive installation
a. Ensure that the drive tray handle is in the open position. Slide the drive into the drive bay until it
snaps into position.
b. Close the drive tray handle to lock the drive in place.
Step 2. Bring the data drive online.
Step 3. Check the drive status LED to verify that the drive is operating correctly.
• If the yellow drive status LED is lit continuously, that drive is faulty and must be replaced.
• If the green drive activity LED is flashing, the drive is being accessed.
46
User Guide forThinkAgile MX Certified Node 2U
Summary of Contents for ThinkAgile MX Certified Node 2U
Page 1: ...User Guide for ThinkAgile MX Certified Node 2U Machine Type 7Z20 ...
Page 4: ...ii User Guide forThinkAgile MX Certified Node 2U ...
Page 14: ...10 User Guide forThinkAgile MX Certified Node 2U ...
Page 38: ...34 User Guide forThinkAgile MX Certified Node 2U ...
Page 94: ...90 User Guide forThinkAgile MX Certified Node 2U ...
Page 98: ...94 User Guide forThinkAgile MX Certified Node 2U ...
Page 100: ...96 User Guide forThinkAgile MX Certified Node 2U ...
Page 103: ......
Page 104: ......

