


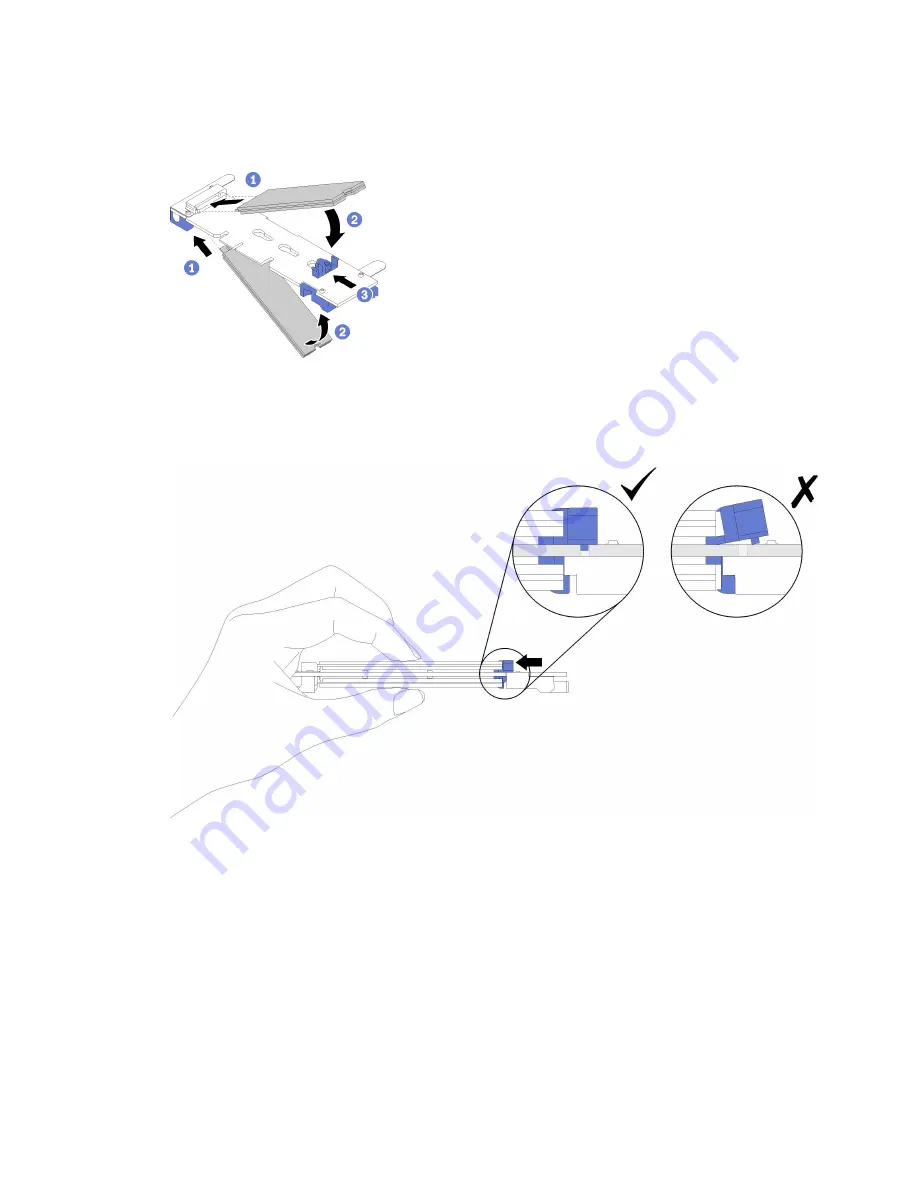
Step 2. Insert the M.2 drive at an angle (approximately 30 degrees) into the connector and rotate it until the
notch catches on the lip of the retainer; then, slide the retainer forward (toward the connector) to
secure the M.2 drive in the M.2 backplane.
Figure 85. M.2 drive installation
Attention:
When sliding the retainer forward, make sure the two nubs on the retainer enter the
small holes on the M.2 backplane. Once they enter the holes, you will hear a soft “click” sound.
Figure 86. M.2 drive installation with the retainers in place
After installing an M.2 drive in the M.2 backplane, see
“Install the M.2 backplane” on page 121
to complete
installation.
Install the M.2 backplane
Use this procedure to install the M.2 backplane.
Before installing the M.2 backplane:
1. Read the safety information and installation guidelines (see
).
121
Summary of Contents for 7X69
Page 1: ...ThinkSystem SR860 Setup Guide Machine Type 7X69 and 7X70 ...
Page 8: ...vi ThinkSystem SR860 Setup Guide ...
Page 62: ...54 ThinkSystem SR860 Setup Guide ...
Page 69: ...Chapter 3 Server hardware setup 61 ...
Page 82: ...74 ThinkSystem SR860 Setup Guide ...
Page 108: ...100 ThinkSystem SR860 Setup Guide ...
Page 162: ...154 ThinkSystem SR860 Setup Guide ...
Page 166: ...158 ThinkSystem SR860 Setup Guide ...
Page 171: ......
Page 172: ...Part Number SP47A30799 Printed in China 1P P N SP47A30799 1PSP47A30799 ...


