


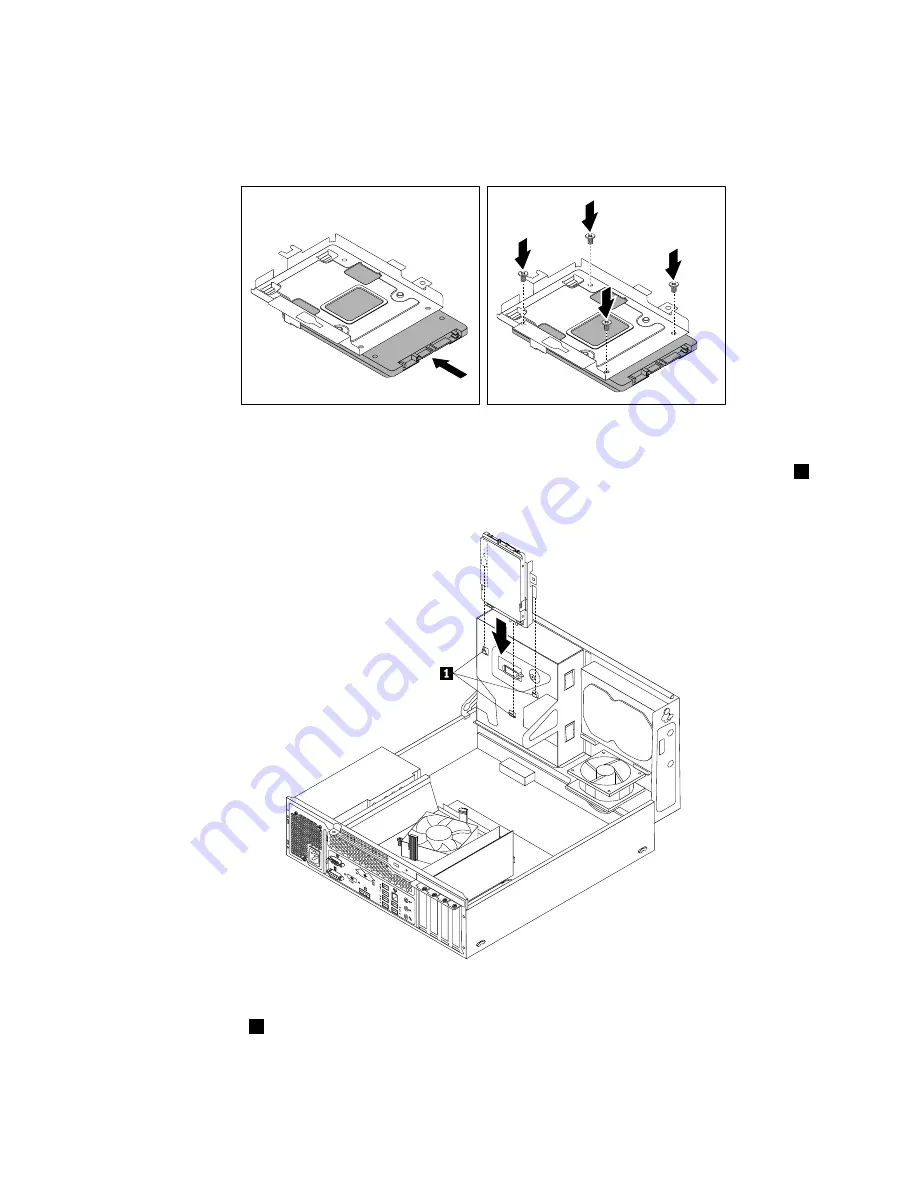
9. Slide the new solid-state drive into the solid-state drive bracket as shown until the four holes in the
drive are aligned with the corresponding holes in the bracket. Then, install the four screws to secure the
new solid-state drive to the bracket.
Figure 74. Installing the solid-state drive into the bracket
10. Carefully slide the solid-state drive bracket downward until it is secured by the three retaining clips
1
on
the bottom of the optical drive bay.
Figure 75. Installing the solid-state drive bracket
11. Install the screw
1
to secure the bracket on the bottom of the optical drive bay.
Chapter 10
.
Replacing FRUs (machine type: 10AQ)
137
Summary of Contents for 10AQ
Page 1: ...ThinkCentre E93 Hardware Maintenance Manual Machine Types 10AR and 10AQ ...
Page 6: ...2 ThinkCentre E93 Hardware Maintenance Manual ...
Page 13: ...Chapter 2 Safety information 9 ...
Page 17: ...Chapter 2 Safety information 13 ...
Page 18: ...1 2 14 ThinkCentre E93 Hardware Maintenance Manual ...
Page 19: ...1 2 Chapter 2 Safety information 15 ...
Page 24: ...1 2 20 ThinkCentre E93 Hardware Maintenance Manual ...
Page 25: ...1 2 Chapter 2 Safety information 21 ...
Page 28: ...24 ThinkCentre E93 Hardware Maintenance Manual ...
Page 32: ...28 ThinkCentre E93 Hardware Maintenance Manual ...
Page 86: ...82 ThinkCentre E93 Hardware Maintenance Manual ...
Page 128: ...124 ThinkCentre E93 Hardware Maintenance Manual ...
Page 183: ......
Page 184: ......