Page 9
Diagnostic LEDs (Table 5)
The defrost board includes two LEDs used for diagnostics. The LED flashes indicate a specific diagnostic code as detailed
in the table below.
TABLE 5
LED 1
LED 2
Condition
Possible Cause(s)
Solution
OFF
OFF
Power problem
1
No power (24V) to board terminals R &
C.
2
Board failure.
1
Check control transformer power (24V).
2
If power is available and LED(s) are unlit,
replace board and all sensors.
ON
ON
Coil sensor problem
1
Coil temperature outside of sensor
range.
2
Faulty sensor wiring connections at
board or poor sensor contact on coil.
3
Sensor failure.
1
Sensor function will resume when coil
temperature is between −20°F and 110°F.
2
Check sensor wiring connections at
board and sensor contact on coil.
3
Replace board and all sensors.
OFF
ON
Ambient sensor problem
1
Ambient temperature outside of sensor
range.
2
Faulty sensor wiring connections at
board or sensor.
3
Sensor failure.
1
Sensor function will resume when coil
temperature is between −20°F and 110°F.
2
Check sensor wiring connections at
board and sensor.
3
Replace board and all sensors.
FLASH
FLASH
Normal operation
Unit operating normally or in standby
mode.
None required.
ON
OFF
3−Strike pressure lockout
(Short test pins or reset 24V
power to board to override
lockout)
1
Restricted air flow over indoor or outdoor
coil.
2
Improper refrigerant charge.
1
Remove any blockages or restrictions.
Check outdoor fan motor for proper opera-
tion.
2
Check approach, superheat & subcooling
t
t
ON
FLASH
Low pressure switch circuit
open during Y1 demand
Improper refrigerant charge.
3
Improper metering device operation.
Check approach, superheat & subcooling
temperatures.
3
Check system pressures. Repair leaks.
Replace metering device.
FLASH
ON
High pressure switch circuit
open during Y1 demand
4
Poor contact between coil sensor and
coil.
Replace metering device.
4
Make sure that sensor is properly posi-
tioned on coil and that firm contact is es-
tablished. Refer to service manual for
proper placement.
ALTERNATING
FLASH
ALTERNATING
FLASH
5−minute delay
(Jumper test pins to override
delay)
Thermostat demand for cooling or heat
pump operation. Unit operating in 5−minute
anti−short−cycle mode.
None required.
OPERATION
The demand defrost control board initiates a defrost cycle based on either frost detection or time.
Frost Detection
− If the compressor runs longer than 34 minutes and the actual difference between the clear coil and frosted coil temperatures exceeds the maximum differ-
ence allowed by the control, a defrost cycle will be initiated.
IMPORTANT − The demand defrost control board will allow a greater accumulation of frost and will initiate fewer defrost cycles than a time/temperature defrost system.
Time
− If 6 hours of heating mode compressor run time has elapsed since the last defrost cycle while the coil temperature remains below 35°F (2°C), the demand defrost
control will initiate a defrost cycle.
Actuation
− When the reversing valve is de−energized, the Y1 circuit is energized, and the coil temperature is below 35°F (2°C), the board logs the compressor run time. If
the board is not calibrated, a defrost cycle will be initiated after 34 minutes of heating mode compressor run time. The control will attempt to self−calibrate after this (and all
other) defrost cycle(s). Calibration success depends on stable system temperatures during the 20−minute calibration period. If the board fails to calibrate, another defrost
cycle will be initiated after 90 minutes of heating mode compressor run time. Once the defrost board is calibrated, it will use demand defrost logic to initiate a defrost cycle.
A demand defrost system initiates defrost when the difference between the clear coil and frosted coil temperatures exceeds the maximum difference allowed by the control
OR after 6 hours of heating mode compressor run time has been logged since the last defrost cycle.
Termination
− The defrost cycle ends when the coil temperature exceeds the termination temperature or after 14 minutes of defrost operation. If the defrost is terminated
by the 14−minute timer, another defrost cycle will be initiated after 34 minutes of run time.
Test Mode
− When Y1 is energized and 24V power is being applied to the board, a test cycle can be initiated by placing the termination temperature jumper across the Test"
pins for 2 to 5 seconds. If the jumper remains across the Test" pins longer than 5 seconds, the control will ignore the test pins and revert to normal operation. The jumper
will initiate one cycle per test.
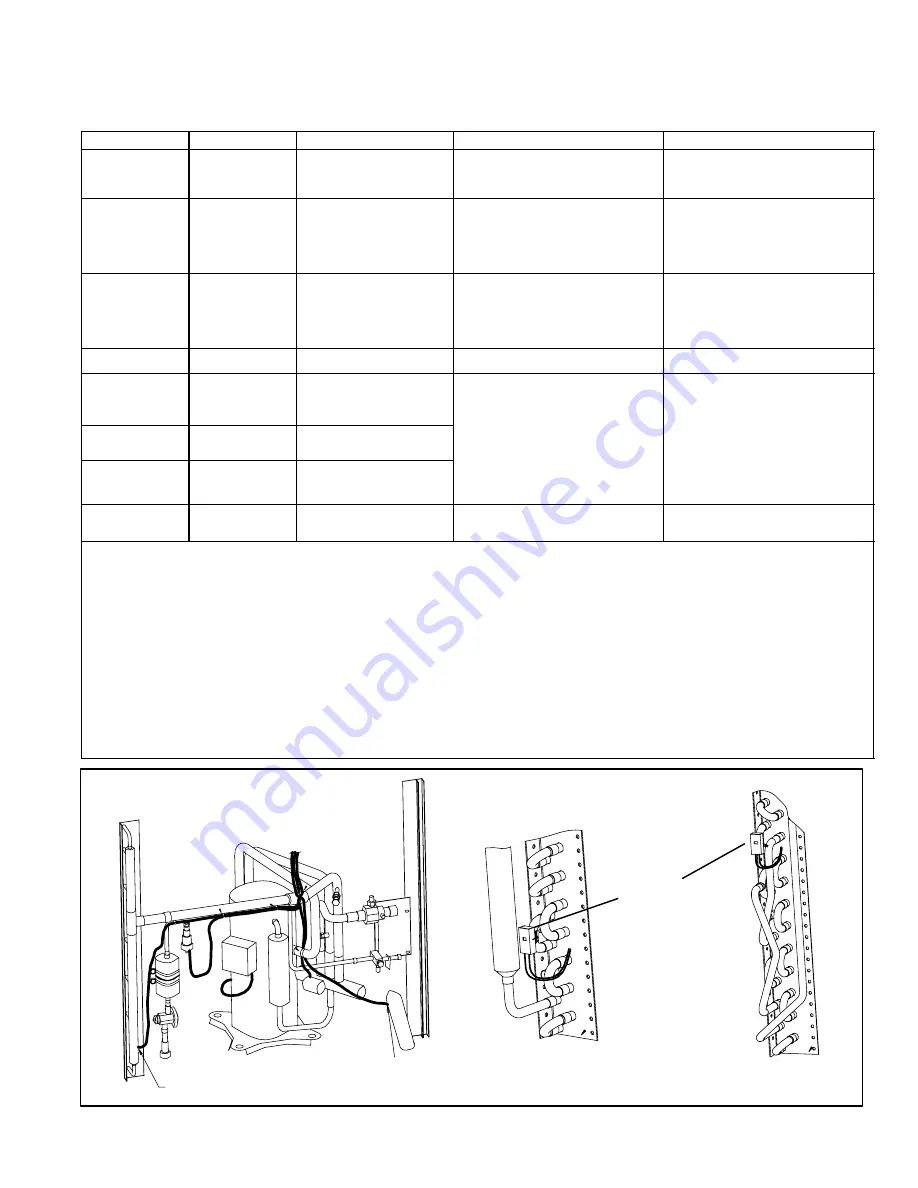
FIGURE 11
HP27−036/042 PLUMBING SHOWN
See detail A" and B"
ambient sensor
inside PVCpipe
Detail A"
−024, −030, 042
Coil Temperature
Sensor
Detail B"
−036


