Installation
29
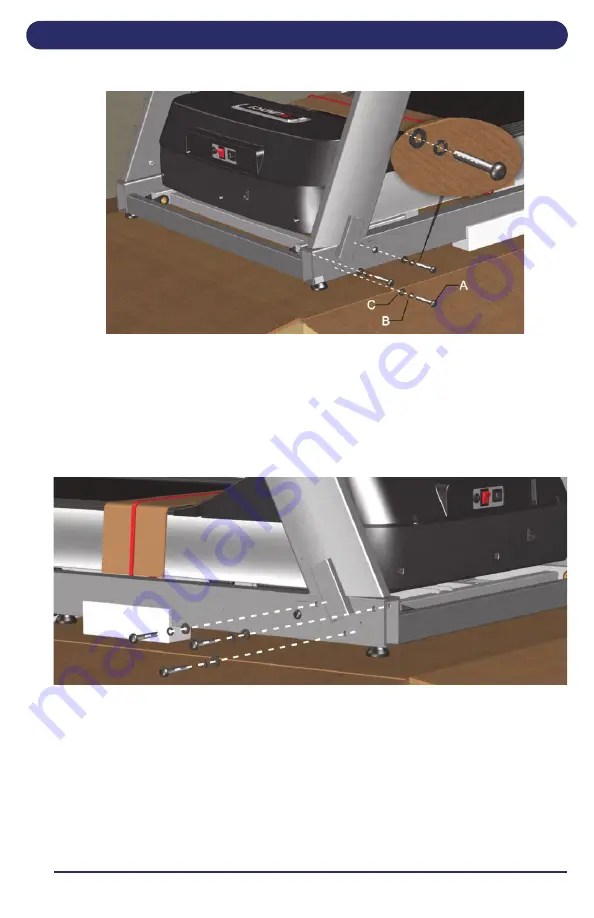
Figure 2-16. Upright Securing Screw Locations (Left Side)
Note:
If necessary, have another person move the uprights
slightly in order to align the holes so the screws can be
threaded properly. Do not cross-thread the screws.
3. Repeat step Note: for the right frame leg (Figure 2-17).
Figure 2-17. Upright Securing Screw Locations (Left Side)
4. When all six screws have been installed, fully tighten them
using the driver provided in the kit.
Note:
Wiring runs from the left leg into the handrails. Do not
pinch the wiring when lowering the console.
5. Slowly rotate the handrail/console assembly down into a
horizontal position. (Figure 2-18).


