11
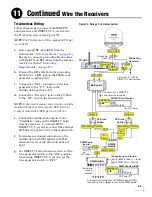
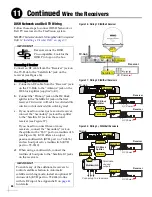
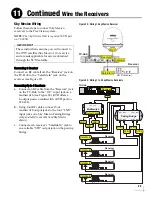
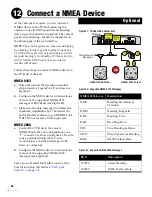
Follow these steps to connect the antenna RF
cable(s) to the antenna.
a.
Clean and dry the bottom of the antenna
b.
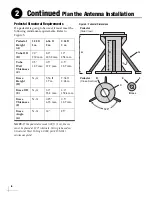
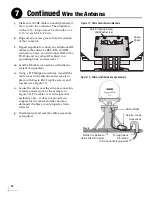
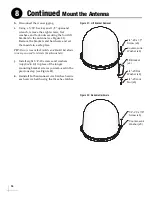
To access the antenna’s connectors, you first
need to detach the cable cover. Loosen the six
#6-32 captive screws securing the cable cover
to the base (see Figure 15). Then set the cable
cover aside in a safe place.
c.
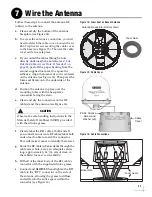
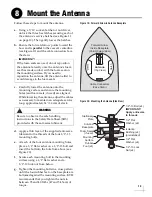
If you routed the cables through a hole
directly underneath the antenna (see
Out the Cable Access Hole, If Needed” on
), peel off the paper backing from the
second supplied foam seal to expose the
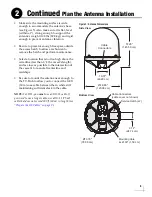
adhesive. Align the foam seal so it is centered
on the antenna (see Figure 14). Then press the
foam seal firmly onto the underside of the
antenna.
d.
Position the antenna in place over the
mounting holes with the baseplate’s
connectors facing the stern.
e.
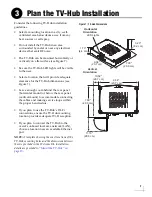
Clean and dry the connectors on the RF
cable(s) and the antenna (see Figure 16).
f.
Clearly label the RF1 cable at both ends. If
you connect two or more RF cables, label both
ends of each cable to match the connector.
This will make it easier to identify them later.
g.
Route the RF cable(s) belowdecks through the
cable access hole. Leave an adequate service
loop, approximately 14" (36 cm) of slack, in
the cable(s) for easy serviceability.
h.
Fill half of the inner body of the RF1 cable’s
connector with the supplied silicone grease.
i.
Connect and
SLOWLY
hand-tighten the RF1
cable to the “RF1” connector on the side of
the antenna, allowing the grease to diffuse
and settle into the entire space within the
CAUTION
Observe the safe handling instructions in the
Material Safety Data Sheet (MSDS) provided
with the silicone grease.
Figure 14: Foam Seal on Base of Antenna
Fo
a
m Se
a
l
Antenn
a
B
a
sepl
a
te (Bottom View)
#6-32 Captive
Screw and
Washer (x6)
Cable
Cover
Figure 15: Cable Cover
Figure 16: Cable Connections
RF4
RF
3
RF2
RF1
Foam Seals
Baseplate
RF1
RF2
RF3
RF4
Wire the Antenna
7
Summary of Contents for TracVision TV10
Page 1: ...TracVision TV10 Installation Guide ...
Page 53: ......


