54_0386 Re
vA
Setup
System Startup
Skew Adjustment
Quick Start Guide
KVH TracVision M3
KVH Industries, Inc.
50 Enterprise Center
Middletown, RI, USA 02842-5279
Phone: +1 401 847-3327
Fax: +1 401 849-0045
E-mail: [email protected]
KVH Europe A/S
Kokkedal Industripark 2B
2980 Kokkedal, Denmark
Phone: +45 45 160 180
Fax: +45 45 160 181
E-mail: [email protected]
Internet: www.kvh.com
SAT 1= ASTRA1?
CHANGE ACCEPT
The antenna restarts automatically once setup is
complete.
Follow the steps below to set up the system for your
desired satellite(s).
If you need to change an existing
setup, reset the system as explained in Chapter 4 of the
User’s Guide.
DX Version - Linear
SAT 2= NONE?
CHANGE ACCEPT
1.
Press any button to begin the setup process.
ASTRA1
SYSTEM NEEDS SETUP
LAT/LONG= 41N, 071W?
CHANGE ACCEPT
2.
Press CHANGE.
LAT/LONG= 41N, 071W?
CHANGE ACCEPT
3.
Enter your vessel’s latitude and longitude.
Press
CHANGE to change each digit; press
ACCEPT to set each digit.
The antenna uses your position information to
report the proper LNB skew setting (see System
Startup) and accelerate satellite acquisition.
4.
Once you have set each digit of latitude and
longitude, press
ACCEPT.
5.
Press
CHANGE until display shows the
primary satellite you want to install and track.
6.
When the display shows the desired satellite,
press ACCEPT.
7.
Repeat steps 5 and 6 to install any additional
satellites (4 max). Select NONE if you don’t
need to install additional satellites.
Whenever you turn on the system, or the antenna restarts,
the display shows the following startup screens
.
KVH INTERFACE BOX
VERSION X.YZ
INSTALLED SATELLITES
ASTRA1, HOTBIRD
LAT/LONG: 41N, 071W
AVERAGE SKEW:-12.3
CHECK LNB SETTING
INITIALIZING ANTENNA
SEARCHING ASTRA1
Interface box and antenna software versions.
Satellite(s) selected for tracking (see Setup).
Vessel position (see Setup and Menu Functions).
Recommended LNB skew setting (see Skew
Adjustment).
If only
1
satellite is installed, display
shows skew for that satellite. If
2+
satellites are
installed, display shows average skew.
Antenna performs a self test then searches for the
selected satellite.
Finding the Correct Skew Angle
Setting the LNB Skew Angle
Startup Warnings
Warning
Description
Wide skew range Average skew may not suffice
for good reception; installed
satellites are too far apart
Satellite out of
antenna range
Based on your position, one
of the satellites you selected
is outside the antenna’s range
If either warning appears on startup, you may need
to change your satellite selections (see Setup).
+
0
–
10 20
30
40
50
60
70
10
20
30
40
50
60
70
5
15
25
35
45
55
65
5
15
25
35
45
55
65
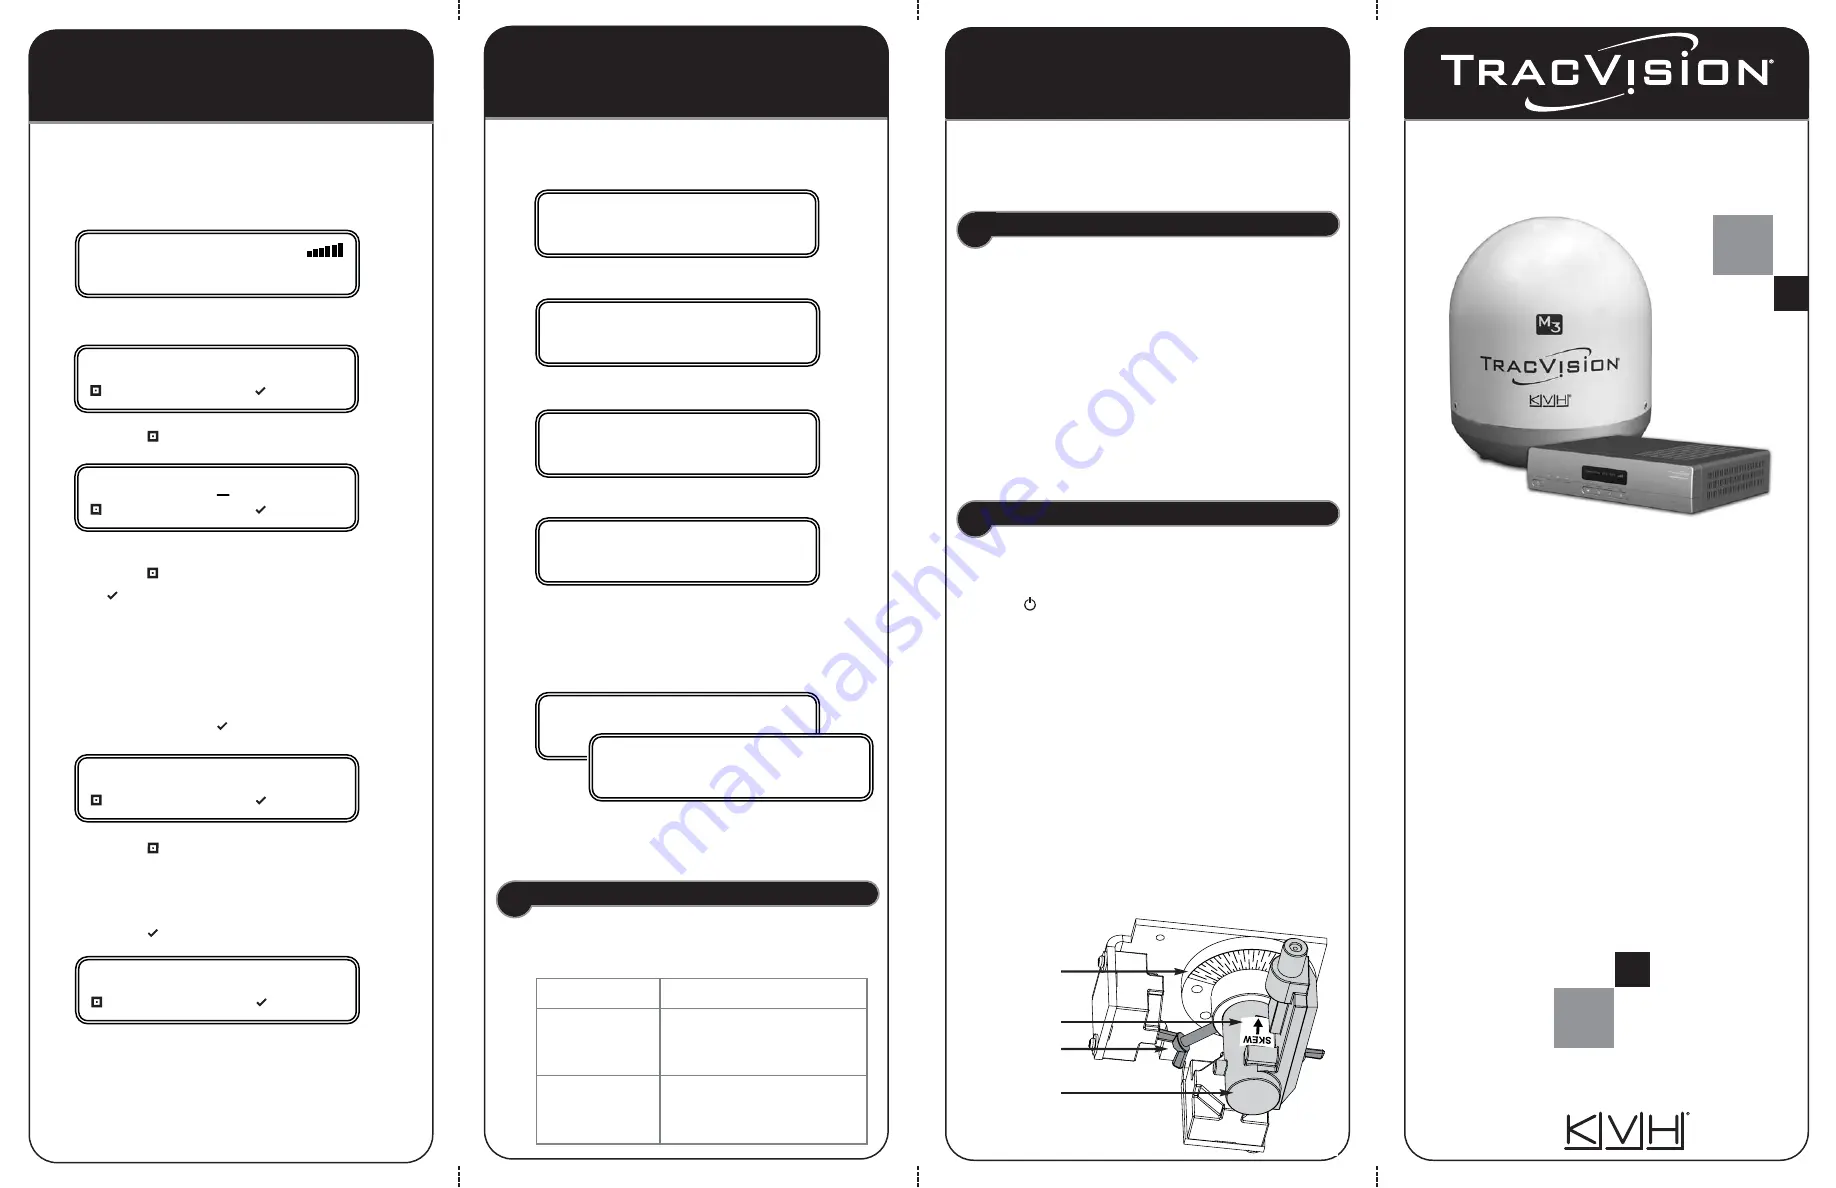
LNB
Wing Screw
(1 of 2)
Skew Arrow
Choke Feed
Skew Angles
1.
Turn off and unplug your satellite TV receiver(s).
2.
Turn off the TracVision system.
Press the
Power switch on the interface box; the
VOLTAGE light should go out.
3.
Remove the three #10-32 screws securing the
radome to the antenna. Carefully remove the
radome and set it aside in a safe place.
4.
Loosen the two wing screws securing the LNB
to the choke feed behind the reflector.
5.
Adjust the LNB, clockwise or counter-clockwise,
until the skew arrow on the LNB points to the
correct skew angle on the choke feed.
Make sure
the LNB stays fully inserted into the choke feed.
6.
Tighten the wing screws.
7.
Reinstall the radome.
To optimize reception, the antenna’s LNB (low noise block)
must be set to the correct skew angle, within 5°, for the
satellite(s) you selected.
To find the correct skew, you can either:
•
Read the reported skew angle on the interface
box during startup (see System Startup)
•
Run the diagnostics test and scroll to the skew
screens (see Chapter 5 of the User’s Guide)
Also check the reported lat/long. If the interface box
reports a lat/long that is more than
600 km
away
from your current position, you should re-enter your
position into the interface box to obtain a more
accurate skew angle (see Menu Functions).
©Copyright 2006, KVH Industries, Inc., All rights reserved.
KVH and TracVision are registered trademarks of KVH Industries, Inc.
All other trademarks are the property of their respective owners.
U.S. patent pending.


