MDX [en-US]
39
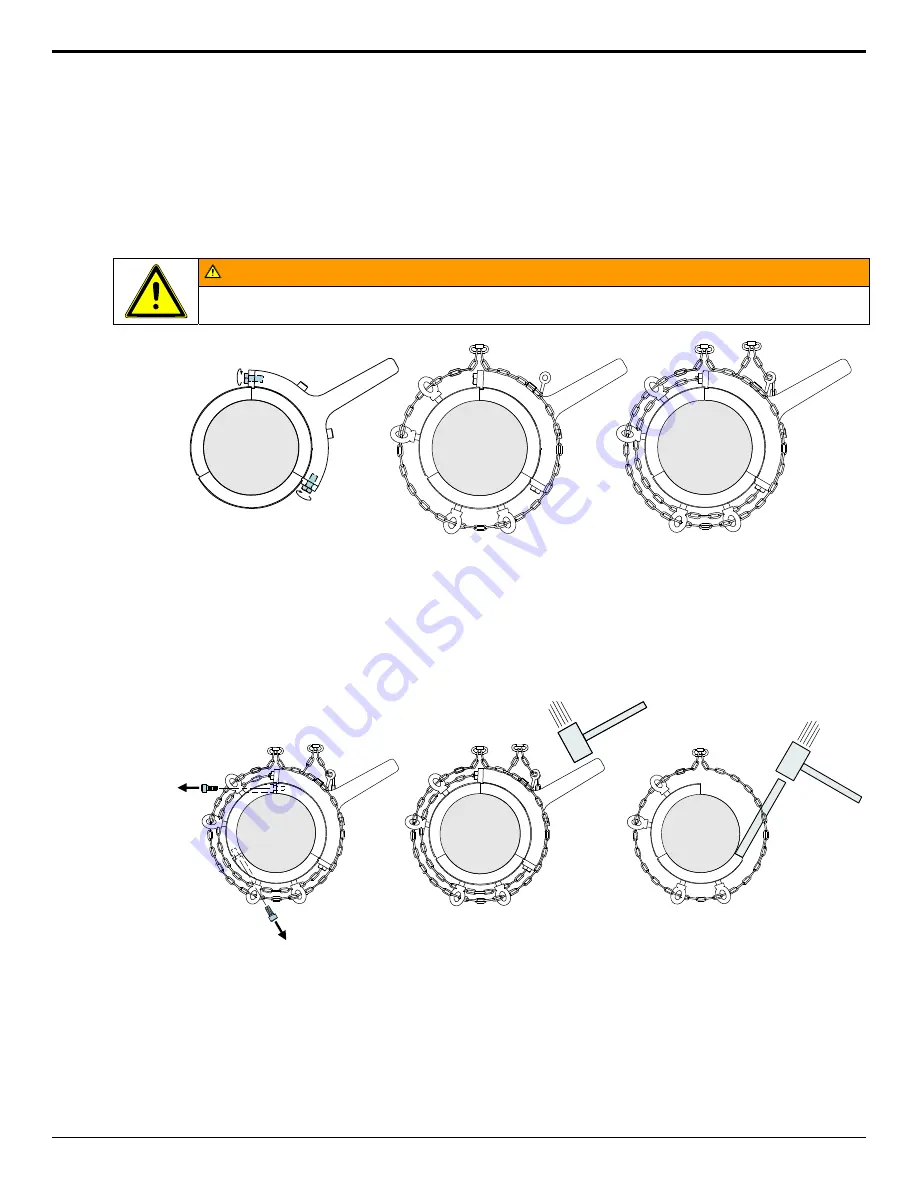
Screw the two SHCS that come with the tool into the push off holes finger tight.
Tighten the tab bolts with a wrench while pushing the tabs into the IRR grooves.
Tighten the SHCS that hold the tool to the IRR.
Screw in four lifting eyes (finger tight) into the push off holes in the remaining IRR segments until they bottom against
the shaft.
Screw a lifting eye in the tool. Note: some tools already have an eye welded to the tool, so a screw-in lifting eye is not
required.
Thread one chain through the four lifting eyes and around the shaft. Remove the slack in the chain and connect the
ends of the chain with a carabineer.
Thread a second chain through the tool lifting eye and around the shaft.
WARNING
The chains are required as a safety precaution and must be used to prevent injury.
Remove the slack in the chain and connect the ends of the chain with a carabineer.
Remove the remaining two IRR parting line SHCS. Note: it may be necessary to move the nearby lifting eye first.
Hit the tool with a sledge hammer until the IRR segment breaks free. After each hammer blow, re-tighten any loose
fasteners and verify the tabs fit snugly into the IRR groove.
If all three IRR segments break loose, the removal job is complete. Otherwise, remove the tool, the loose IRR segment
and the chain. While the other two IRR segments are still chained to the shaft, seat a solid steel bar on the parting line
face of either of the two remaining segments, and rap with a hammer until they break free.
Summary of Contents for GIW MDX
Page 53: ...MDX en US 53 14 Notes...


