English
Français
Deutsch
Español
Front Panel
En-
9
14. Headphone jack
This
stereo
1/4”
headphone
jack
carries
the
same
signal
as
the
Main
L/R
outputs.
The
volume
is
controlled
by
the
VOLUME
knob.
15. EXIT button
This
button
makes
it
easy
to
return
to
the
main
page
of
the
current
mode:
• Press
it
once
to
go
to
the
previously
‐
selected
tab
on
the
main
P0
page.
• Press
it
again
to
go
to
the
first
tab
on
the
main
P0
page.
• Press
it
a
third
time
to
select
the
main
parameter
on
the
P0
page,
such
as
the
Program
name
in
Program
mode.
Wherever
you
are
in
Program,
Combi,
or
Sequencer
modes,
pressing
EXIT
three
times
(or
fewer)
will
take
you
back
to
Program/Combination/Song
Select,
where
you
can
immediately
use
the
numeric
keys
or
and
buttons
to
select
a
Program,
Combination,
or
Song.
When
a
dialog
box
is
open,
this
button
cancels
the
settings
made
in
the
dialog
box
and
closes
the
dialog
box,
just
like
pressing
the
Cancel
button.
If
a
popup
menu
or
page
menu
is
open,
pressing
EXIT
closes
the
menu.
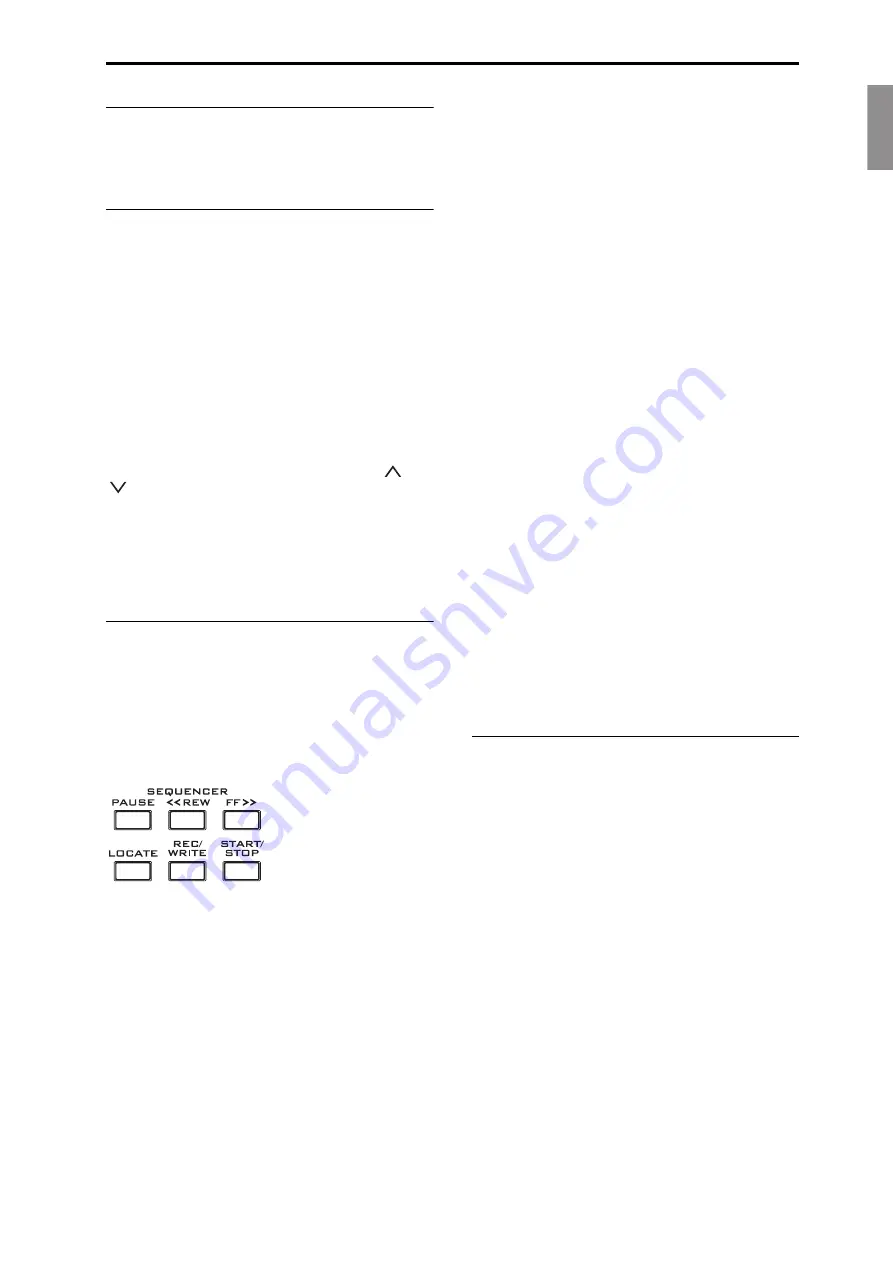
16. SEQUENCER buttons
Most
of
the
buttons
in
this
section
apply
only
to
Sequencer
mode
and,
in
Disk
and
Sampling
modes,
to
audio
CD
playback
from
a
connected
USB
CD
‐
R/RW
drive.
REC/WRITE
is
the
exception;
it
has
special
functions
in
Program,
Combination,
Set
List
and
Global
modes,
as
described
below.
PAUSE button
In
Sequencer
mode,
this
button
pauses
the
playback
of
the
song.
When
paused,
the
button’s
LED
will
light
up.
Press
PAUSE
once
again
to
resume
playback,
and
the
LED
will
turn
off.
In
Disk
and
Sampling
modes,
this
button
pauses
audio
CD
playback.
<<REW button
In
Sequencer
mode,
when
the
Song
is
playing
or
paused,
this
button
will
rewind
the
song.
When
you
press
and
hold
this
button,
its
LED
will
light
up,
and
the
playback
will
rewind.
(Rewind
is
disabled
during
recording,
and
while
the
Song
is
stopped.)
In
Disk
and
Sampling
modes,
this
button
rewinds
the
audio
CD.
FF>> button
In
Sequencer
mode,
when
the
Song
is
playing
or
paused,
this
button
will
fast
‐
forward
the
song.
When
you
press
and
hold
this
button,
the
button
will
light,
and
the
playback
will
fast
‐
forward.
(Fast
‐
forward
is
disabled
during
recording,
and
while
the
Song
is
stopped.)
In
Disk
and
Sampling
modes,
this
button
fast
‐
forwards
the
audio
CD.
LOCATE button
In
Sequencer
mode,
this
button
will
advance
or
rewind
the
song
to
the
specified
locate
point.
This
lets
you
jump
immediately
to
any
point
in
the
current
Song.
The
default
locate
point
is
the
first
beat
of
measure
1.
To
set
the
locate
point
to
the
current
position,
hold
down
ENTER
and
then
press
LOCATE.
You
can
also
set
the
Locate
point
via
the
on
‐
screen
menu.
REC/WRITE button
In
Sequencer
mode,
pressing
this
button
puts
the
system
in
record
‐
ready
mode.
Once
you’re
in
record
‐
ready
mode
(shown
by
the
button’s
lit
LED),
you
can
begin
recording
by
pressing
the
SEQUENCER
START/STOP
button.
REC/WRITE
also
provides
two
very
handy
shortcuts.
For
more
information,
see
and
START/STOP button
This
starts
or
stops
recording
and
playback
in
Sequencer
mode.
In
Disk
and
Sampling
modes,
this
button
starts
and
stops
playback
on
audio
CDs.
17. TEMPO controls
TEMPO knob
This
knob
adjusts
the
tempo
for
the
KRONOS
as
a
whole,
including
Songs,
KARMA,
the
Drum
Track,
Tempo
‐
synced
LFOs
and
BPM
delays,
and
EX
i
Step
Sequencers.
The
LED
will
blink
at
quarter
‐
note
intervals
of
the
current
tempo.
Note:
If
the
GLOBAL
MIDI
page
MIDI
CLOCK
parameter
is
set
to
External
MIDI
or
USB
,
or
if
it
is
set
to
Auto
and
a
clock
is
currently
being
received,
then
neither
the
TEMPO
Knob
nor
the
TAP
TEMPO
button
will
have
any
effect.
TAP TEMPO button
This
button
lets
you
enter
tempos
simply
by
tapping
your
finger
on
the
button.
Two
taps
are
enough
to
change
the
tempo;
for
greater
accuracy,
tap
multiple
times.
Notice
that
the
“
q
=”
in
the
upper
right
of
the
LCD
screen
will
change
to
show
the
new
tempo.
You
can
also
enter
tempos
directly
into
this
field
using
the
data
entry
controls,
such
as
the
numeric
keypad.
Note:
You
can
also
tap
tempos
using
a
foot
switch.
For
more
information,
see
in
the
Appendix
of
the
PG.


