3.
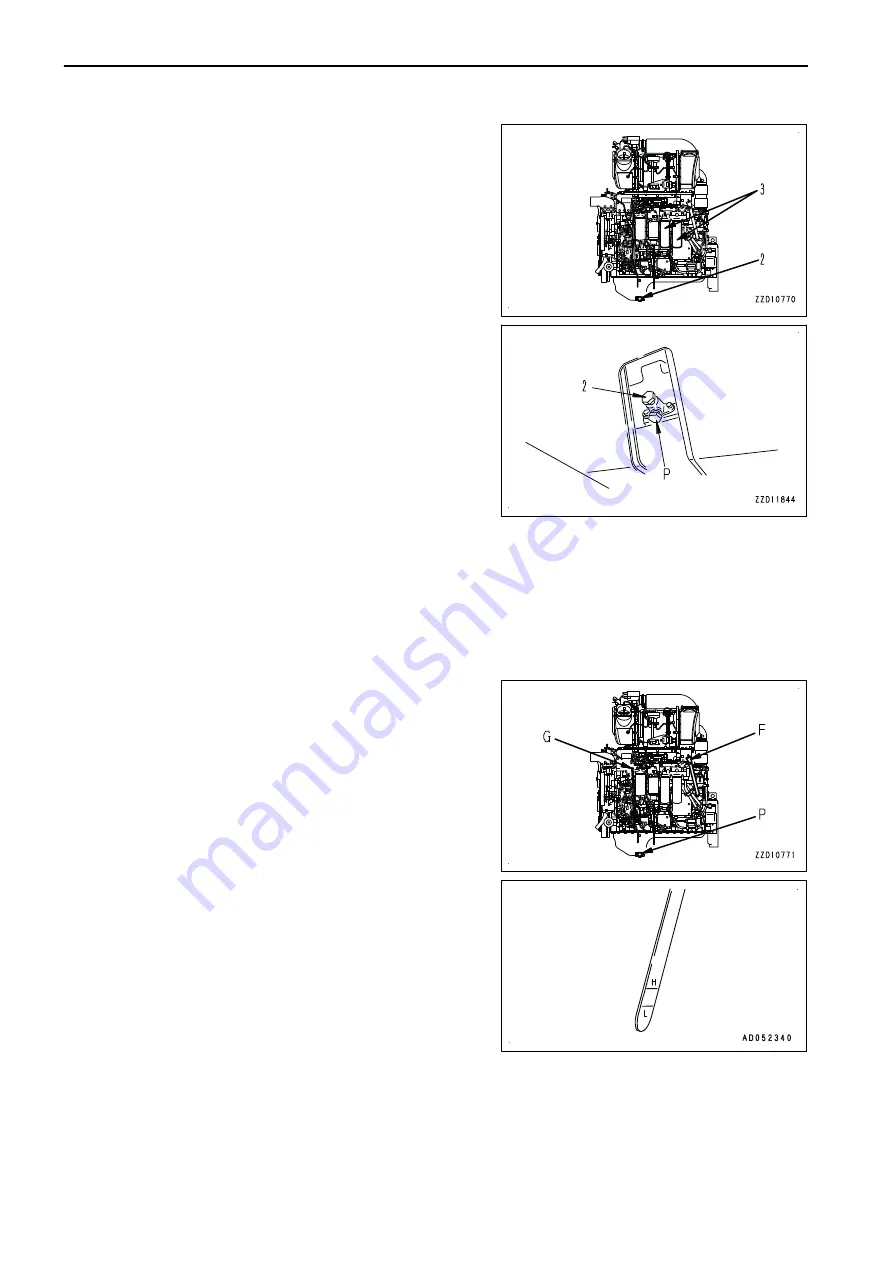
Remove drain plug (P) slowly so that you do not get
splashed with the oil.
4.
Loosen drain valve (2) and drain the oil.
Take care not to deform the stopper pin in drain valve (2)
by loosening the valve too much.
5.
Check the drained oil. If it contains much metallic powder
or foreign material, contact your Komatsu distributor.
6.
Tighten drain valve (2) and drain plug (P).
• Tightening torque of drain valve (2):
49.0 to 78.4 Nm {5.0 to 8.0 kgm}
• Tightening torque of drain plug (P):
58.8 to 78.4 Nm {6.0 to 8.0 kgm}
7.
Turn full-flow filter cartridge (3) counterclockwise by using
the filter wrench, and remove it.
At this time, do not work just under it so that you are not
splashed with oil.
8.
Clean the filter holder, fill the new filter cartridge with en-
gine oil, coat the threaded part and packing surface of the
new filter cartridge with engine oil (or apply thin film of
grease), then install it to the filter holder.
REMARK
Check that there is no old packing stuck to the filter holder. If there is any old packing stuck to it, it will
cause leakage of oil.
9.
When installing the cartridge, tighten it until the packing surface contacts the filter head, then tighten it 3/4
to1 turn.
When tightening by using a filter wrench, be extremely careful not to dent or damage the filter cartridge.
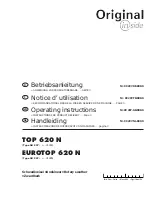
10. After replacing the filter cartridge, refill with engine oil
through oil filler port (F) until the oil level is between H and
L marks on dipstick (G).
11. Run the engine at idle for a time, then stop the engine and
check that the oil level is between H and L marks on the
dipstick. For details, see “METHOD FOR CHECKING OIL
LEVEL IN ENGINE OIL PAN, ADDING OIL (3-146)”.
REMARK
When the ambient temperature is low, water or emulsified matter may stick to the dipstick, oil filler cap, etc. or
the drained oil may be milky white because of water vapor in the blowby gas. However, if the coolant level is
normal, it is not a problem.
There is no problem even if the emulsified matter cannot be removed completely after changing oil.
MAINTENANCE PROCEDURE
MAINTENANCE
4-52
Summary of Contents for D155AX-8E0
Page 2: ......
Page 11: ...Do not repeatedly handle and lift loads FOREWORD VIBRATION LEVELS 1 9...
Page 24: ......
Page 312: ......
Page 397: ...SPECIFICATIONS 5 1...
Page 404: ......
Page 405: ...REPLACEMENT PARTS 7 1...


