4-4
INSTALLATION
TRANSDUCER UNIT INSTALLATION
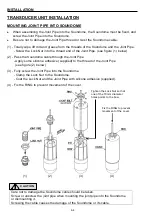
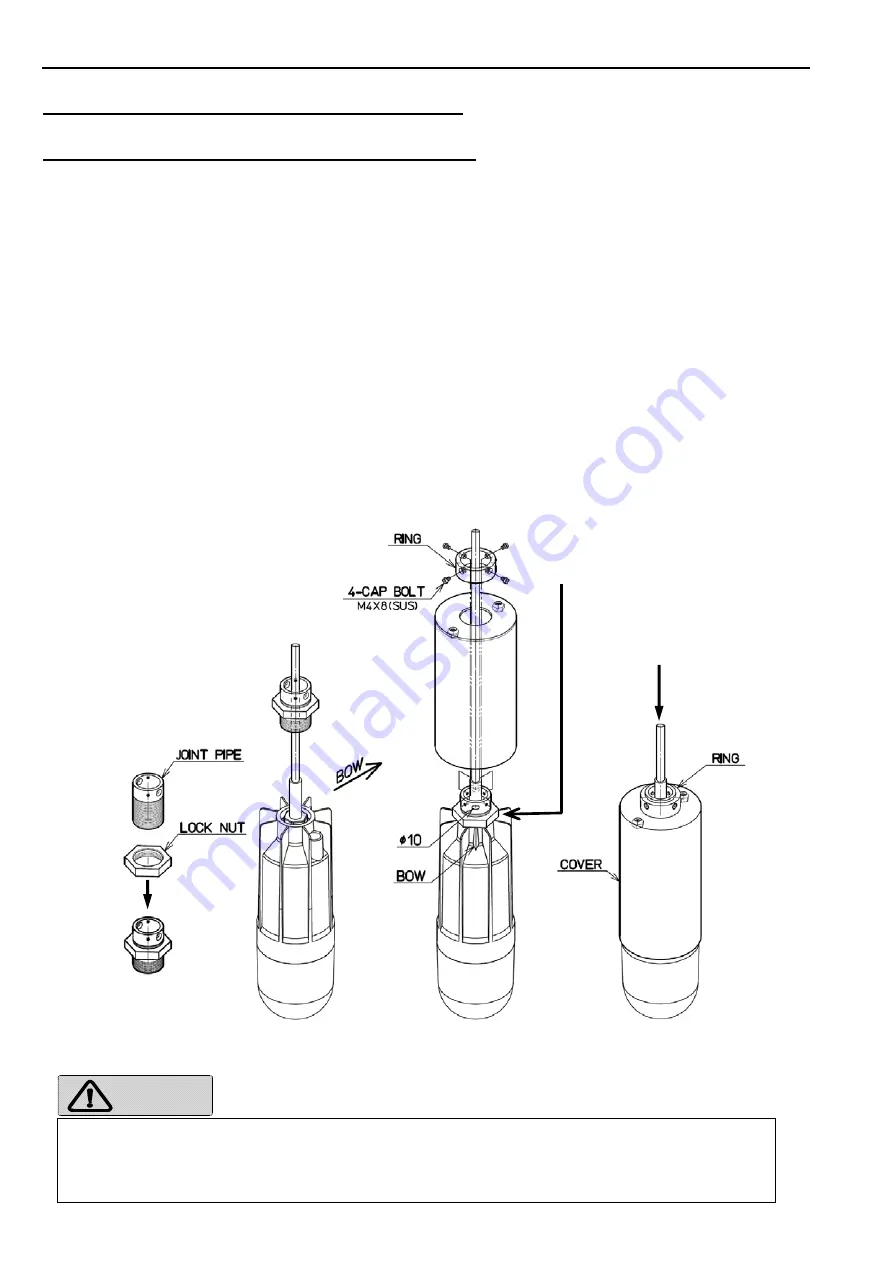
MOUNTING JOINT PIPE INTO SOUNDOME
When assembling the Joint Pipe into the Soundome, the Soundome must be fixed, and
screw the Joint Pipe into the Soundome.
Be sure not to damage the Joint Pipe thread or twist the Soundome cable.
(1) - Totally wipe off dirt and grease from the threads of the Soundome and the Joint Pipe.
- Screw the Lock Nut into the thread end of the Joint Pipe. (see figure (1) below)
(2) - Pass the Soundome cable through the Joint Pipe.
- Apply some silicone adhesive (supplied) to the thread of the Joint Pipe.
(see figure (2) below)
(3) - Fully screw the Joint Pipe into the Soundome.
- Clamp the Lock Nut to the Soundome.
- Coat the Lock Nut and the Joint Pipe with silicone adhesive (supplied).
(4) - Fix the RING to prevent movement of the cover.
(1) (2)
(3) (4)
Care not to damage the Soundome cable should be taken.
Screw or unscrew the joint pipe when mounting the joint pipe into the Soundome
or dismounting it.
Screwing the cable causes the damage of the Soundome or its cable.
CAUT ION
Tighten the Lock Nut so that
one of the 10mm diameter
holes points to the bow.
Fix the RING to prevent
movement of the cover.
Summary of Contents for ESR-S1BB
Page 1: ......
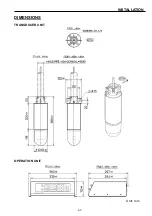
Page 56: ...4 3 INSTALLATION DIMENSIONS TRANSDUCER UNIT Unit mm OPERATION UNIT...
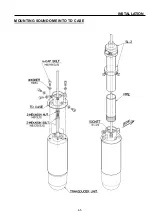
Page 58: ...4 5 INSTALLATION MOUNTING SOUNDOME INTO TD CASE...
Page 73: ......

