Registering Access Point Manually
Creating a QR Code
o
Enter the items required for registering the access point
0
All items will be overwritten and set. Enter all the required items.
0
SSID: Set the identification name (SSID) of the access point.
0
Security Authentication: Set the encryption standard for communication
security.
0
Password: Set the password for the access point.
0
DHCP: Specify whether to obtain the required information for internet
connection automatically from the DHCP server (ON) or not (OFF).
0
When DHCP is set to ON, it is not necessary to set the items following the
IP address.
0
IP Address: Set the information on internet connection (IP address) of the
camera.
0
Subnet Mask: Set the information on internet connection (subnet mask)
of the camera.
0
Default Gateway: Set the information on internet connection (default
gateway) of the camera.
0
Primary DNS: Set the information on internet connection (primary DNS)
of the camera.
0
Secondary DNS: Set the information on internet connection (secondary
DNS) of the camera.
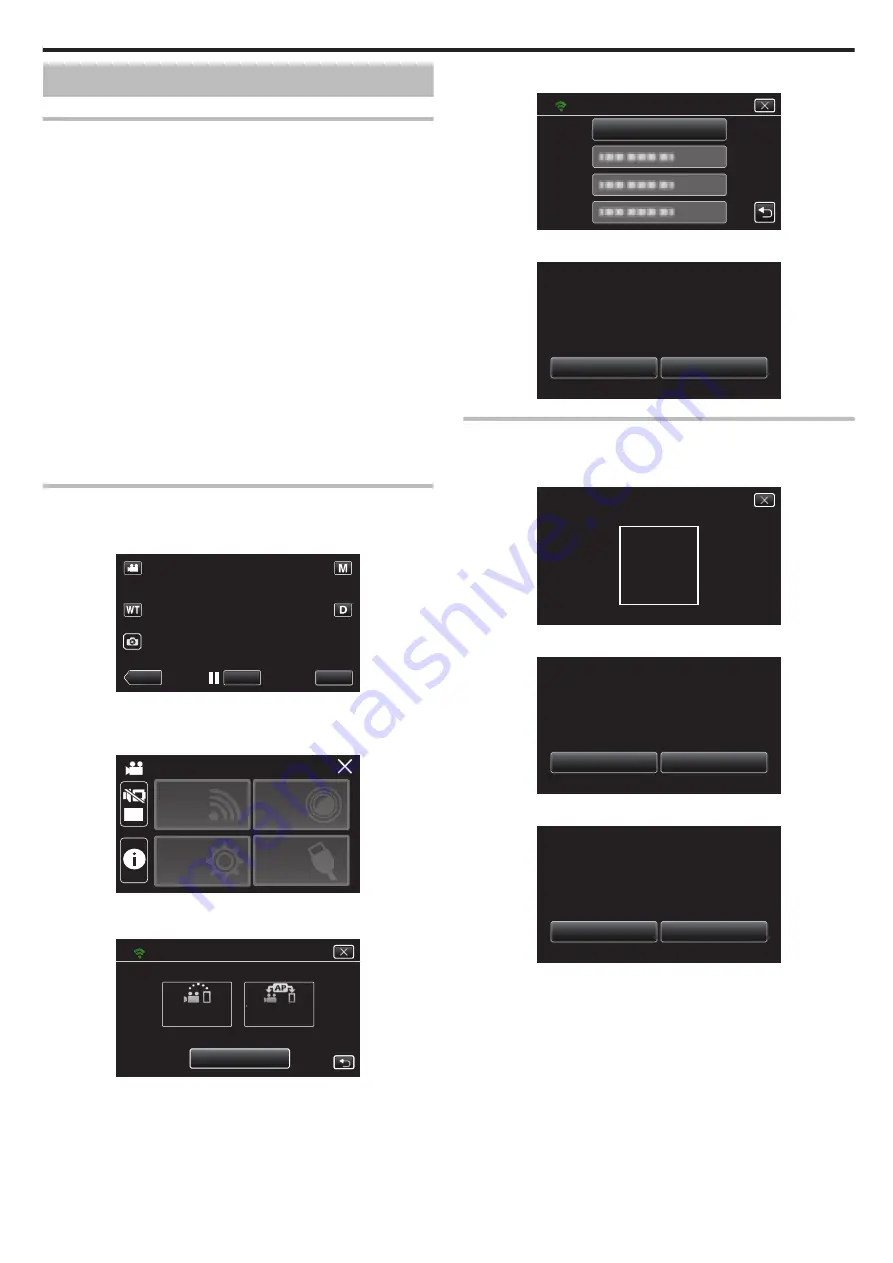
Display the screen for reading the QR code.
1
Tap “MENU”.
(Operation on this camera)
.
REC
≪
PLAY
MENU
0
The top menu appears.
2
Tap the “Wi-Fi” (
Q
) icon.
(Operation on this camera)
.
OFF
SETUP
TOP MENU
Wi-Fi
SETTING
RECORD
SETTINGS
CONNECTION
3
Tap “Wi-Fi SETTING”.
(Operation on this camera)
.
Wi-Fi
Wi-Fi SETTING
ACCESS POINT
CONNECTION
CONNECTION
DIRECT
4
Tap “SET FROM QR CODE”.
.
SET FROM QR CODE
Wi-Fi SETTING
5
Tap “EXECUTE”.
.
STOP
EXECUTE
SMART USER GUIDE
USING WEB USER GUIDE OR
Wi-Fi SETTING CAN BE SET
SET FROM QR CODE
Read a QR code.
1
Read a QR code.
(Operation on this camera)
.
PLEASE READ QR CODE
2
Tap “YES”.
.
NO
YES
8 POINTS HAVE ALREADY
UNABLE TO REGISTER IF
REGISTER THE ACCESS POINT
SET FROM QR CODE
3
Tap “OK”.
.
NEXT
OK
SETTINGS COMPLETED
SET FROM QR CODE
0
Tap “NEXT” to return to the screen to read the QR code.
0
Set contents are saved.
Using Wi-Fi by Creating a QR Code
143


