


3. Locate the power cords shipped with the switch; the cords have plugs appropriate for your geographical
location. See
“AC Power Cord with Type C15 Coupler Specifications” on page 68
or
with Type C13 Coupler Specifications” on page 66
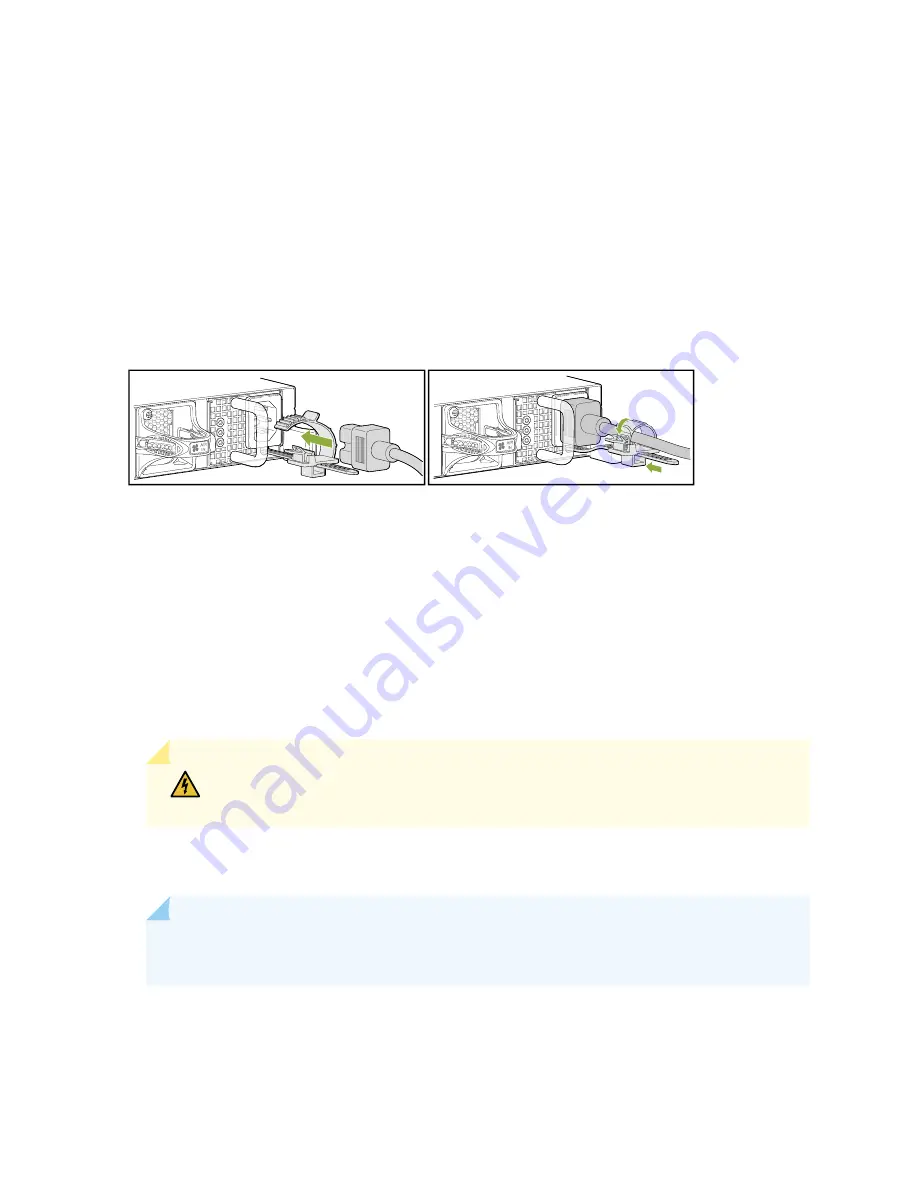
For each power supply:
a. Ensure the loop on the power cord retainer is open and there is enough space to insert the power
cord coupler into the inlet. If the loop is closed, press the small tab on the retainer to loosen the
loop. See
Figure 55: Attaching the Power Cord Retainer
g051060
b. Thread the power cord coupler through the power cord retainer loop.
c. Insert the power cord coupler firmly into the AC inlet on the power supply faceplate.
d. Slide the power cord retainer loop towards the power supply until it is snug against the base of the
coupler.
e. Press the tab on the loop and draw out the loop to enclose the power cord. See
WARNING:
Ensure that the power cord does not block access to device components
or drape where people can trip on it.
4. If the AC power source outlet has a power switch, set it to the OFF (O) position.
NOTE:
The switch powers on as soon as power is provided to the power supply. There is no
power switch on the device.
5. Insert the power cord plug into an AC power source outlet.
138
Summary of Contents for QFX5220
Page 1: ...QFX5220 Switch Hardware Guide Published 2019 11 07 ...
Page 18: ......
Page 77: ......
Page 107: ......
Page 148: ......
Page 172: ...5 CHAPTER Troubleshooting Hardware Troubleshooting the QFX5220 179 ...
Page 173: ......
Page 182: ......
Page 206: ...Restricted Access Warning 213 ...
Page 221: ...Jewelry Removal Warning 228 ...
Page 224: ...Operating Temperature Warning 231 ...
Page 234: ...DC Power Disconnection Warning 241 ...
Page 238: ...DC Power Wiring Sequence Warning 245 ...