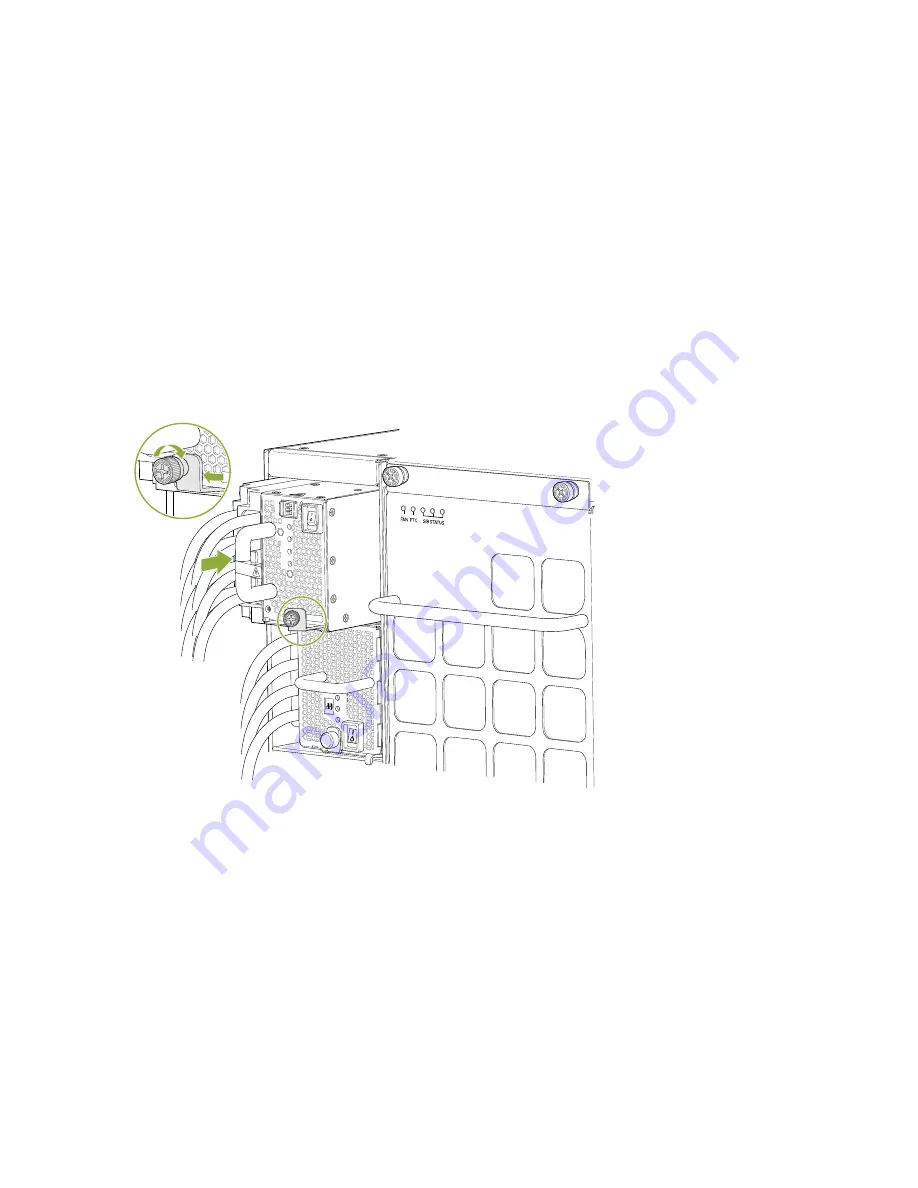
14. Using both hands, place the power supply in the power supply slot on the rear of the router. Slide the
power supply straight into the chassis until the power supply is fully seated in the slot. The power
supply will protrude from the chassis about 2 in. (5 cm) (see
and
15. Push the captive screw into the power supply faceplate. Ensure that the screw is seated inside the
corresponding hole on the faceplate.
16. Tighten the captive screw by turning it clockwise by using the Phillips (+) screwdriver, number 1. When
the screw is completely tight, the latch locks into the router chassis.
Figure 137: Installing a JNP10K-PWR-DC2 in an MX10008
g100601
240
Summary of Contents for MX10008
Page 1: ...MX10008 Universal Routing Platform Hardware Guide Published 2019 11 11 ...
Page 19: ......
Page 89: ......
Page 129: ......
Page 170: ......
Page 278: ...5 CHAPTER Troubleshooting Hardware Restoring Junos OS 283 Alarm Messages 287 ...
Page 279: ......
Page 287: ......
Page 318: ...Restricted Access Warning 321 ...
Page 333: ...Jewelry Removal Warning 336 ...
Page 336: ...Operating Temperature Warning 339 ...
Page 345: ...DC Power Disconnection Warning 348 ...
Page 349: ...DC Power Wiring Sequence Warning 352 ...
Page 352: ...DC Power Wiring Terminations Warning 355 ...
Page 361: ...Translation The emitted sound pressure is below 92 dB A per GR63 CORE 364 ...


