background image

508

2973

 - 501

1633

3 GB

F 8

6

Description of servicing and maintenance operations

6.1

Prepare truck for the servicing and maintenance operations

All required safety measures must be taken to prevent any accidents in the course of
the servicing and maintenance operations. The following preparatory operations
must be performed:

– Expose the batteries (refer to chapter D).

6.2

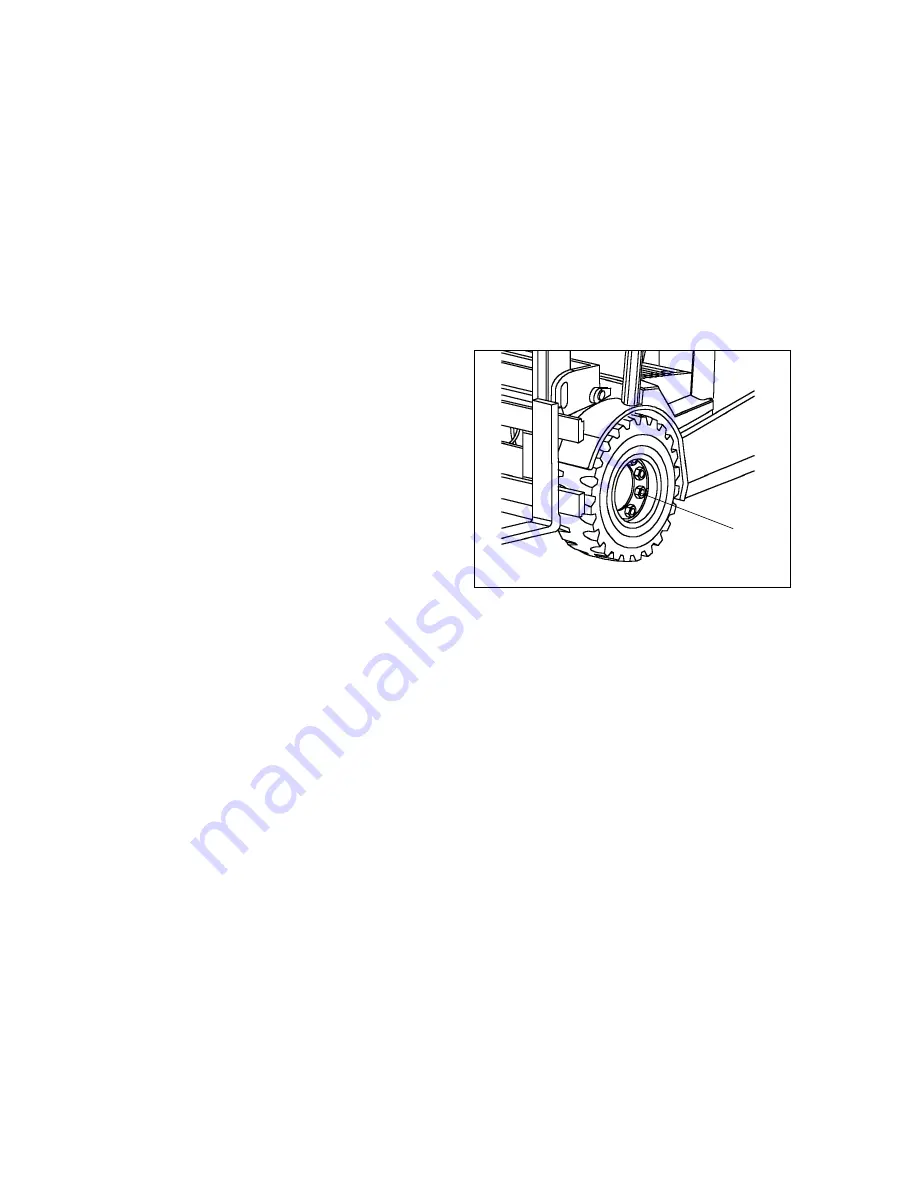
Check attachment of tyres

– Park and lock the truck (refer to

chapter E).

– Crosswise tighten the wheel nuts (1)

with a torque wrench.

Torque

Wheels/Drive axle 6-hole Wheel rim 
M

A

 = 330 Nm

Wheels/Drive axle 10-hole Wheel rim
M

A

 = 220 Nm

Wheels/Steering axle M

A

 = 170 Nm

6.3

Tyre pressure

Wheels/Drive axle 10 bar
Wheels/Steering axle 7 - 8 bar

1

Summary of Contents for EFG-Vac 22

Page 1: ...Operating instructions 50116333 EFG Vac 22 30 25L S SL G 01 01 12 03...

Page 2: ...explanations are indicated by the following graphics f Used before safety instructions which must be observed to avoid danger to personnel m Used before notices which must be observed to avoid materi...

Page 3: ...0108 GB...

Page 4: ...4 2 Truck load diagram B 12 4 3 Fork arm load diagram basic device B 13 4 4 Attachment load diagram B 13 C Transportation and commissioning 1 Transportation by crane C 1 2 Commissioning C 2 3 Moving t...

Page 5: ...restraint belt E 10 3 4 Automatic Mechanical Support System optional E 12 3 5 Adjusting the steering column E 14 3 6 Providing operational readiness E 14 4 Operation of the fork lift truck E 15 4 1 Sa...

Page 6: ...ydraulic oil level F 9 6 5 Check transmission oil level F 10 6 6 Draining oil F 10 6 7 Refilling oil F 10 6 8 Changing the hydraulic filter F 10 6 9 Changing the vacuum filter F 11 6 10 Check oil leve...

Page 7: ...5082973 50116333 GB I 4...

Page 8: ...behalf it is used In special cases e g leasing or renting the user is considered the person who in accordance with existing contractual agreements between the owner and the user of the fork lift truc...

Page 9: ...5082973 50116333 GB A 2...

Page 10: ...due to its load lifting device being located in front of the lift truck unload lorries and deliver the load on ramps or in racks unimpededly It can be used to stack and transport DIN 15142 pallets DI...

Page 11: ...2 2 Description of assembly groups and functions Item Designation 1 t Overhead guard 2 t Driver seat 3 t Counterweight 4 t Steering axle 5 t Drive axle 6 t Fork arm carriage 7 t Lifting mast 8 t Stee...

Page 12: ...st fault analysis and programming can be performed via PC Drive and brake system The front drive offers ideal traction to the drive wheels at all times The hydraulically actuated oil bath multi disk b...

Page 13: ...05 h10 Coupling height 390 550 390 550 390 550 mm L1 Overall length including fork 3 428 3 428 3 572 mm L2 Length including fork back 2 278 2 278 2 422 mm b1 Overall width 1 196 1 196 1 196 mm b3 Widt...

Page 14: ...height 390 550 390 550 390 550 mm L1 Overall length including fork 3 428 3 572 3 577 mm L2 Overall length including fork back 2 278 2 422 2 427 mm b1 Overall width 1 196 1 196 1 196 mm b3 Width of fo...

Page 15: ...5082973 50116333 GB B 6...

Page 16: ...adient with without load S2 5 min 20 31 18 29 17 27 Acceleration time with without load for 10 m 4 2 3 9 4 3 4 0 4 4 4 1 s Designation EFG Vac 25S EFG Vac 25SL EFG Vac 30 Q Carrying capacity load 2 5...

Page 17: ...ear 2 300 2 300 2 530 2 220 2 600 2 500 kg Designation EFG Vac 22 EFG Vac 25 EFG Vac 25L Solid rubber tyres SE solid air Solid Solid Solid Tyre size front 23 x 9 10 23 x 9 10 23 x 9 10 Tyre size rear...

Page 18: ...ion in the vertical plane It is determined by driving over bumps with a constant speed Electromagnetic compatibility EMC The manufacturer confirms compliance with the limit val ues for electromagnetic...

Page 19: ...itions and identification plates f Warning and information labels such as load diagrams sling points and ID plates must be readable at all times and must be renewed if necessary 2 3 4 1 5 6 7 8 9 10 1...

Page 20: ...or under load danger of crushing 9 Label do not drive with elevated load forward mast tilt with elevated load prohibited 10 Label warning when turning over 11 Label lifting lowering 12 Label tilt for...

Page 21: ...and the desired lifting height H in mm Example for determining the maximum carrying capacity At a load centre distance of D 600 mm and maximum lifting height H 3 600 mm the maximum carrying capacity...

Page 22: ...uck in connection with the respective attachment in kg The attachment serial number indicated in the load diagram must correspond to the ID plate of the attachment since the manufacturer must state th...

Page 23: ...5082973 50116333 GB B 14...

Page 24: ...provided for transport for first commissioning For application conditions that require frequent shipment changing usage locations it is required to consult the manufacturer m Hoisting belts or chains...

Page 25: ...d on battery current Rectified alternate current will damage the electronics Cables connected to the battery trailing cables must be less than 6 meters in length In order to prepare the truck for work...

Page 26: ...l be fully operative While turning the steering wheel the foot brake must not be actuated f Before the driver leaves the truck with the spring loaded brake disengaged he must secure the truck against...

Page 27: ...5082973 50116333 GB C 4...

Page 28: ...t ready Servicing of batteries The battery cell screw caps must be kept dry and clean Terminals and cable shoes must be clean lightly greased with pole grease and must be securely tightened Batteries...

Page 29: ...ries must correspond to the following table and drawing Operation of the truck with non conforming batteries is only allowed with prior approval by the manufacturer EFG Vac 22 80 V 4PzW battery 480 Ah...

Page 30: ...th support system optional m If the truck is equipped with a support system the battery hood can only be opened when the safety straps are swivelled downwards In case of the automatic support system l...

Page 31: ...OT Pull control valve cover 2 forward until it engages Carefully fold back battery cover with driver s seat 3 With SOLOPILOT Unlatch control valve cover 2 by pressing lever 4 and swivel forward Carefu...

Page 32: ...ttery m Check all cable and plug connections for visible damages prior to charging Connect charging cable of the battery charging station to battery plug 5 Charge the battery according to the instruct...

Page 33: ...e recess at the overhead guard and must exert vertical pulling action so that the battery trough is not crushed The hooks must be fastened in such a way that they cannot fall onto the battery cells wh...

Page 34: ...erformed by customer service engineers If this setting is not performed the battery might suffer damage caused by exhaustive discharge When reaching the last 10 of the available capacity the warning s...

Page 35: ...5082973 50116333 GB D 8...

Page 36: ...ift truck or on the attachments must immediately be brought to the notice of the person in charge fork lift trucks that cannot be safely operated e g due to worn tyres or defective brakes must not be...

Page 37: ...Truck is decelerated 8 Travel direction switch MULTIPILOT Horn Auxiliary hydraulics ZH3 o o o o The desired travel direction is set Controls the functions of the lifting mast Triggers a warning signal...

Page 38: ...E 3 5082973 50116333 GB Truck with MULTIPILOT Dual pedal control Truck with SOLOPILOT 1 2 4 5 6 7 8 10 9 3 11 12 13 14 15 16 17 18 19 20 10...

Page 39: ...rning switch Switch 360 warning light parking light Switch Windscreen wiper and washing system Position 1 Windscreen wiper ON Position 2 Windscreen washer ON Function Override switch Lift cut off Swit...

Page 40: ...r temperature 25 Seat switch 26 Parking brake applied 27 Travel direction indicator o 28 Truck in operation key switch ON 29 Service display UVV display 30 Brake fluid level too low 31 Lights up in ca...

Page 41: ...itored Power is reduced in case of over temperature 25 Seat switch Seat switch not closed Truck ready for operation seat not occupied 26 Parking brake applied Truck ready for operation parking brake a...

Page 42: ...nds at a capacity of 0 38 Operating hours error display Indicates the operating hours Eff Indicates the overall operating hours Error display The operating hours display is cleared when an error Err o...

Page 43: ...ng device against lifting out and shifting no visible damages at the load carrying unit bends cracks severe abrasion operation of the warning equipment 3 2 Adjusting the driver seat A To achieve optim...

Page 44: ...e desired seating position by sliding it forward or backward Allow locking lever 39 to latch again f The driver seat locking must be securely latched in the adjusted position The driver seat setting m...

Page 45: ...are not permitted Increased risk through malfunctions Replace restraint belts after an accident Use only original spare parts for retrofits and repairs f Damaged or non functioning restraint belts mus...

Page 46: ...providing not enough protection A Only use the belt to secure persons After use push the red button and hold the latch with your hand while the belt is being retracted A The latch hitting the housing...

Page 47: ...t the dimension 90 mm between strap 1 and seat must be observed to ensure safe working con ditions Behaviour in the event of unusual situations f If the truck is in danger of tipping over under no cir...

Page 48: ...the truck and app lied the parking brake the safety straps open automatically Only turn the switch key to 0 and take it out after the safety straps have opened In the event of a power failure the supp...

Page 49: ...ards the I position until reaching the stop Check function of horn pushbutton 43 f Check function of electric and hydraulic brake as well as parking brake The truck is now ready for operation The mult...

Page 50: ...st only be negotiated at slow speed with the driver ready to brake at any moment Use of lifts and driving on loading platforms Lifts and loading platforms must only be used if they are of adequate loa...

Page 51: ...h refer to section 3 Adjusting the driver weight The spring loaded brake is disengaged by occupying the driver seat and actuating the accelerator pedal The travel speed is reduced depending on the ste...

Page 52: ...ravel into the opposite direction make sure that the rear travelling area is free Release foot from actuated driving pedal 6 Decelerate the truck to standstill by means of brake pedal 7 Push travel di...

Page 53: ...further Motor speed and travel speed increase in relation to the pedal travel Accelerating the truck dual pedal Slowly actuate accelerator pedal 11 or 13 depending on selected travel direction until...

Page 54: ...ery low therefore turn the steering wheel sensitively Driving right curves Turn the steering wheel clockwise according to the desired steering radius Driving left curves Turn the steering wheel counte...

Page 55: ...opposite direction Parking brake Engage the parking brake f The parking brake actuates an on off valve i e deceleration cannot be performed sensitively A The parking brake mechanically decelerates the...

Page 56: ...Lifting mast tilting forward backward f Make sure not to put any parts of the body between mast and front wall when tilting the mast backward To tilt the lifting mast backward push MULTIPILOT 8 to the...

Page 57: ...pacity of the attachment Auxiliary control III Push key 47 at the MULTIPILOT for auxiliary control III e g locking Controlling the speed of the working equipment The excursion of the MULTIPILOT moveme...

Page 58: ...e lifting mast forward push SOLOPILOT 17 to the front Controlling attachments f Observe the carrying capacity of the attachment SOLOPILOT auxiliary hydraulic system ZH 1 18 e g side shifting device Pu...

Page 59: ...h a way that both have the same distance to the outside edges of the fork arm carriage and the load centre is centred between the fork arms Swivel locking lever 49 upward Push the fork arms 48 on the...

Page 60: ...el and disengage the parking brake f Make sure the area to the rear is clear for travelling Back up carefully and slowly until the load is outside the storage area f All personnel must stay clear of t...

Page 61: ...resent to give guiding instructions f At upward and downward slopes the load must always be transported on the hill side never travel diagonally and never turn around Setting down loads Carefully appr...

Page 62: ...k with elevated load Depress the master switch 10 Set key in keyswitch 5 to position 0 Remove key from key switch 5 m Parking the truck for longer periods in areas with temperatures below 15 C should...

Page 63: ...nto the opening Insert the socket pin push it down turn it by 90 degrees until it engages 4 10 Trailer loads m The driver must make sure not to exceed the maximum permissible trailer load prior to cou...

Page 64: ...connected Check battery plug and plug in if necessary Master switch depressed Release the master switch Key switch in position 0 Set the key switch to position I Battery charge too low Check battery c...

Page 65: ...5082973 50116333 GB E 30...

Page 66: ...ork lift truck is to be lifted the lifting gear must only be secured to the points specially provided for this purpose When the truck is to be jacked up suitable measures must be taken to prevent the...

Page 67: ...ng behaviour of the fork lift truck Changes must only be made following consultations with the manufacturer When replacing wheels or tyres it must be ensured that the fork lift truck remains level tyr...

Page 68: ...east once a week M6 Every 1000 operating hours at least every six months M12 Every 2000 operating hours at least every 12 months M24 Every 4000 operating hours at least every 24 months A The maintenan...

Page 69: ...heel bearings t Steering 4 1 Check hydraulic components for function and leaks t 4 2 Grease all bearings of the steering axle wheel bearing king pin steering arm and swivel according to the lubricatio...

Page 70: ...ry plug connections check for tight seat t Lifting mast 10 1 Apply lubricating grease to slide way and lateral stopping face of the guide rollers in the lifting mast profiles t 10 2 Check lifting chai...

Page 71: ...schedule EFG Vac g Glide surfaces b Transmission oil filler pipe s Lubricator nipple a Transmission oil drain plug Hydraulic oil filler pipe t Filler pipe for brake system mineral oil c Hydraulic oil...

Page 72: ...these operating instructions Avoid spilling Spilt liquid must be removed immediately using a suitable binding agent and the mixture of consumption type material and binding agent is to be disposed of...

Page 73: ...ntenance operations The following preparatory operations must be performed Expose the batteries refer to chapter D 6 2 Check attachment of tyres Park and lock the truck refer to chapter E Crosswise ti...

Page 74: ...e tank is sufficiently filled the hydraulic level must be readable at the upper marking 4 If required refill hydraulic oil up to the required level 10 mm at dipstick 3 correspond to approximately 1 l...

Page 75: ...otection regulations 6 6 Draining oil Drain the oil when the oil is at operating temperature Place an oil pan under the unit Unscrew oil drain plug 6 and drain transmission oil 6 7 Refilling oil Renew...

Page 76: ...fill or change the mineral oil the cover 8 must be removed m Do not use conventional brake fluid refill only with prescribed mineral oil Park and lock the truck refer to chapter E Remove cover 8 after...

Page 77: ...e function of the belt buckle for correct retraction of the belt into the retractor Check cover for damage Testing the automatic blocking retractor Park the industrial truck on a horizontal surface Pu...

Page 78: ...gnation Electric circuit Rating type 1 F3 1 Option 2 F3 1 Control circuit fuse DC DC converter 24 V 10 A 3 6F5 Control circuit fuse 12 V 3 A 4 F1 2 Control circuit fuse 80 V 10 A 5 F2 1 Control circui...

Page 79: ...be decommissioned for more than 6 months additional measures must be discussed with the Service Department of the manufacturer 7 1 Operations to be performed prior to decommissioning Thoroughly clean...

Page 80: ...be chekked by a qualified inspector The inspector must assess the condition of the truck from a standpoint purely concerned with safety aspects uninfluenced by any company or economic circumstances T...

Page 81: ...5082973 50116333 GB F 16...

Reviews: