28
JO
NIX
mate
11
MIN
3 mm
12
13
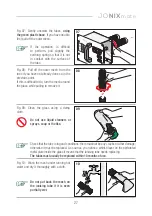
Fig. 11: Put the outer metal mesh back on
the glass tube so that it fully overlaps the
internal plate.
In any case ensure a minimum
distance of at least 3 mm from
the base of the tube.
Fig. 12: Gently screw the ionising tube
holding on to the base (green part).
If the operation is difficult to perform, pull
slightly the earthing spring so that it is not in
contact with the surface of the tube.
ATTENTION: do not overtighten the screw
after reaching its end stop.
Check that the earthing spring
is in contact with the outer
mesh once the ionising tubes
have been screwed back into
place. Otherwise contact the
manufacturer.
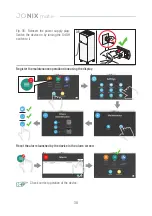
Fig. 13: Reposition the
JO
NIX
duct
module, inserting it horizontally into its box
by using the handle and tighten the 4 fixing
screws.
Summary of Contents for 70MATEWHITE
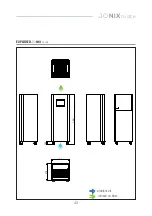
Page 42: ...42 JONIXmate ATTACHMENTS EXPLODED JONIX mate ...
Page 43: ...43 JONIXmate 1941 135 678 700 EXPLODED JONIX mate ambient air ionised air flow ...
Page 44: ...44 JONIXmate NOTES ...
Page 45: ...45 JONIXmate ...
Page 46: ...46 JONIXmate ...
Page 47: ......

