background image

ENGLISH  

OPERATION 

MANUAL 


JB SYSTEMS® 

1/46 

DYNAMO 


Thank you for buying this JB Systems product. To take full advantage of all possibilities 
and for your own safety, please read these operating instructions very carefully before you 
start using this unit.  


FEATURES 

This unit is radio-interference suppressed. This product meets the requirements of the 
current European and national guidelines. Conformity has been established and the 
relevant statements and documents have been deposited by the manufacturer. 

 This device has been designed to produce decorative effect lighting and is used in light 

show systems. 

 Very attractive compact DMX scanner for mobile DJs 

 Just connect the small, optional CA-8 controller for easy operation 

 Master/slave mode with built-in pr micro 

 Easily controlled with iLEAD, SM1612 or any other DMX controller 

 10 multi colored Gobo  

 Gobo Shaking effect 

 Blackout and variable strobe  

 DMX control 4 channels: (pan, tilt, shutter/gobo shaking, gobo/color) 

 Fan cooling and electronic overheat protection. 

 Adjustable focus 


BEFORE USE 

 Before you start using this unit, please check if there’s no transportation damage. Should 

there be any, do not use the device and consult your dealer first.  


Important: 

This device left our factory in perfect condition and well packaged. It is 

absolutely necessary for the user to strictly follow the safety instructions and warnings in 
this user manual. Any damage caused by mishandling is not subject to warranty. The 
dealer will not accept responsibility for any resulting defects or problems caused by 
disregarding this user manual. 

 Keep this booklet in a safe place for future consultation. If you sell the fixture, be sure to 

add this user manual. 

 
Check the contents: 

Check that the carton contains the following items: 

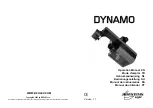
 DYNAMO scanner 

 Mains cable 

 EFP 100W/12V lamp 

 Operating instructions 

ENGLISH  

OPERATION 

MANUAL 


JB SYSTEMS® 

2/46 

DYNAMO 

SAFETY INSTRUCTIONS: 

 To protect the environment, please try to recycle the packing material as much as 

possible. 

 A new light effect sometimes causes some unwanted smoke and/or smell. This is normal 

and disappears after some minutes. 

 To prevent fire or shock hazard, do not expose this appliance to rain or moisture. 

 To avoid condensation to be formed inside, allow the unit to adapt to the surrounding 

temperatures when bringing it into a warm room after transport. Condense sometimes 
prevents the unit from working at full performance or may even cause damages. 

 This unit is for indoor use only.  

 Don’t place metal objects or spill liquid inside the unit. Electric shock or malfunction may 

result. If a foreign object enters the unit, immediately disconnect the mains power. 

 Locate the fixture in a well ventilated spot, away from any flammable materials and/or 

liquids. The fixture must be fixed at least 50cm from surrounding walls. 

 Don’t cover any ventilation openings as this may result in overheating.  

 Prevent use in dusty environments and clean the unit regularly. 

 Keep the unit away from children. 

 Inexperienced persons should not operate this device. 

 Maximum save ambient temperature is 45°C. Don’t use this unit at higher ambient 

temperatures. 

 The units’ surface temperature may reach up to 85°C. Don’t touch the housing with bare 

hands during its operation. 

 Make sure the area below the installation place is free from unwanted persons during 

rigging, de-rigging and servicing. 

 Allow the device about 10 minutes to cool down before replacing the bulb or start 

servicing. 

 Always unplug the unit when it is not used for a longer time or before replacing the bulb 

or start servicing. 

 The electrical installation should be carried out by qualified personal only, according to 

the regulations for electrical and mechanical safety in your country. 

 Check that the available voltage is not higher than the one stated on the rear panel of the 

unit. 

 The power cord should always be in perfect condition: switch the unit immediately off 

when the power cord is squashed or damaged. 

 Never let the power-cord come into contact with other cables! 

 This fixture must be earthed to in order comply with safety regulations. 

 Don’t connect the unit to any dimmer pack. 

 Always use an appropriate and certified safety cable when installing the unit. 

 In order to prevent electric shock, do not open the cover. Apart from the lamp and mains 

fuse there are no user serviceable parts inside. 


Never

 repair a fuse or bypass the fuse holder. 

Always

 replace a damaged fuse with a 

fuse of the same type and electrical specifications! 

 In the event of serious operating problems, stop using the fixture and contact your dealer 

immediately. 

 The housing and the lenses must be replaced if they are visibly damaged. 

 Please use the original packing when the device is to be transported. 

 Due to safety reasons it is prohibited to make unauthorized modifications to the unit. 

Summary of Contents for Dynamo

Page 1: ...cva Reproduction or publication of the content in any manner without express permission of the publisher is prohibited Operation Manual Mode d emploi Gebruiksaanwijzing Bedienungsanleitung Manual de i...

Page 2: ...t toestel en de gebruikte batterijen op een milieuvriendelijke manier conform de in uw land geldende voorschriften DU ENTSORGUNG DES GER TS Entsorgen Sie das Ger t und die Batterien auf umweltfreundli...

Page 3: ...ringing it into a warm room after transport Condense sometimes prevents the unit from working at full performance or may even cause damages This unit is for indoor use only Don t place metal objects o...

Page 4: ...ention Check the label on the backside of the device or see the technical specifications in this manual to know which lamp should be used Never install lamps with a higher wattage Lamps with higher wa...

Page 5: ...hen the blackout function is active After about 30sec blackout the lamp will be switched off automatically to extend its lifetime MODE FUNCTION BUTTONS With the MODE button you can select 3 different...

Page 6: ...ject to change without prior notice FRAN AIS MODE D EMPLOI JB SYSTEMS 8 46 DYNAMO Merci d avoir choisi ce produit JB Systems Pour votre s curit et pour une utilisation optimale de toutes les possibili...

Page 7: ...anique en vigueur dans votre pays Assurez vous que le voltage de la source d alimentation de la zone dans laquelle vous vous trouvez ne d passe pas celui indiqu l arri re de l appareil Le cordon d ali...

Page 8: ...zone d installation supporte un point localis minimum de 10 fois le poids de l appareil Utilisez syst matiquement un c ble de s curit qui peut supporter 12 fois le poids de l appareil lors de l instal...

Page 9: ...us du lieu d installation ne comporte pas de personnes ind sirables lors de la maintenance Mettez l unit hors tension d branchez le cordon d alimentation et attendez que l appareil ait refroidi Pendan...

Page 10: ...ecoratieve lichteffecten te produceren en kan eventueel worden gebruikt in lichtshows Zeer compacte aantrekkelijke scanner voor mobiele DJ s De kleine CA 8 controller zorgt voor heel wat mogelijkheden...

Page 11: ...geveer 10 minuten afkoelen alvorens de lamp te vervangen of alvorens te starten met de onderhoudsbeurt Trek altijd de stekker uit wanneer het apparaat gedurende langere tijd niet wordt gebruikt of alv...

Page 12: ...compartiment met de schroef Klaar NEDERLANDS HANDLEIDING JB SYSTEMS 20 46 DYNAMO OPHANGEN VAN HET APPARAAT Belangrijk De installatie van het toestel mag uitsluitend door bekwaam onderhoudspersoneel ui...

Page 13: ...n XLR M F aansluitingen Bvb JB Systems ref 7 0063 Om onvoorspelbaar gedrag door interferenties te vermijden dient men de keten af te sluiten met een weerstand van 90 tot 120 Gebruik nooit Y splitter k...

Page 14: ...e Bedienungsanleitung sorgf ltig vor der Inbetriebnahme durch zur vollen Aussch pfung der M glichkeiten die dieses Ger t bietet sowie zu Ihrer eigenen Sicherheit EIGENSCHAFTEN Das Ger t ist funkentst...

Page 15: ...nhaltung der Sicherheitsbestimmungen mu das Ger t geerdet sein Ger t nicht an einen Dimmer anschlie en Ausschlie lich vorschriftsm ige Kabel zur Installation verwenden Ger t nicht ffnen Abgesehen vom...

Page 16: ...ationen vor Erstbetrieb fachm nnisch vorgenommen worden sind Installationen sollten j hrlich durch qualifiziertes Fachpersonal inspiziert werden um jederzeit einen sicheren Betrieb zu gew hrleisten DE...

Page 17: ...rialien und Aufh ngungen Decke Balken abgeh ngte Decken d rfen keine Anzeichen von Verformung zeigen Ist die Optik sichtbar besch digt Spr nge oder tiefe Kratzer dann m ssen die entsprechenden Teile a...

Page 18: ...escargas no exponga este aparato a la lluvia o humedad Para evitar que se forme condensaci n en el interior permita que la unidad se adapte a las temperaturas circundantes cuando la lleve a una habita...

Page 19: ...or ver la conexi n de la l mpara Saque la conexi n de la l mpara con tacto fuera del compartimiento de la l mpara Desenchufe la l mpara vieja Sostenga la conexi n de la l mpara mientras desconecte la...

Page 20: ...o master slave Conectar el controlador a la entrada jack de la primera unidad master Ahora todas las unidades pueden ser controladas BOTON STANDBY Pulsarlo para entrar salir del modo blackout sobre t...

Page 21: ...nto caso de haberlos y las aperturas de ventilaci n deber an ser limpiados mensualmente El interior del aparato deber a ser limpiado anualmente usando una aspiradora o m quina de aire La limpieza de l...

Page 22: ...a o no interior da unidade ao transport la para ambiente quente aguarde algum tempo de modo a que haja uma ambienta o temperatura A condensa o poder afectar o desempenho da unidade ou at danific la Es...

Page 23: ...rtar o parafuso que fecha o compartimento da l mpada No interior ir ver o conector da l mpada Com cuidado retire o conector da l mpada do compartimento Ao retirar a l mpada usada segure o conector N o...

Page 24: ...o modo blackout em todas as unidades ligadas O LED est aceso quando a fun o est activa Ap s cerca de 30 segundos em modo blackout a l mpada ser desligada automaticamente de forma a prolongar a sua dur...

Page 25: ...limpos todos os meses Utilize um aspirador ou um compressor de ar para limpar o interior da unidade uma vez por ano De forma a optimizar a projec o de luz limpe as lentes pticas internas e externas e...

Reviews: