7
DE
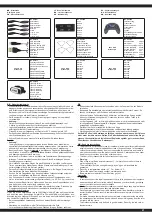
1. Binden von Sender und Modell
•
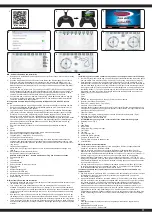
Platzieren Sie das Modell auf einer geraden Oberfläche.
• Schieben Sie den Akku ein und schalten Sie anschließend
das Modell ein (1). Die LEDs am Modell beginnen zu
blinken. Nun das Modell nicht mehr bewegen, damit der
Gyro sich einstellen kann. Schalten Sie jetzt den Sender ein
•
Zum initialisieren schieben Sie den Gashebel ganz nach
oben und wieder zurück (1.2), dabei ertönt ein akustisches
Signal. Wenn die LEDs am Modell dauerhaft leuchten ist der
Bindevorgang abgeschlossen.
Sollte es nicht funktionie-
ren, wiederholen Sie den Prozess.
GB
1. Binding of transmitter and model
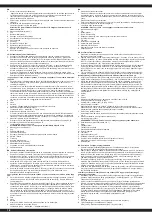
• With the model places on level surface.
• Push the battery in the model and switch the model on (1).
The LEDs on the model blinking. At this time avoid moving
the model so the radio and gyro system can initialize. Turn
on the transmitter.
• For the initialisation process to be completed push the
throttle stick to the top and back (1.2); an acoustic signal
sounds. Once the LED lights up permanently, the binding
process is completed.
If this does not work, repeat the
process.
FR
1. Synchroniser le modèle avec l‘émetteur.
• Placez l’modèle sur une surface horizontale plane.
• Glissez la batterie à l’intérieur puis allumez le modèle (1)
Les LED commencent à clignoter. Ne bougez plus le modèle
réduit afin que le gyroscope puisse se régler. Allumez
maintenant l’émetteur.
• Pour l’initialisation, poussez la manette des gaz complète-
ment vers l’avant puis revenez en arrière (1.2). Un signal
acoustique retentit. Si les LED restent allumées en
permanence, cela indique que la synchronisation est
terminée.
Si la procédure a échoué, recommencez
l’opération.
IT
1. Binding trasmettitore e modello
• Il Binding deve avvenire su un tavolo oppure per terra.
• Collegare il pacco batteria e accendete il modello (1). I LED
del telaio cominciano a lampeggiare. Accendere il
trasmittente.
• Per inizializzare premere la leva del gas fino sopra e tutto il
tragitto indietro (1.2). Durante questa manovra si sente un
segnale acustico. Se i LED sono accesi sul modelo è com-
pletato il processo di associazione.
In caso che il LED
lampeggia, ripetete la procedura.
ES
1. Binding del modelo y la emisora
•
Ponga el modelo en una superficie plana.
• Meta la batería en su sitio y encender el modello (1). Los
LEDs comienzan a parpadear. Ahora no mueva mas el
modelo, para que se pueda inicializar el giróscopo.
Encienda la emisora.
• Para iniciar, presione la palanca de gas hacia arriba y nueve
mente hacia atrás (1.2), te va a suenar un señal acústico. Si
los LED del modelo queman de forma permanente el
proceso de unión es completa.
Si el LED vuelve a
parpadear o sigue parpadeando, repita el proceso de
combinación.
CZ
1. Spojení vysílače s modelem
• Model umístěte na rovný povrch.
• Zasuňte baterii do modelu a model zapněte obr. (1) nahoře.
LED na modelu začne blikat. V této době se vyhněte pohybu
modelu, aby se mohl systém radio a gyro inicializovat.
Zapněte vysílač.
• Pro dokončení procesu inicializace, zatlačte páčku regulace
výkonu nahoru a dolu (1.2); ozve se akustický signál.
Jakmile bude LED svítit stále, je proces propojení hotový.
Pokud nebude vše správně pracovat, proces opakujte.
PL
1. Połączenie nadajnika z modelem
• Umieść model na płaskiej powierzchni.
• Włóż baterię do modelu i włącz model rys. (1) powyżej.
Dioda na modelu zacznie migać. Unikaj ruchu w tej chwili
model, aby można było zainicjować system radiowy i
żyroskopowy. Włącz nadajnik.
• Aby zakończyć proces inicjalizacji, naciśnij dźwignię
sterującą włączanie i wyłączanie (1.2); rozlegnie się sygnał
dźwiękowy. Gdy dioda nadal się świeci, proces łączenia jest
zakończony.
Jeśli wszystko nie działa poprawnie,
powtórz proces.
NL
1. Aansluiting van de zender op het model
• Plaats het model op een vlakke ondergrond.
• Plaats de batterij in het model en schakel het model fig. (1)
hierboven in. De LED op het model begint te knipperen.
Vermijd beweging op dit moment model zodat het radio- en
gyrosysteem kan worden geïnitialiseerd. Zet de zender aan.
• Om het initialisatieproces te voltooien, drukt u op de
bedieningshendel in- en uitschakelen (1.2); klinkt er een
akoestisch signaal. Zodra de LED nog brandt, is het
verbindingsproces voltooid.
Als alles niet goed werkt, herhaalt u het proces.
SK
1. Spojenie vysielača s modelom
• Model umiestnite na rovný povrch.
• Zasuňte batériu do modelu a model zapnite obr. (1) hore.
LED na modeli začne blikať. V tejto dobe sa vyhnite pohybu
modelu, aby sa mohol systém radio a gyro inicializovať.
Zapnite vysielač.
• Pre dokončenie procesu inicializácie, zatlačte páčku
regulácie výkonu hore a dole (1.2); ozve sa akustický signál.
Akonáhle bude LED svietiť stále, je proces prepojenia
hotový.
Pokiaľ nebude všetko správne pracovať, proces
opakujte.
1
1.2
DE
Altitude Hold Adjustment
Altitude Hold Adjustment ist eine Funktion, die es dem Modell ermöglicht, mittels eines Barometers
(bzw. Höhenmeters) die vorgegebene Flughöhe anhand des gemessenen Luftdruckes zu halten.
Das Barometer misst anhand des sich verändernden Luftdruckes die Höhenunterschiede des Mo-
dells und gleicht diese selbstständig aus.
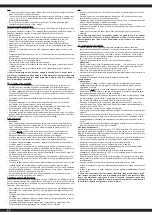
1. Starten des Modells.
•
Möglichkeiten das Modell zu starten:
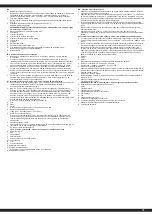
Möglichkeit 1: Bringen Sie die beiden Steuerknüppel um 45° nach unten/außen (1), die
Rotoren beginnen sich zu drehen.
Möglichkeit 2: Bringen Sie die beiden Steuerknüppel um 45° nach unten/innen zur Mitte
(1.2), die Rotoren beginnen sich zu drehen.
Möglichkeit 3: Drücken Sie die linke obere Taste an der Fernsteuerung (1. 3), die Rotoren
des Modells beginnen zu rotieren.
Drücken Sie den Gashebel langsam nach oben und das Modell wird abheben.
2.
Landen des Modells
•
Möglichkeiten das Modell zu landen:
Möglichkeit 1: Ziehen Sie den Gashebel zurück (2), das Modell sinkt und wird landen. Die
Rotoren kommen zum Stillstand.
Möglichkeit 2: Lande/Startassistent:
Wenn Sie die Taste (1.3) im Flug kurz drücken reduziert das Modell im Flug
automatisch so weit die Höhe bis es aufsetzt und zum Stillstand kommt.
Während dessen muss das Modell weiterhin gesteuert werden. Der Assistent
übernimmt nur die Höhenkontrolle.
•
Notfallabschaltung:
Sollte sich eine Situation ergeben in der das Modell schnellstmöglich abgeschaltet
werden muss, können Sie dies indem Sie 3 Sekunden die linke obere Taste am Modell
(2.2) drücken. Die Rotoren werden sofort gestoppt, das Modell stürzt ab. Um das
Modell wieder starten zu können, müssen Sie das Modell und den Sender neu starten.
GB
Altitude Hold Adjustment
Altitude Hold Adjustment is a function that allows the model to maintain the predetermined altitude
based on the measured air pressure by a barometer (or altimeter). The barometer measures on the
basis of changes in air pressure, the height differences of the model and compensates automatically
and unnoticeable.
1. Start operating method of the aircraft.
•
Start the aircraft:
Way 1: Move the two control sticks 45 ° downwards outwards (1), the rotors begin to rotate.
Way 2: Bring the two control sticks downwards by 45 ° to the centre (1.2), the rotors begin to
rotate.
Way 3: Press the left upper button (1.3) on the transmitter to start the motor.
Push upward the throttle lever, the aircraft will take off.
2. Stop operating method of the aircraft.
•
Stop the aircraft:
Way 1: Press down the left throttle stick (2) and the aircraft will landing pack to earth. The
rotors come to a stop.
Way 2: Land/ Start Assistant
If you press the button (1.3) when the model flying, automatically reduced the modell
altitude during flight until it touches down and will then come to a standstill. You will
have to continue stearing the model. The assistant only takes control of the height.
•
Emergency Stop:
In the case that it is fallen off by accident or meeting the danger during the course of
flying, please press the left upper button for 3 seconds to start the emergeny stop (2.2)
shown. The rotors are stopped immediately, the model crashes. To restart the model,
you must restart the model and transmitter.
1
2
1.2
1.3
2.2
3 sec.
Summary of Contents for Angle 120 Altitude 2,4 GHz
Page 31: ...31...


