


25
07610-003-61-42-U
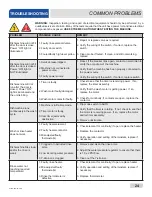
COMMON PROBLEMS
TROUBLESHOOTING
PROBLEM
POSSIBLE CAUSE
REMEDY
Machine doesn’t
drain when power
button is pressed.
1. Drain clogged.
2. Standpipe not removed before
draining.
3. Defective drain valve.
1. Remove obstruction.
2. Remove standpipe and run drain cycle again.
3. Replace.
No indication of
pressure.
1. Water turned off.
2. Transducer disconnected.
3. Pressure transducer defective.
1. Turn water on.
2. Verify wiring.
3. Replace pressure transducer.
Wash water is not
reaching required
temperature.
1. Faulty wash heater.
2. Misadjusted/faulty thermostat(s).
3. Wash thermometer is defective.
1. Check element for continuity; if open, replace the heater.
2. Verify operation and setting of thermostats, replace if
necessary.
3. Replace thermometer.
Doors will not close
completely.
1. Improper spring tension.
2. Obstruction in door channel.
3. Doors are not square with frame.
1. Adjust spring tension as required by loosening (not
removing) spring bolt nuts and adjusting the tension.
Tighten nuts back when done.
2. Remove the obstruction.
3. Adjust the frame to accommodate the doors.
Water leaks at the
wash pump.
1. Wash pump seal defective.
2. Petcock or pump drain (if
equipped) not shut/tight.
3. Loose hoses (hose clamps) on
the wash pump.
1. Replace the seal.
2. Close or tighten.
Tighten the hose clamps.
Will not rinse during
autocycle.
1. Defective rinse solenoid.
2. Faulty timer.
3. No water to the machine.
1. Repair or replace the rinse solenoid as required.
2. Replace timer.
3. Verify that there is water at 10 ± 2 PSI connected to the
machine.
Dishes are not
coming clean.
1. Machine temperatures are not up
to the minimum requirements.
2. No detergent/too much
detergent.
3. Solid dispenser canister is empty.
1. Verify that incoming water, rinse water, and wash
water match the required temperatures as listed on the
machine data plate.
2. Adjust detergent concentration as required for the
amount of water held by the machine.
3. Replace the canister.
WARNING:
Inspection, testing, and repair of electrical equipment should only be performed by a
qualified service technician. Many of the tests require that the unit have power to it and live electrical
components be exposed.
USE EXTREME CAUTION WHEN TESTING THE MACHINE.
!
WARNING
Summary of Contents for TEMPSTAR LT
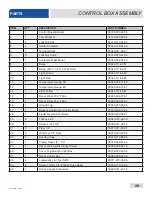
Page 35: ...07610 003 61 42 U 28 26 1 29 28 30 33 34 36 CONTROL BOX ASSEMBLY PARTS ...
Page 67: ...07610 003 61 42 U 60 PARTS VENTLESS SYSTEM ASSEMBLY ...
Page 75: ...07610 003 61 42 U 68 SCHEMATICS 208 230 V 50 60 HZ 1 PHASE ...
Page 76: ...69 07610 003 61 42 U SCHEMATICS 460 V 50 60 HZ 3 PHASE ...
Page 77: ...07610 003 61 42 U 70 SCHEMATICS LT NB 208 230 V 50 60 HZ 1 PHASE ...
Page 78: ...71 07610 003 61 42 U SCHEMATICS LT NB 460 V 50 60 HZ 3 PHASE ...
Page 79: ...07610 003 61 42 U 72 SCHEMATICS STEAM 208 230 V 50 60 HZ 1 3 PHASE ...
Page 80: ...73 07610 003 61 42 U SCHEMATICS SDI OPTIONS ...
Page 81: ...07610 003 61 42 U 74 SCHEMATICS DRAIN QUENCH OPTION ...