GAPS
-
User Guide
4.4.1.2
Configuring the Position Input
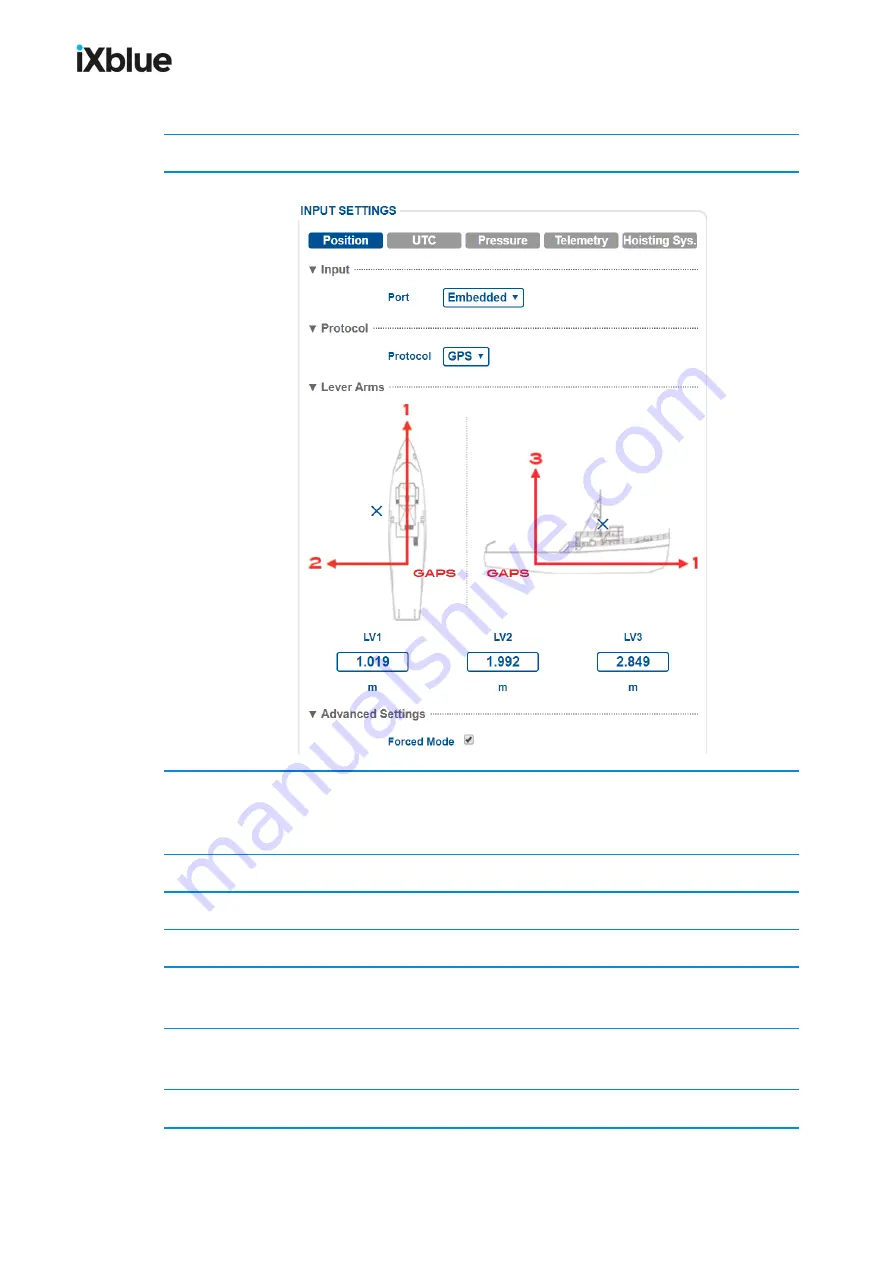
1.
Click on the
INSTALLATION > INPUTS
.
2.
Click on
Position
to display the parameters.
3.
In
Input
, select the
Port
between
Serial A, B, C, D
or
Ethernet A, B, C, D
or select
Embedded
if you use the iXblue GPS.
We recommend to set the same port for Position and UTC.
4.
In
Protocol
, select the protocol in the corresponding scrolling list.
5.
For a
Serial
link, enter the
Parity
,
Stopbits
,
Standard
and
Baudrate
.
6.
For a
Ethernet
link, select the
Transport Layer
,
IP address
and
Port
.
7.
Lever Arms
, enter
LV1
,
LV2
,
LV3
separating GPS from the CRP. Make sure the GPS lever
arms have not been input in a third party navigation software. See note below.
8.
You may set the GAPS in
Forced Mode
by selecting the corresponding check box. All
GPS positions are input in the INS
9.
Click on
OK
to validate your input configuration and send this data to the GAPS.
MU-GAPS-AN-005-H - November 2019
65
Summary of Contents for GAPS
Page 1: ...GAPS Positioning System User Guide...
Page 2: ......
Page 22: ...GAPS User Guide Figure 7 HiSys hoisting system 22 MU GAPS AN 005 H November 2019...
Page 112: ...GAPS User Guide Figure 52 Mobile properties window 112 MU GAPS AN 005 H November 2019...
Page 228: ...PAGE INTENTIONALLY LEFT BLANK 228 MU GAPS AN 005 H November 2019 GAPS User Guide...
Page 229: ...GAPS User Guide L GAPS Antenna Mechanical Drawing MU GAPS AN 005 H November 2019 229...
Page 231: ...GAPS User Guide N GAPS BOX Mechanical Drawing MU GAPS AN 005 H November 2019 231...
Page 232: ...GAPS User Guide O Rackable GAPS BOX Mechanical Drawing 232 MU GAPS AN 005 H November 2019...


