i-ALERT2 Application Guide
56 of 64
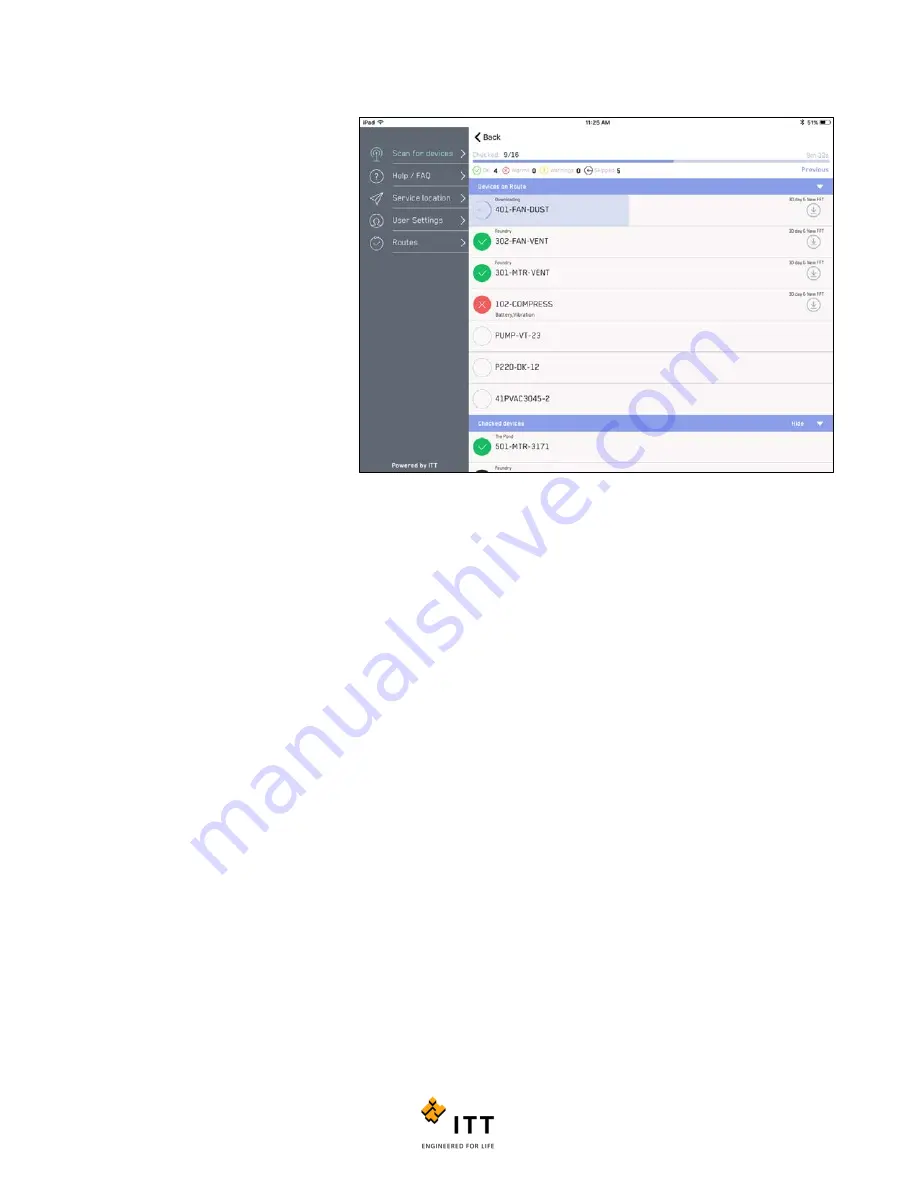
The icons to the left of each device display
the current status. Green indicates “no
alarms or warnings”, whereas red indicates
“in alarm state”. Below the device tag
name you will find a description of the
alarm state. Above the tag name you will
find an assignable location for that device.
When the icons are empty, the devices are
not yet in range or unavailable.
On the right side of each device there is a
description of download actions required;
these actions will vary based on the route
type selected and the current status of the
device. When a download action is
required, tap each device icon one at a
time and wait for the download actions to
complete as indicated by the download
status bar.
If a device is to be skipped, swipe left and
select “Skip”. The device will then move
down to the checked device list and display a black icon.
It is possible to resort the device list by tapping the triangle on the right of the title bar. To hide checked device, toggle
“Hide” and “Unhide” on the title bar.
After all the devices are checked, a report will automatically generate and email to the addresses specified in settings.
The first page of the report is shown below. Here you will find an overall summary of the health of each machine, as well as
tabular data showing overall RMS vibration for each axis and current temperature. The equipment type can be edited from
the Equipment Details. In the tabular data columns any values in red font indicate an alarm condition.
Figure 55: Active Route Screen
Summary of Contents for i-ALERT2
Page 1: ...Application Guide...
Page 2: ...i ALERT2 Application Guide 2 of 64...
Page 32: ...i ALERT2 Application Guide 32 of 64 Figure 27 Devices in range and out of range...
Page 58: ...i ALERT2 Application Guide 58 of 64 Figure 57 Route Report Trend Details Screen...
Page 63: ...i ALERT2 Application Guide 63 of 64...
Page 64: ...i ALERT2 Application Guide 64 of 64 G iALERT2AppGuide en US 2016 10...


