SXG
50
9. FAN BELT
WARNING:
• Before checking the fan belt, stop the engine
and remove the key from the starter switch.
• Wait until the engine and accessories cool
down completely to prevent burns.
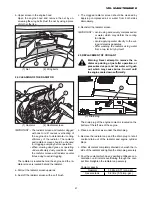
The fan belt is accessible from the right rear of the en-
gine room by opening the engine hood. Check the belt
for tension and damage.
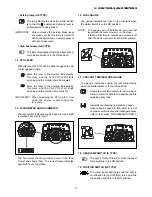
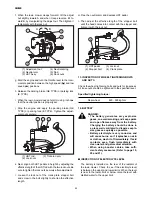
Push down the belt with a finger at the intermediate
point between the alternator and crankshaft pulley
with a force of 10 kgf (22 lb) and see its deflection.
If it deflects by about 13.8 mm (0.54 in.) ~ 14.8 mm
(0.58 in.), the tension is proper.
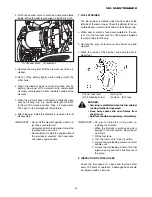
(1) Fan belt
(4) Lock bolt
(2) Crankshaft pulley
(5) Adjustment bolt
(3)
Alternator
When the belt deflection is improper, correct in the fol-
lowing procedure:
a. Loosen the lock bolt and the adjustment bolt of the al-
ternator.
b. Pull the alternator outward to apply more tension to
the belt. Tighten the lock bolt and the adjustment bolt
temporarily while pulling the alternator.
c. Check for the belt deflection to see if the tension is
proper. If so, tighten the lock bolt and adjustment bolt
securely.
IMPORTANT: When the belt is found to be defective,
ask your dealer for replacing it.
10. FRONT PTO
After a long period of operation, the front PTO belt
could be expanded and the tension of the belt could
be deteriorated. It is necessary to adjust the belt. Be
sure to inspect the tension of the belt before opera-
tion and correct the tension if required. Operation with
loose belt will result not only in lower efficiency but
also damage to the belt.
WARNING: Inspection of the front PTO
should be done while the engine is cold.
Otherwise it may cause burns.
a. Open the engine hood.
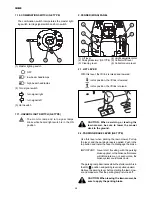
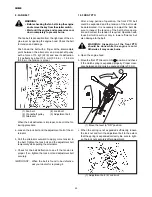
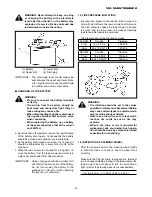
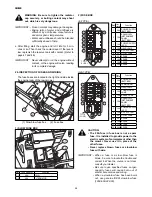
b. Move the front PTO lever to ON ( ) position, and check
if the clutch spring is expanded properly. Proper clear-
ance between spring coils in expanded state is 0.3 mm.
(1) Move the lever to “ON” position.
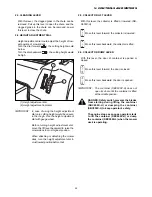
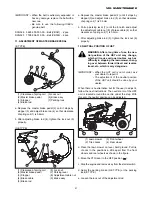
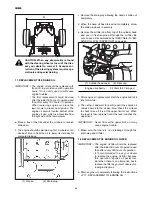
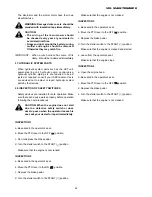
c. When the spring is not expanded sufficiently, loosen
the lock nut and turn the adjustment bolt to the extent
that the spring is expanded correctly. Be sure to tight-
en the lock nuts securely after adjustment.
(1) Adjustment bolt (2) Lock nut
1
Summary of Contents for SBC550X
Page 71: ...SXG 70 ...
Page 72: ...XI ELECTRIC WIRING 71 XI ELECTRIC WIRING E TYPE ...
Page 73: ...72 SXG GE TYPE ...
Page 103: ...SBC600XH SBC550XL 102 ...

