


47612267 Rev B
EN-7
EN
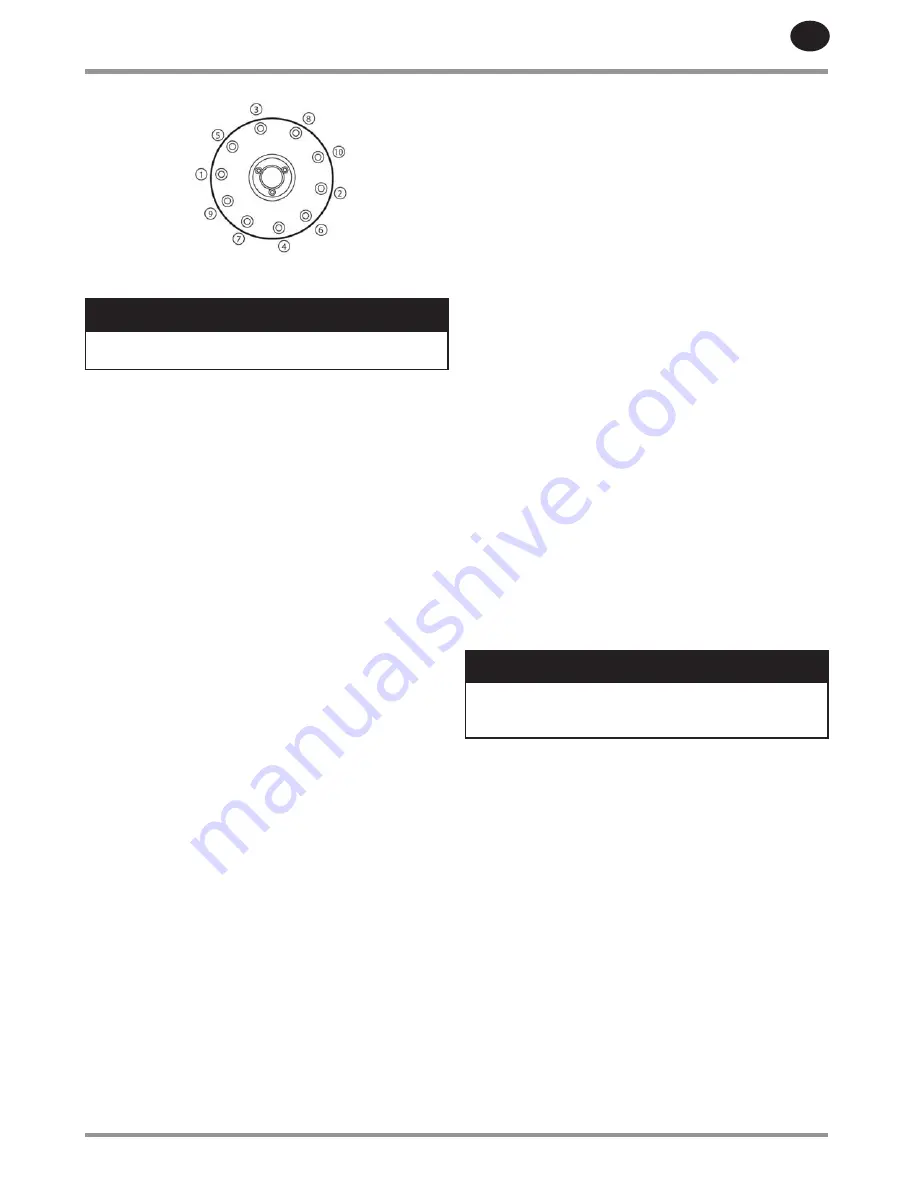
Figure 3: Recommended Bolt Tightening Cross Pattern
9. Start the compressor and check for leaks.
NOTICE
Do not use any form of sealant on either the separator
tank or the separator tank cover faces.
INSPECTING SEPARATOR TANK / PRESSURE SYSTEM
Inspect the external surfaces of the airend and separator
tank, including all fittings, for visible signs of impact damage,
excessive corrosion and abrasions. When changing the
separator element, inspect the internal components and
surfaces. Any suspect parts shall be replaced before the
compressor is put back into service.
The separator tank should also be tested and inspected in
accordance with any national or local codes that may exist.
CLEANING / CHECKING SCAVENGE SCREEN
The screen/orifice assemblies are similar in appearance to a
straight tubing connector and will be located between 0.25
inch hose and 6mm (0.25 in) O.D. scavenge line tubing.
The main body is made from 19 mm hexagon shaped metal
and the diameter of the orifice and a direction-of-flow arrow
is stamped in flat areas of the hexagon.
A removable screen and orifice will require clearing as
outlined in the maintenance chart.
To remove the screen/orifice:
1. Disconnect the scavenge line tubing from each end.
2. Hold the center section firmly and use a pair of pliers
to gently grasp the exit end of the assembly that seals
against the scavenge line tubing. The exit end is the
end toward which the arrow is pointing.
3. Pull the end out of the center section while using care
to prevent damage to the screen or sealing surfaces.
4. Clean and inspect all parts prior to reinstallation.
5. When the assembly is installed, confirm the
direction of flow to be correct. Observe the small
arrow stamped in the center section and ensure the
direction flow to be from the separator tank to the
airend.
CHECKING MINIMUM PRESSURE CHECK VALVE
(MPCV)
The minimum pressure check valve (MPCV) shall be
frequently tested and regularly maintained. Remove it
from the compressor for testing. If operating conditions are
particularly severe, the frequency of testing and maintenance
shall be increased accordingly. The user shall establish the
frequency of such tests as it is influenced by such factors as
the severity of the operating environment including, but not
limited to, cycles.
The minimum pressure check valve (MPCV) should be
tested and re-calibrated in accordance with any national or
local codes that may exist. If no code exists,
Ingersoll Rand
recommends that the valve is recalibrated at intervals of one
year by a licensed contractor or qualified service personnel.
CHANGING AIR FILTER
1. Check the retaining cap for dirt and debris and wipe
clean.
2. Unclip the retaining cap and withdraw the old
element.
3. Fit the new element and refit the retaining cap.
REGREASING MOTOR
The blower motor contains pre-greased, sealed bearings.
They cannot be re-greased and do not require re-greasing.
Motor bearings
- Clean the area around the inlet and outlet
plugs before removing the plugs. Add the specified quantity
of recommended grease using a hand lever gun. Replace the
inlet plug, run the machine for 10 minutes and then replace
the outlet plug
NOTICE
Read the motor data plate(s). For motors that require
greasing, grease them more frequently in harsh
environments or higher ambient conditions.
CLEANING AIR COOLED COOLING SYSTEM
Air compressor operating temperatures will be higher than
normal if the external passages between the fins of the
cooler cores become restricted with foreign material. Regular
cleaning of the cooler surfaces will support the reliable
operation of the air compressor system, improve the life of
the compressor coolant and improve overall compressor
efficiency. When performed frequently as determined by
site conditions and airborne contamination, more significant
cleaning or replacement may not be necessary.
1. Stop the compressor.
2. Isolate the compressor from the system.
3. Press the emergency stop. Fixed speed compressors
can take more than two minutes to fully de-pressurize
once stopped.
4. Ensure that the main power disconnect switch is
locked off and tagged.
RELEASED 11/Feb/2019 01:43:20 GMT


