


49
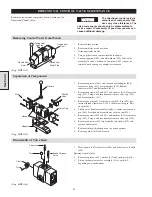
Intermediate Carrier Disassembly
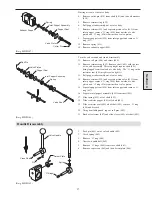
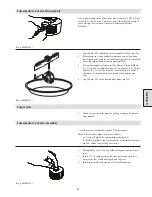
rior to disassembly check planet gear side clearance, 0.005 to 0.032
inches (0.13 to 0.81 mm). Spin gears, gears should rotate freely. If
gears are tight or clearance is incorrect, disassemble planet
assembly.
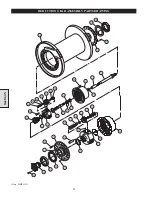
(Dwg. MHP1169)
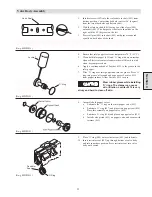
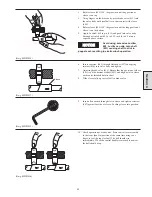
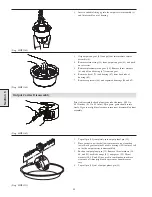
1.
Tap roll pin (50) completely into intermediate planet pin (46).
2.
Place carrier in a wide shallow container or on a clean shop
towel. Each gear contains 36 needle bearings (48) that may fall
out as the intermediate carrier is disassembled.
3.
Tap out intermediate planet pin (46). Remove thrust washers
(52, 55, and 64), needle bearings (48), and spacer (49). Thrust
washers (52, 55, and 64) are used in combination to achieve
clearance, all three might not be present or quantities may
vary.
4.
Tap roll pin (50) out of intermediate planet pin (46).
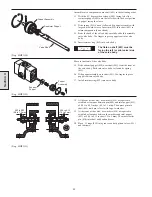
(Dwg. MHP1187)
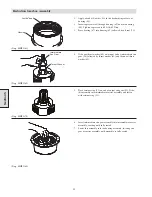
Inspection
1.
Check all gear teeth for signs of galling, chipping, or uneven
wear pattern.
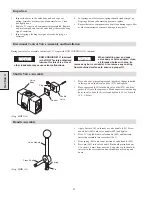
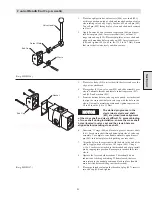
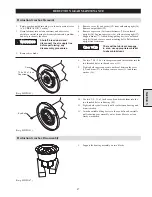
Intermediate Carrier Assembly
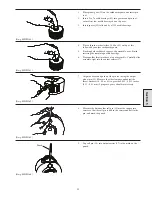
Cut two pieces of cardboard 3 inches (76 mm) square.
Make a intermediate planet pin tool as follows:
a. Cut an old pin to the same width as the gear, or
b. Make a pin that is the same diameter as intermediate planet
pin (46) and as long as the gear is wide.
1.
Place planet gear (51) on the cardboard square and insert pin
tool.
2.
Insert 5 to 7 needle bearings (48) into gear around pin tool,
ensure first few needle bearings do not tip over.
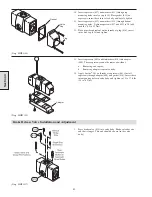
3.
Insert spacer (49) followed by all 18 needle bearings.
(Dwg. MHP1164)
Section 5
Summary of Contents for FA5A
Page 10: ...10 DISC BRAKE PARTS DRAWING Dwg MHP0667 Dwg MHP0630 One Way Clutch Detail Section 1...
Page 19: ...19 Section 2 SERVICE NOTES...
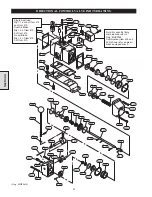
Page 54: ...54 REDUCTION GEAR ASSEMBLY PARTS DRAWING Dwg MHP1221 Section 5...
Page 57: ...57 SERVICE NOTES...
Page 58: ...58 SERVICE NOTES...
Page 59: ...59 SERVICE NOTES...


