


27
Inspection
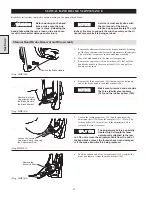
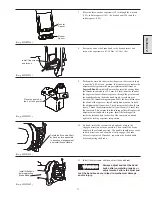
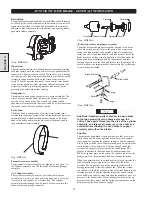
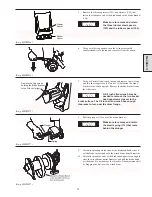
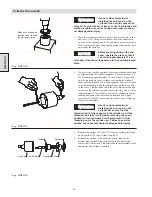
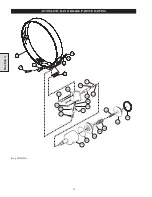
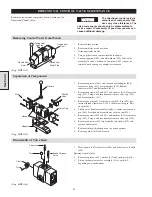
1.
Examine the ‘O’ rings (109, 110, and 122) on the piston
and cylinder rod for signs of cracking or wear. If any of the
‘O’ rings are cracked or worn, replace them.
2.
Make sure the cylinder rod (108) moves easily and
smoothly inside the cylinder (121), and make sure the
plunger (114) moves easily and smoothly inside the brake
bracket (106). If the cylinder rod or the plunger sticks or
hesitates, clean and polish (or replace) as necessary.
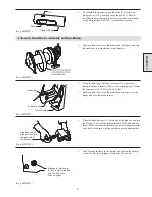
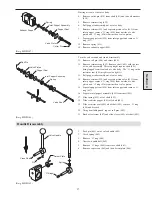
3.
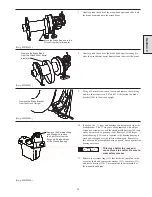
Inspect the roller (116) for wear on the inner and outer
surfaces, and the cylinder rod (108) for wear on the cam-
shaped end. Replace both if any wear is found.
4.
Check the pin (115) for wear. Replace the pin and the roller
(116) as needed.
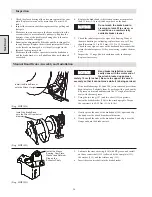
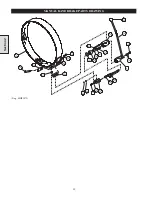
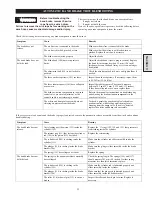
5.
Examine the springs (124 and 127). They should measure
at least 203 mm (8.0 inches) long. Replace them if they
have collapsed or become bent.
6.
Ensure that the spring (113) has not collapsed or become bent.
It should measure at least 203 mm (8.0 inches) long. Replace it
if it has collapsed or become bent.
7.
Check the tubular spacers for signs of collapsing. If any of
them are buckling or collapsing, replace them as a set. They
should measure 28.3 to 28.8 mm (1.115 to 1.135 inches)
8.
Look for any signs of wear on the washers that retain the
tubular spacers. If they are wearing, replace them as a set.
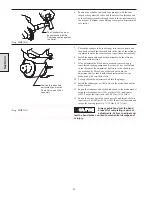
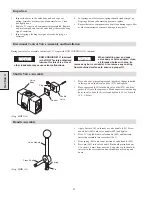
9.
Inspect the brake band lining for wear. It should be worn
evenly, without high or low spots anywhere around the brake
band. Replace the brake band if the friction surface measures
less than 1.5 mm (1/16 inch) thick anywhere on the band.
NOTICE
Do not wash the brake band in
cleaning solvent. Wipe clean if
needed. Use a commercially
available brake cleaner.
Section 3
Summary of Contents for FA5A
Page 10: ...10 DISC BRAKE PARTS DRAWING Dwg MHP0667 Dwg MHP0630 One Way Clutch Detail Section 1...
Page 19: ...19 Section 2 SERVICE NOTES...
Page 54: ...54 REDUCTION GEAR ASSEMBLY PARTS DRAWING Dwg MHP1221 Section 5...
Page 57: ...57 SERVICE NOTES...
Page 58: ...58 SERVICE NOTES...
Page 59: ...59 SERVICE NOTES...


