20
alarm, then the indicator will turn off, and press
Ǐ
ENT
ǐ
key to clear
the alarm in that channel.
(2)
Clear all alarms
In the alarm management menu, move the cursor to "Clear All"
button, and press
Ǐ
ENT
ǐ
key to clear all alarms.
4.7 Recording
4.7.1 Manual Recording
Note:
User must have the recording authority.
Make sure hard disks are installed before recording.
1.
Enter manual recording
From the main menu "Record" or
Ǐ
REC
ǐ
key in front panel enter
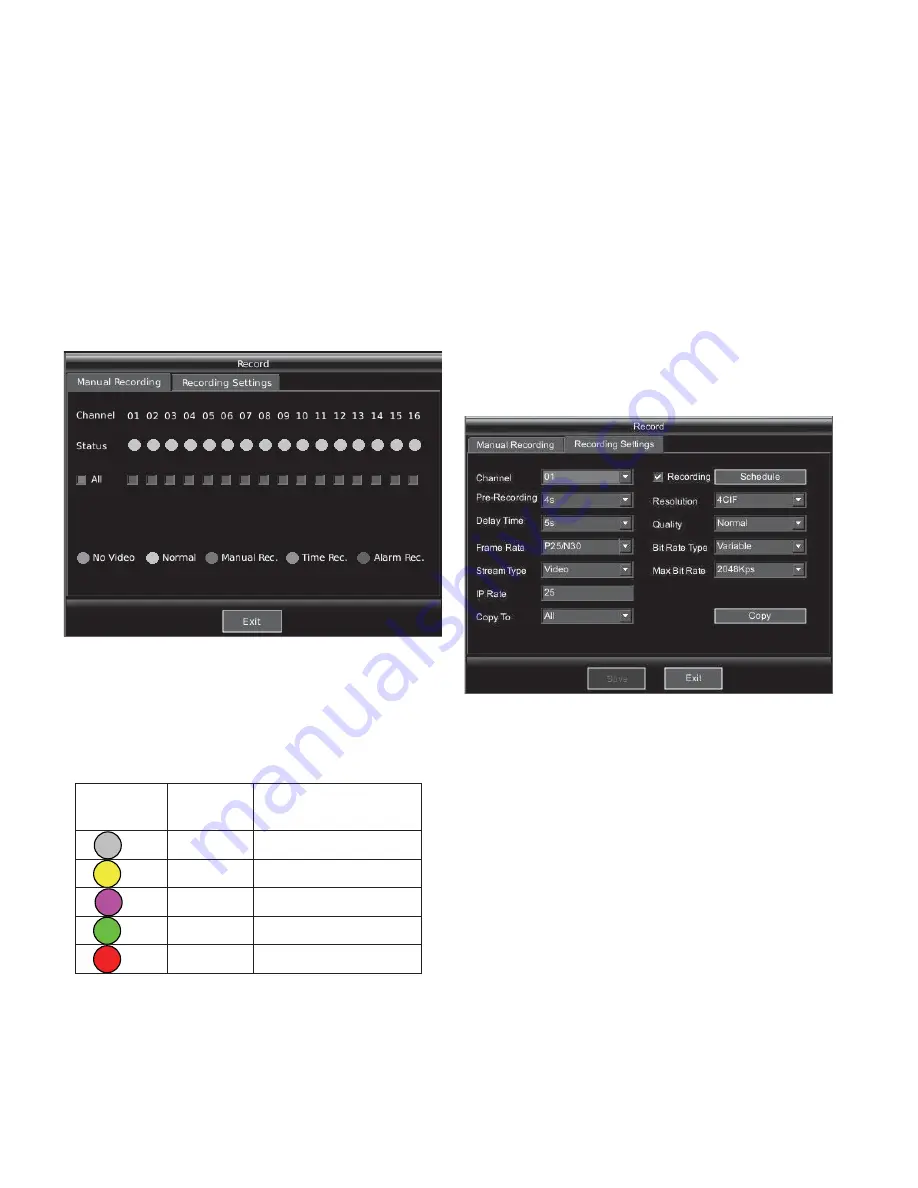
the "Manual recording" interface, as shown in Figure 4-12.
Figure 4-12
(1)
Status list
The status shows the recording status of all 16 channels.
The different icon of each channel indicates the status, as follows
Table 2 Icon introduction for recording status indicators
Indicator
Icon
Color Status
Gray
No
video
Yellow Normal
Reserved Manual
recording
Green Scheduled
recording
Red
Alarm
recording
(2)
Start/Stop manual recording
1. Start/Stop manual recording in single channel
Select the channel number (the small check box under the
indicators), and press
Ǐ
ENT
ǐ
key to start/stop the manual
recording.
2. Start/Stop manual recording in all channels
Move the cursor to "Select All" button, and press
Ǐ
ENT
ǐ
key to
select all channels and start the manual recording. Press
Ǐ
ENT
ǐ
key
to cancel the selection to stop the manual recording.
Note
:
1.
For manual recording, it must stop manually, or the DVR will
keep on recording. Since the priority of alarm recording is
higher, the manual recording will stop when the channel is in
the alarm recording status. The manual recording resumes
after finishing the alarm recording.
2.
It's not necessary to restart the manual recording if reboot the
DVR.
4.7.2 Scheduled Recording
From the main menu "Record" or
Ǐ
REC
ǐ
key in front panel enter
the "Recording management" interface, and press
Ǐ
WIDE
ǐ
key to
switch to "Recording Settings" option, as shown in Figure 4-13.
Figure 4-13
1. Select recording channel
Move the cursor to "Channel", press
Ǐ
ENT
ǐ
key to drop down the
channel list and select the desired channel, and press
Ǐ
ENT
ǐ
key.
2. Set pre-recording and post-recording
Move the cursor to set the pre-recording (default: 4 seconds) and
post-recording time (default: 5 seconds). The DVR will record the
video of 5 seconds before start recording and the video of 5 seconds
after stop recording.
Note
: This function is valid for alarm recording only.
3. Set recording schedule
Move the cursor to "Recording schedule", and press
Ǐ
ENT
ǐ
key to
enter setting interface. Select recording date and time sector, and set
the "Recording Type" to "Time Recording", as shown in Figure
4-14. Refer to "Set schedule" of "video mask alarm" in section 4.5.1
for the recording schedule settings.
Summary of Contents for V3060 Series
Page 6: ......


