background image

4

Deactivating the Automatic
Start Function

The CD-113DPR is provided with an automatic
start function: After switching on the unit and
reading in a sound carrier (CD, USB flash drive
or SD card) the replay of the first title will start
automatically. If you do not wish the unit to start
automatically [replay will not start before the but-
ton PLAY/ PAUSE (11) is pressed], deactivate
the automatic start function.

Always disconnect the mains plug from the
socket before opening the unit!

On the PCB with the power supply unit and the
audio jacks there is a jumper (see arrow in fig. 5).
The automatic start function is activated when
the jumper is in the position AUTO PLAY. To
deactivate the function, re arrange the jumper to
the position MANUAL PLAY.

5

Setting Up and 
Connecting the Player

The player is designed for installation into a rack
(482 mm /19″); however, it can also be placed as
desired as a desktop unit. For rack installation,
1 rack space (RS = 44.45 mm) is required.

Prior to making or changing any connec-

tions, switch off the CD-113DPR and the units to
be connected.

1) Connect the jacks LINE OUTPUT (20) via an

RCA cable to a line input e. g. on a mixer or an
amplifier (L = left channel, R = right channel).

2) For recording on an SD / MMC card or a USB

flash drive connect an audio unit with line out-
put (e. g. radio, tape deck, mixer) to the jacks
AUX INPUT (21).

3) Connect the mains cable provided to the

mains jack (22) first and then to a mains
socket  (230 V~ / 50 Hz).

6

Operation

Switch on the player with the POWER switch (1).
The display (4) will show “Welcome”.

First the player will read the CD. If no CD has

been inserted, the player will read the USB flash
drive. If no USB flash drive has been connected,
the player will read the SD / MMC memory card. If
no memory card has been inserted, the display
will show “NO DISC”.

6.1 Remote control

1) To insert the batteries (2 × 1,5 V, size AAA),

remove the battery compartment cover on
the rear side of the remote control. Insert the
batteries as indicated in the battery compart-
ment. Close the compartment with the cover.

If the remote control is not in use for a

longer period of time, remove the batteries to
prevent any damage due to battery leakage.

2) When you press a button on the remote con-

trol, always direct the remote control towards
the sensor IR (7). There must be no obsta-
cles between the remote control and the sen-
sor.

3) If the range of the remote control decreases,

the batteries are exhausted and must be
replaced.

6.2 Replaying music titles

1) Insert a CD with the lettering facing up into

the slot (5) until it is pulled in automatically
and / or
connect a USB flash drive to the USB port (6)
and / or
insert an SD/MMC memory card into the slot
SD / MMC CARD (2), the notched corner of
the card facing up. To remove the card,
slightly press it into the slot so that it is
ejected.

2) Select the sound carrier (CD, USB flash

drive, memory card) with the button FUNC
(17), if required. Also the input AUX INPUT
(21) for MP3 recordings can be selected with
this button (

chapter 6.9). The display

(shortly) shows the sound carriers available:
CD

= CD inserted

USB

= USB flash drive

CARD = memory card
AUX

= input AUX INPUT

3) After reading in the sound carrier, the first title

will start automatically. However, if the auto-
matic start function has been deactivated
(chapter 4), press the button PLAY/ PAUSE
(11) to start the first title. To select other titles
see chapter 6.3.

4) While replaying, the upper line of the display

will show the replay symbol 

on the right.

The lower line will show the number (TR …)
of the current title and the time already played
of the title (min. : sec.). At the far right, MP3 is
shown for titles in MP3 format or ESP for
standard audio CDs when the anti-shock
memory has not been switched off with the
button ESP (25).

5) For MP3 files, the following additional infor-

mation will scroll in the upper line:

File – …
Title – …
Artist – …
Album – …

Note:

The file name will only be displayed after

starting the replay. If an information is not available,
the display will show “NONE” instead of a name.

6) When you press the button DISPLAY (26) on

the remote control, various information for
MP3 files will be displayed in the lower line of
the display:
basic setting

The lower line will show the title number
and the time already played of the title.

first actuation of button

The folder name will be displayed.

second actuation of button

The file name will be displayed.

third actuation of button

The number of folders and the number of
titles will be displayed.

fourth actuation of button

return to basic setting

7) Press the button PLAY/ PAUSE to switch be -

tween replay and pause. In the pause mode,
the pause symbol  will be inserted and the
time indication will flash.

8) To stop the replay, press the button STOP (10).

9) To eject the CD, press the button EJECT

(18). The display will show “EJECT”, the CD
will be ejected and can be removed. If the CD
is not removed from the slot, the CD player
will pull it in again automatically after approx.
10 seconds.

6.3 Title selection

6.3.1 Direct selection of the title number

For direct selection of a title, enter its number
with the numerical keys (3). To start the title,
press the button PLAY/ PAUSE (11). Examples:

Title number

Keys

4

4, PLAY/ PAUSE

27

2, 7, PLAY/ PAUSE

135

1, 3, 5, PLAY/ PAUSE

Note:

The player will arrange MP3 titles as follows:

1. all titles without folder in the root directory
2. all titles in folders in the root directory
3. all titles in subfolders, etc.

The titles and folders will not be arranged in alphabeti-
cal order, but can be easily found with the search func-
tion (

chapters 6.3.3 and 6.3.4).

6.3.2 Skipping titles 

in forward / reverse direction

To skip one title or several titles in forward or
reverse direction, briefly press the button CUE or
REV (9) [repeatedly].

Button CUE: to skip to the next title

Button REV: to return to the beginning of the title
currently playing. Each time the button REV is
pressed again, the unit will go back one title at a
time.

Note:

Only press the buttons REV and CUE briefly,

longer actuation will result in fast forward or reverse.

6.3.3 Alphabetical search for MP3 titles

1) Press the button FIND (13). A magnifying

glass symbol will flash on the left at the bot-
tom of the display. On the right of it, the letter
A will appear and in the upper line of the dis-
play the name of the first file beginning with
the letter A. Press each of the other buttons
within 15 seconds, otherwise the search
function is deactivated. In this case actuate
the button FIND again.

2) Press the button CUE or REV (9) to select the

first letter of the desired file name. The
numerals 0 – 9 are also available. If there are
no file names beginning with certain letters or
numbers, these letters or numbers are
marked “None”.

3) If there are several file names beginning with

the same letter, select the desired letter and
keep the button REV or CUE pressed until
the letter starts flashing next to the magnify-
ing glass symbol. All file names beginning
with the letter will now be available to be
selected one after the other with the button
REV or CUE.

4) When searching, the display will always show

the number of the folder and of the title on the
right at the bottom. When you have found the
desired title, start the replay with the button
PLAY/ PAUSE  (11).

6.3.4 Selection of folders and 

search for folders

With MP3 files in several folders (file directories),
press the buttons FOLDER (14) during the
replay to go to the first title of the next folder (but-
ton 

) and to the first tile of the previous folder

(button ).

To select a specific folder, it is easier to use

the search function:

1) Press the button FIND (13) twice so that the

display shows the magnifying glass symbol in
a flashing way and “Dir” for directory (folder)
on the right of it. Press each of the other but-
tons within 15 seconds, otherwise the search
function is deactivated. In this case press the
button FIND twice.

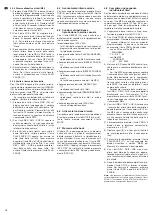
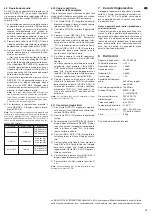
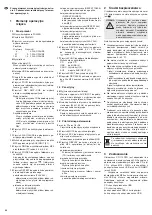
WARNING

To make this modification, the unit
must be opened by skilled person-
nel only. Inexpert handling may
result in electric shock!

Used batteries must not be placed in
the household waste; always take
them to a special waste disposal, e. g.
collection container at your retailer.

9

GB

Summary of Contents for CD-113 DPR

Page 1: ... EMPLOI ISTRUZIONI PER L USO MANUAL DE INSTRUCCIONES INSTRUKCJA OBSŁUGI VEILIGHEIDSVOORSCHRIFTEN SIKKERHEDSOPLYSNINGER SÄKERHETSFÖRESKRIFTER TURVALLISUUDESTA MP3 REKORDER MIT CD SPIELER MP3 RECORDER WITH CD PLAYER ENREGISTREUR MP3 AVEC LECTEUR CD REGISTRATORE MP3 CON LETTORE CD ...

Page 2: ... buena utilización para su nuevo apa rato img Stage Line Por favor lea estas instrucciones de uso atentamente antes de hacer funcionar el aparato De esta manera conocerá todas las funciones de la uni dad se prevendrán errores de operación usted y el apa rato estarán protegidos en contra de todo daño causado por un uso inadecuado Por favor guarde las instruccio nes para una futura utilización La ve...

Page 3: ...UNC SKIP REV CUE STOP PLAY PAUSE FOLDER CD 113DPR CD MP3 PLAYER REC DEL REC LEVEL 2 6 1 7 8 3 9 5 0 4 1 2 3 4 5 6 USE ONLY WITH A 250V FUSE R L LINE OUTPUT AUX INPUT R L 230V 50Hz 20 21 22 23 2 3 1 5 6 4 8 9 7 0 STOP PROG FIND ESP PLAY PAUSE REV SKIP CUE FUNC DISPLAY REPEAT MUTE EJECT FOLDER REC DEL 17 9 25 13 8 10 11 18 24 15 14 3 16 AUTO PLAY MANUAL PLAY 26 ...

Page 4: ... Tape Deck Mischpult 22 Netzbuchse zum Anschluss an eine Steck dose 230 V 50 Hz über das beiliegende Netzkabel 23 Halterung für die Netzsicherung Eine geschmolzene Sicherung nur durch eine gleichen Typs ersetzen 1 3 Fernbedienung 3 und 8 11 und 13 18 Diese Tasten haben die gleichen Funktionen wie die Tasten am Gerät 24 Taste MUTE zum Stummschalten 25 Taste ESP zum Aus und Wiedereinschalten des Ant...

Page 5: ...splay zeigt kurz die Auswahl an CD eingelegte CD USB USB Stick CARD Speicherkarte AUX Eingang AUX INPUT 3 Nach dem Einlesevorgang startet automa tisch die Wiedergabe des ersten Titels Wurde jedoch die Auto Start Funktion aus geschaltet Kap 4 mit der Taste PLAY PAUSE 11 die Wiedergabe des ersten Titels starten Zum Anwählen anderer Titel siehe Kapitel 6 3 4 Während des Abspielens ist in der oberen D...

Page 6: ...ei MP3 Dateien vorhanden nächster Tastendruck REPEAT ALL ständige Wiederholung aller Titel nächster Tastendruck RANDOM REPEAT ständiges Abspielen der Titel in zufälliger Reihenfolge nächster Tastendruck PLAY ALL Zurückschalten auf die Grundeinstellung 6 6 Ton stumm schalten Um während der Wiedergabe eines Titels den Ton stumm zu schalten die Taste MUTE 24 drücken Zum Wiedereinschalten des Tons die...

Page 7: ...halten bis neben dem Lupensym bol File angezeigt wird Dann durch Antip pen der Taste REV oder CUE den zu kopie renden Titel wählen Das Kopieren mit der Taste REC DEL starten 6 Während des Kopiervorgangs wechselt das Display zwischen der Anzeige COPY und und der Anzeige des Quellenspeichers CARD oder USB Ist der Vorgang beendet zeigt das Display kurz COPY OK Die kopier ten Titel befinden sich in de...

Page 8: ...eactivate the anti shock memory not in MP3 mode 23 Button DISPLAY to change the information in the lower line of the display during replay of MP3 files basic setting The lower line will show the title number TR and the time already played of the title first actuation of button The folder name will be displayed second actuation of button The file name will be displayed third actuation of button The...

Page 9: ... the display will show NONE instead of a name 6 When you press the button DISPLAY 26 on the remote control various information for MP3 files will be displayed in the lower line of the display basic setting The lower line will show the title number and the time already played of the title first actuation of button The folder name will be displayed second actuation of button The file name will be di...

Page 10: ...four zeroes will flash as a prompt to enter the title number 4 Select the number of the first title of the title sequence with the buttons REV SKIP CUE 9 or enter it with the numerical keys 3 For MP3 files in folders please note that these files are not arranged consecutively but that the first file in each folder is always number 1 5 To memorize press the button PROG The display will show the nex...

Page 11: ... 9 5 When the folder is found keep the button REV or CUE pressed until File is shown next to the magnifying glass symbol Then select the title to be deleted by shortly press ing the button REV or CUE 6 To delete press the button REC DEL The display shortly shows DELETE 7 To delete further titles repeat the steps 2 to 6 Note The deleting process can be stopped at any time during the operating seque...

Page 12: ...cteur à relier à une prise 230 V 50 Hz via le cordon secteur livré 23 Porte fusible tout fusible fondu doit être rem placé par un fusible de même type 1 3 Télécommande 3 et 8 11 et 13 18 Ces touches ont les mêmes fonctions que celles de lʼappareil 24 Touche MUTE pour couper le son 25 Touche ESP pour désactiver et activer la mémoire anti chocs pas en mode MP3 26 Touche DISPLAY pour commuter les inf...

Page 13: ...e Pour des titres au format MP3 MP3 sʼaffiche tout à droite ou ESP pour CDs audio standards lorsque la mémoire anti chocs nʼa pas été éteinte avec la touche ESP 25 5 Pour des fichiers MP3 sʼaffiche en plus dans la ligne supérieure File nom du fichier Title nom du titre Artist nom de lʼartiste Album nom de lʼalbum Remarques Le nom du fichier ne sʼaffiche quʼaprès le démarrage de la lecture Sʼil man...

Page 14: ... fichiers MP3 sautez cet étape et allez directement au point 4 Pour des fichiers MP3 il faut tout dʼabord sélectionner le numéro du dossier dans lequel se trouve le premier titre souhaité pour la suite Cʼest également nécessaire lorsque tous les titres sont dans le répertoire principal ROOT sans dossier Dans ce cas saisissez 1 comme numéro de dossier Sélectionnez le numéro de dossier avec les touc...

Page 15: ...té La fonction de recherche de dossier est activée 4 Avec les touches REV SKIP CUE 9 sélectionnez le répertoire dans lequel se trouve le titre à effacer 5 Lorsque le répertoire est trouvé maintenez la touche REV ou CUE enfoncée jusquʼà ce que File soit affiché à côté du symbole loupe En appuyant brièvement sur la touche REV ou CUE sélectionnez le titre à effacer 6 Pour effacer appuyez sur la touch...

Page 16: ...on uscita Line p es radio tape deck mixer 22 Presa per il collegamento con una presa di rete 230 V 50 Hz tramite il cavo in dota zione 23 Portafusibile Sostituire un fusibile difettoso solo con uno dello stesso tipo 1 3 Telecomando 3 e 8 11 e 13 18 Questi tasti hanno le stesse funzioni dei tasti sullʼapparecchio 24 Tasto MUTE per la funzione di muto 25 Tasto ESP per attivare e disattivare la memo ...

Page 17: ...erito USB chiavetta USB CARD scheda di memoria AUX ingresso AUX INPUT 3 Dopo il caricamento dei dati si avvia automati camente la riproduzione del primo titolo Se è stata disattivata la funzione auto start Cap 4 avviare la riproduzione del primo titolo con il tasto PLAY PAUSE 11 Per scegliere altri titoli vedi capitolo 6 3 4 Durante la riproduzione nella riga superiore del display si vede a destra...

Page 18: ...è presente solo per i file MP3 ulteriore pressione del tasto REPEAT ALL ripetizione continua di tutti i titoli ulteriore pressione del tasto RANDOM REPEAT riproduzione continua dei titoli in ordine casuale ulteriore pressione del tasto PLAY ALL ritorna allʼimpostazione base 6 6 Attivare la funzione di muto Per rendere muto lʼaudio durante la riproduzione di un titolo premere il tasto MUTE 24 Per r...

Page 19: ...r premuto il tasto REV o CUE finché di fianco al simbolo della lente si vede File Quindi toccando leggermente il tasto REV o CUE scegliere il titolo da copiare Avviare la copiatura con il tasto REC DEL 6 Durante il processo di copiatura il display cambia fra lʼindicazione COPY e lʼindicazione della memoria sorgente CARD o USB Al termine del processo il display visualizza brevemente COPY OK I titol...

Page 20: ...nectar una fuente de señal con salida de línea p ej radio pletina mezclador 22 Toma de corriente para la conexión a un enchufe 230 V 50 Hz mediante el cable de corriente entregado 23 Soporte para el fusible de corriente Cambie siempre un fusible fundido sólo por otro del mismo tipo 1 3 Control remoto 3 y 8 11 y 13 18 Estos botones tienen las mismas funciones que los botones del lector 24 Botón MUT...

Page 21: ...or muestra brevemente los portadores de sonido dis ponibles CD CD insertado USB Unidad USB CARD Tarjeta de memoria AUX Entrada AUX INPUT 3 Después de leer el soporte de sonidos empezará automáticamente la primera pista Sin embargo si se ha desactivado la función de inicio automático apartado 4 pulse el botón PLAY PAUSE 11 para iniciar la pri mera pista Para seleccionar otras pistas vea el apartado...

Page 22: ...ón disponible sólo para archivos MP3 Siguiente actuación del botón REPEAT ALL Todas las pistas se repetirán continuamente Siguiente actuación del botón RANDOM REPEAT Se reproducirán todas las pistas continua mente en orden aleatorio Siguiente actuación del botón PLAY ALL Vuelve al ajuste básico 6 6 Silenciar el sonido Para silenciar el sonido de una pista durante la reproducción pulse el botón MUT...

Page 23: ...símbolo de lupa Pulse brevemente el botón REV o CUE para seleccionar la pista que hay que copiar Empiece la copia con el botón REC DEL 6 Durante la copia el visualizador cambia de la indicación COPY a la indicación de la fuente de memoria CARD o USB Cuando termina el proceso en el visualizador aparece breve mente COPY OK Las pistas copiadas esta rán en la carpeta COPY creada por el apa rato Nota E...

Page 24: ...eciowym 230 V 50 Hz za pomocą dołą czonego kabla zasilającego 23 Pokrywa bezpiecznika Spalony bezpiecznik należy wymieniać na nowy o identycznych parametrach 1 3 Pilot zdalnego sterowania 3 oraz 8 11 oraz 13 18 Przyciski te są identyczne jak na urządzeniu 24 Przycisk MUTE do wyciszania dźwięku 25 Przycisk ESP do włączania wyłączania pa mięci anty wstrząsowej niedostępna przy odtwarzaniu plików MP3...

Page 25: ...D USB pamięć przenośna USB CARD karta pamięci AUX wejście AUX INPUT 3 Po wczytaniu zawartości nośnika rozpocznie się odtwarzanie pierwszego utworu Jeżeli funkcja automatycznego startu została wyłą czona rozdz 4 wcisnąć przycisk PLAY PAUSE 11 aby rozpocząć odtwarzanie pierwszego utworu Aby wybrać inny utwór patrz rozdz 6 3 4 Podczas odtwarzania na wyświetlaczu poja wia się symbol w górnej linii po ...

Page 26: ...ybranego fol deru dostępne tylko przy odtwarzaniu plików MP3 kolejne wciśnięcie przycisku REPEAT ALL ciągłe odtwarzanie wszystkich plików kolejne wciśnięcie przycisku RANDOM REPEAT ciągłe odtwarzanie wszystkich plików w kolej ności losowej kolejne wciśnięcie przycisku PLAY ALL powrót do podstawowego ustawienia 6 6 Wyciszanie W celu wyciszenia dźwięku podczas odtwarza nia należy wcisnąć przycisk MU...

Page 27: ...iedni plik Rozpocząć kopiowanie przyciskiem REC DEL 6 Podczas kopiowania wyświetlacz przełącza się pomiędzy wskazaniem COPY a nazwą nośnika CARD lub USB Jeśli kopiowanie zostanie przerwane wyświetlacz pokaże na krótko komunikat COPY OK Skopiowane utwory znajdują się w folderze COPY Uwaga Kopiowanie może zostać przerwane w każdej chwili za pomocą przycisku STOP 6 11 Kasowanie pojedynczych utworów 1...

Page 28: ...een milieuvriendelijke verwer king uitsluitend als KGA b v de inzamelbox in de detailhandel WAARSCHUWING De netspanning 230 V van het apparaat is levensgevaar lijk Open het apparaat niet want door onzorgvuldige in grepen loopt u het risico van elektrische schokken Læs nedenstående sikkerhedsoplysninger op mærksomt igennem før ibrugtagning af enhe den Bortset fra sikkerhedsoplysningerne henvi ses t...

Page 29: ...stoppa föremål i ventilhålen Risk för elskador före ligger Ole hyvä ja huomioi joka tapauksessa seuraavat turvallisuuteen liittyvät seikat ennen laitteen käyt töä Laitteen toiminnasta saa lisätietoa tarvitta essa tämän laitteen muunkielisistä käyttöohjeista Turvallisuudesta Laite vastaa kaikkia tarvittavia EU direktiivejä ja on varustettu merkinnällä Ole hyvä ja huomioi seuraavat seikat Laitteet s...

Page 30: ... MONACOR INTERNATIONAL GmbH Co KG Zum Falsch 36 28307 Bremen Germany Copyright by MONACOR INTERNATIONAL All rights reserved A 1350 99 01 07 2012 ...

Reviews: