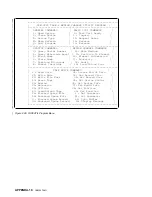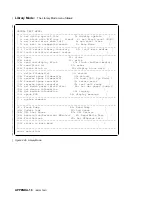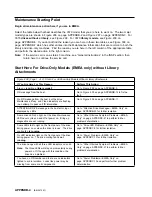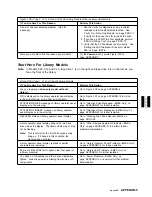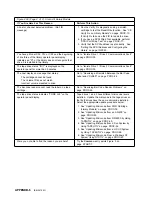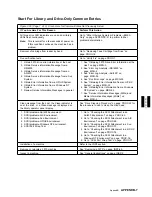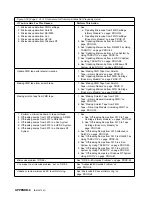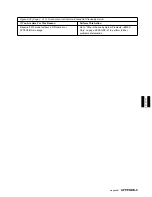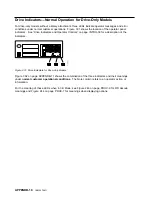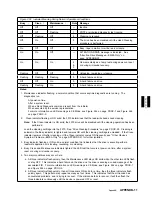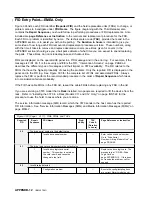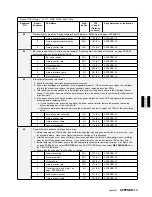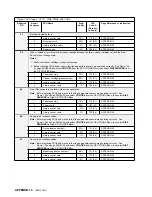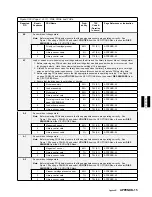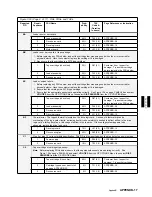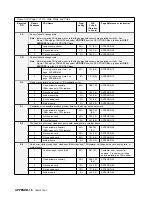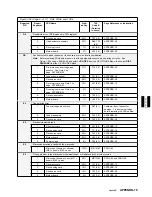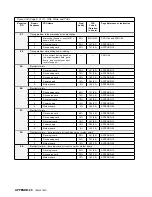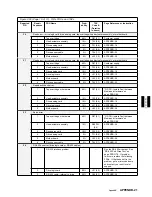
Figure 299 (Page 2 of 2). Start—All Library Models
If You Are Here For This Reason
Perform This Action
A host or channel detected problem. (No FID
message)
1. Run the Verify Fix diagnostics using a scratch
cartridge to test the Read/Write function. See “CE
Verify Fix on Library Models” on page PROC-10.
If Verify Fix fails, use the FID to repair the drive.
2. If you have a SCSI Wrap Tool available, perform
“SCSI Port Wrap Test” on page PROC-77.
3. Verify that the SCSI address is set correctly. See
“Setting the SCSI Address and Configuring the
Library” on page INST-43.
You have a Model C02, C12 or C22 and the beginning
of line three of the library operator panel display
indicates an "N", or the library does not recognize that
drive 2 is installed in the library.
Go to “Isolate Drive 1 / Drive 2 Communications Fault”
on page PROC-35.
The tape drive status "INIT" is displayed on the
operator panel for more than 5 minutes.
Go to “Isolate Drive 1 / Drive 2 Communications Fault”
on page PROC-35.
The host displays a message that states:
The cartridge cannot be found.
The Volume ID does not match.
Incorrect volume mounted in drive.
Go to “Resolving a Mismatch Between the Bar Code
Label and VOLSER” on page PROC-26
The bar code reader cannot read the label on a tape
cartridge.
Go to “Resolving Bar Code Reader Problems” on
page PROC-24.
The tape drive status indicates "CODE LVL" on the
operator panel display.
Tape drives 1 and 2 have different microcode levels
installed. Update the microcode in the tape drives so
that both drives have the same microcode installed.
Select the appropriate update procedure below:
1. See “Updating Microcode from FMR Cartridge
(Library Models)” on page PROC-34.
2. See “Updating Microcode from an AS/400” on
page PROC-49.
3. See “Updating Microcode from RS/6000 by Using
TAPEUTIL” on page PROC-50.
4. See “Updating Microcode from a Sun System by
Using TAPEUTIL” on page PROC-54.
5. See “Updating Microcode from a HP-UX System
by Using TAPEUTIL” on page PROC-56.
6. See “Updating Microcode From a Windows NT
System Using NTUTIL” on page PROC-60.
Were you not able to find the reason you are here?
Try the Common entry points Figure 5 on
page START-7.
APPENDB-6
IBM 3570 MI
Summary of Contents for Magstar MP 3570 C Series
Page 1: ...IBM Magstar MP 3570 Tape Subsystem Maintenance Information C Series Models...
Page 2: ......
Page 12: ...x IBM 3570 MI...
Page 46: ...MAPS 2 IBM 3570 MI...
Page 56: ...Notes MAPS 12 IBM 3570 MI...
Page 62: ...MAPS 18 IBM 3570 MI...
Page 70: ...Notes MAPS 26 IBM 3570 MI...
Page 72: ...MAPS 28 IBM 3570 MI...
Page 84: ...Figure 22 Label Locations for Models Without Libraries INTRO 12 IBM 3570 MI...
Page 87: ...Figure 25 Model C00 Drive INTRO Introduction INTRO 15...
Page 95: ...Figure 29 Model C02 Stand Alone Library Model INTRO Introduction INTRO 23...
Page 96: ...A 2 1 M 0 0 3 5 Figure 30 Model C11 Rack Mounted Library Model INTRO 24 IBM 3570 MI...
Page 97: ...Figure 31 Model C12 Rack Mounted Library Model INTRO Introduction INTRO 25...
Page 98: ...Figure 32 Model C21 Rack Mounted Library Model INTRO 26 IBM 3570 MI...
Page 99: ...Figure 33 Model C22 Rack Mounted Library Model INTRO Introduction INTRO 27...
Page 120: ...INTRO 48 IBM 3570 MI...
Page 136: ...Figure 57 Model C02 Stand Alone Library Model LIBRARY 16 IBM 3570 MI...
Page 137: ...A 2 1 M 0 0 3 5 Figure 58 Model C11 Rack Mounted Library Model LIBRARY Library LIBRARY 17...
Page 138: ...Figure 59 Model C12 Rack Mounted Library Model LIBRARY 18 IBM 3570 MI...
Page 139: ...Figure 60 Model C21 Rack Mounted Library Model LIBRARY Library LIBRARY 19...
Page 144: ...LIBRARY 24 IBM 3570 MI...
Page 192: ...Figure 108 Operator Menus PANEL 12 IBM 3570 MI...
Page 206: ...Figure 128 Part 1 of 3 CE Panel Menu PANEL 26 IBM 3570 MI...
Page 207: ...Figure 128 Part 2 of 3 CE Panel Menu PANEL Operator Panel PANEL 27...
Page 208: ...Figure 128 Part 3 of 3 CE Panel Menu PANEL 28 IBM 3570 MI...
Page 242: ...PANEL 62 IBM 3570 MI...
Page 249: ...Korean Inspection INSP 7...
Page 250: ...Korean INSP 8 IBM 3570 MI...
Page 256: ...Figure 187 Support Slide left side Models C21 and C22 INSP 14 IBM 3570 MI...
Page 260: ...INSP 18 IBM 3570 MI...
Page 270: ...Figure 196 Model C00 Drive Inner Cover Configuration INST 10 IBM 3570 MI...
Page 273: ...Figure 200 Drive Only Model C00 SCSI Connection INST Installation INST 13...
Page 275: ...Figure 202 EIA Rack Template for Models C11 and C12 INST Installation INST 15...
Page 276: ...This Page Left Intentionally Blank INST 16 IBM 3570 MI...
Page 288: ...INST 28 IBM 3570 MI...
Page 289: ...Figure 212 EIA Rack Template for Models C21 and C22 INST Installation INST 29...
Page 290: ...This Page Left Intentionally Blank INST 30 IBM 3570 MI...
Page 297: ...Figure 216 Attaching Cable Arm and Strain Relief Bracket INST Installation INST 37...
Page 312: ...Figure 227 Rear View of Model C02 C12 or C22 INST 52 IBM 3570 MI...
Page 319: ...Figure 237 Cable Routing Model C11 INST Installation INST 59...
Page 321: ...Figure 240 Cable Routing Model C21 INST Installation INST 61...
Page 328: ...INST 68 IBM 3570 MI...
Page 348: ...Figure 252 Removing a Stuck Cartridge From a Drive PROC 20 IBM 3570 MI...
Page 369: ...Figure 260 Blank Error Log Analysis Work Sheet PROC Common Procedures PROC 41...
Page 371: ...Figure 263 Example Error Log Analysis Work Sheet PROC Common Procedures PROC 43...
Page 396: ...6 When the Tape Device Test menu is displayed select Exit test menu 3 PROC 68 IBM 3570 MI...
Page 420: ...PROC 92 IBM 3570 MI...
Page 424: ...Figure 270 Library Model C01 Exploded View CARR 4 IBM 3570 MI...
Page 435: ...Figure 274 Base Drive FRU Breakout CARR Checks Adjustments Removals and Replacements CARR 15...
Page 448: ...Figure 279 Library Front Door Assembly Holding Screws CARR 28 IBM 3570 MI...
Page 456: ...CARR 36 IBM 3570 MI...
Page 504: ...APPENDC 2 IBM 3570 MI...
Page 521: ...APPENDC Appendix C APPENDC 19...
Page 522: ...Notes APPENDC 20 IBM 3570 MI...
Page 532: ...APPENDC 30 IBM 3570 MI...
Page 537: ...Figure 312 Library Model C01 Exploded View APPENDD Appendix D APPENDD 5...
Page 541: ...Figure 315 Basic Drive All Models APPENDD Appendix D APPENDD 9...
Page 546: ...Figure 317 Base Drive FRU Breakout APPENDD 14 IBM 3570 MI...
Page 551: ...Figure 318 Base Drive Head Actuator Assembly Close up APPENDD Appendix D APPENDD 19...
Page 557: ...APPENDD Appendix D APPENDD 25...
Page 563: ...Figure 326 Drive Loader Assembly Exploded View APPENDD Appendix D APPENDD 31...
Page 580: ...Figure 332 Library Front Door Assembly Holding Screws APPENDD 48 IBM 3570 MI...
Page 591: ...Parts Catalog Parts Catalog PARTS 3...
Page 592: ...Assembly 1 Rackmount Library Assembly Model C11 PARTS 4 IBM 3570 MI...
Page 594: ...Assembly 2 Desktop Drive Model C00 PARTS 6 IBM 3570 MI...
Page 596: ...Assembly 3 Desktop Library Assembly Model C01 PARTS 8 IBM 3570 MI...
Page 598: ...Assembly 4 Rackmount Library Assembly Model C12 PARTS 10 IBM 3570 MI...
Page 601: ...Parts Catalog Parts Catalog PARTS 13...
Page 602: ...Assembly 5 Desktop Library Assembly Model C02 PARTS 14 IBM 3570 MI...
Page 605: ...Parts Catalog Parts Catalog PARTS 17...
Page 606: ...Assembly 6 Rackmount Library Assembly Model C21 PARTS 18 IBM 3570 MI...
Page 608: ...Assembly 7 Rackmount Library Assembly Model C22 PARTS 20 IBM 3570 MI...
Page 611: ...Parts Catalog Parts Catalog PARTS 23...
Page 612: ...Assembly 8 Base Drive All Models PARTS 24 IBM 3570 MI...
Page 614: ...PARTS 26 IBM 3570 MI...
Page 629: ...wrap tool SCSI port PROC 77 INDEX Index Index 7...

