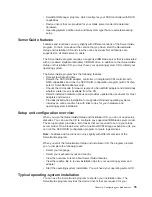
hardware
and
for
the
operating
system
that
you
are
installing.
This
section
describes
a
typical
ServerGuide
operating-system
installation.
Note:
Features
and
functions
can
vary
slightly
with
different
versions
of
the
ServerGuide
program.
1.
After
you
have
completed
the
setup
process,
the
operating-system
installation
program
starts.
(You
will
need
your
operating-system
CD
to
complete
the
installation.)
2.
The
ServerGuide
program
stores
information
about
the
blade
server
model,
service
processor,
hard
disk
drive
controllers,
and
network
adapters.
Then,
the
program
checks
the
CD
for
newer
device
drivers.
This
information
is
stored
and
then
passed
to
the
operating-system
installation
program.
3.
The
ServerGuide
program
presents
operating-system
partition
options
that
are
based
on
your
operating-system
selection
and
the
installed
hard
disk
drives.
4.
The
ServerGuide
program
prompts
you
to
insert
your
operating-system
CD
and
restart
the
server.
At
this
point,
the
installation
program
for
the
operating
system
takes
control
to
complete
the
installation.
The
BladeCenter
CD-ROM
drive
must
be
associated
with
the
blade
server
before
you
perform
this
step.
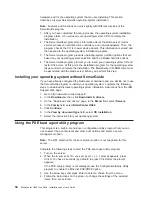
Installing
your
operating
system
without
ServerGuide
If
you
have
already
configured
the
blade
server
hardware
and
you
decide
not
to
use
the
ServerGuide
program
to
install
your
operating
system,
complete
the
following
steps
to
download
the
latest
operating-system
installation
instructions
from
the
IBM
Support
Web
page:
1.
Go
to
http://www.ibm.com/pc/support/.
2.
In
the
Download
section,
click
Downloads
&
drivers.
3.
On
the
“Downloads
and
drivers”
page,
in
the
Brand
field,
select
Servers.
4.
In
the
Family
field,
select
BladeCenter
HS40.
5.
Click
Continue.
6.
In
the
View
by
document
type
field,
select
OS
installation.
7.
Select
the
instructions
for
your
operating
system.
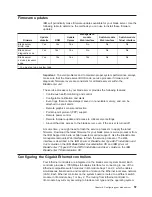
Using
the
PXE
boot
agent
utility
program
This
program
is
a
built-in,
menu-driven
configuration
utility
program
that
you
can
use
to
select
the
boot
protocol
and
other
boot
options
and
select
a
power
management
option.
Note:
The
RPL
selection
for
the
boot
protocol
option
is
not
supported
for
this
server.
Complete
the
following
steps
to
start
the
PXE
boot
agent
utility
program:
1.
Turn
on
the
server.
2.
When
the
Broadcom
NetXtreme
Boot
Agent
vX.X.X
prompt
appears,
press
Ctrl+S.
You
have
2
seconds
(by
default)
to
press
Ctrl+S
after
the
prompt
appears.
If
the
PXE
setup
prompt
is
not
displayed,
use
the
Configuration/Setup
Utility
program
to
enable
the
Ethernet
PXE/DHCP
option.
3.
Use
the
arrow
keys
and
press
Enter
to
select
a
choice
from
the
menu.
4.
Follow
the
instructions
on
the
screen
to
change
the
settings
of
the
selected
items;
then,
press
Enter.
56
BladeCenter
HS40
Type
8839:
Installation
and
User’s
Guide
Summary of Contents for HS40 - BladeCenter - 8839
Page 3: ...BladeCenter HS40 Type 8839 Installation and User s Guide ERserver...
Page 8: ...vi BladeCenter HS40 Type 8839 Installation and User s Guide...
Page 76: ...62 BladeCenter HS40 Type 8839 Installation and User s Guide...
Page 90: ...76 BladeCenter HS40 Type 8839 Installation and User s Guide...
Page 114: ...100 BladeCenter HS40 Type 8839 Installation and User s Guide...
Page 118: ...104 BladeCenter HS40 Type 8839 Installation and User s Guide...
Page 119: ......
Page 120: ...Part Number 90P3102 Printed in USA 1P P N 90P3102...

