12
IBM® xSeries 330: Installation Guide
3.
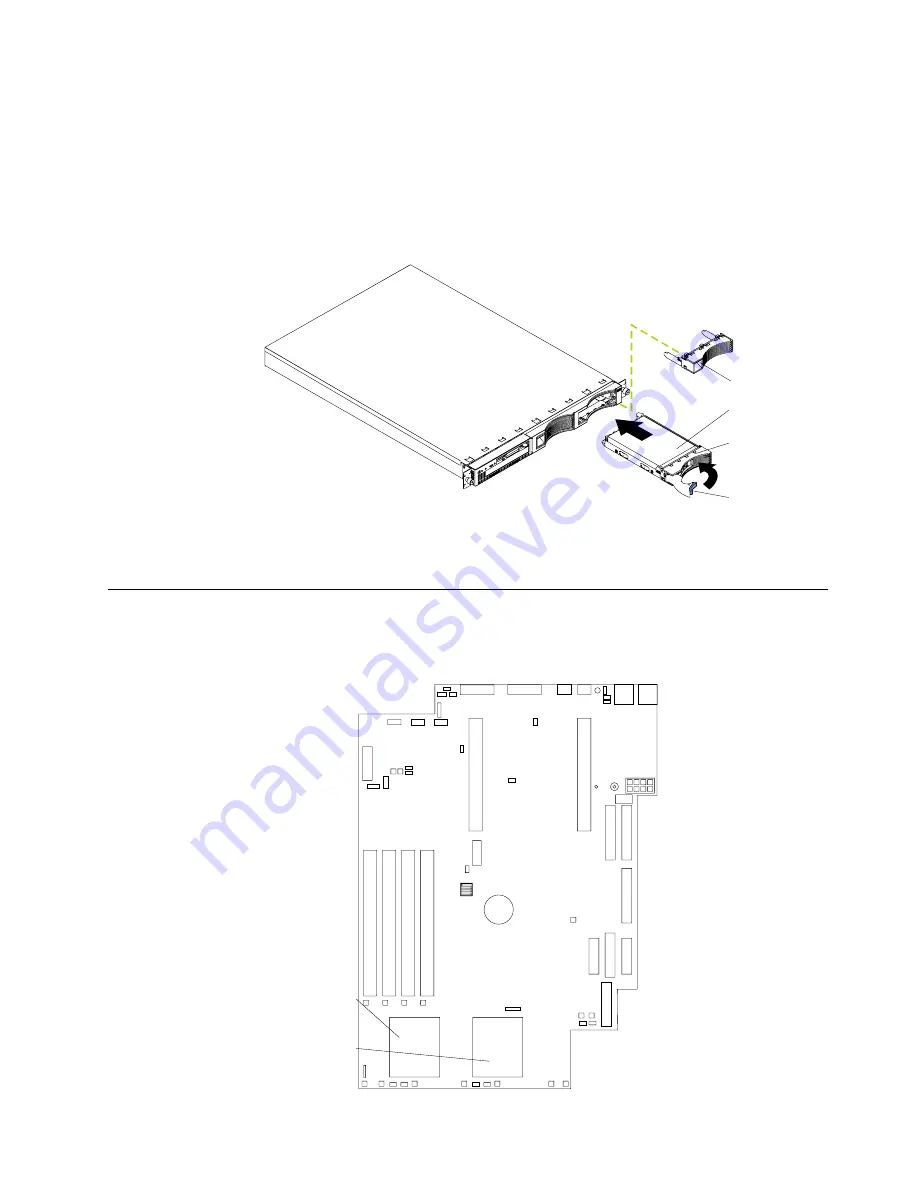
Install the new hard disk drive in the drive bay:
a.
Ensure that the tray handle is open (that is, perpendicular to the drive).
b.
Align the rails on the drive assembly with the guide rails in the drive bay.
c.
Carefully push the drive assembly into the bay until the drive connects to the
backplane.
d.
Push the tray handle toward the closed position until it locks the drive in
place.
4.
Reconnect the external cables and power cords; then, turn on the server.
Working with microprocessors
Your server comes with one or two microprocessors installed. The following
illustration will help you locate the microprocessor on the system board of your server.
Filler panel
Hard disk drive
Drive tray
Drive tray handle
(in open position)
Microprocessor 1
(U47)
Microprocessor 2
(U79)
Summary of Contents for eServer 330 xSeries
Page 3: ...IBM IBM xSeries 330 Installation Guide SC06 P455 80...
Page 12: ...x IBM xSeries 330 Installation Guide...
Page 32: ...20 IBM xSeries 330 Installation Guide...
Page 42: ...30 IBM xSeries 330 Installation Guide...
Page 56: ...44 IBM xSeries 330 Installation Guide...
Page 74: ...62 IBM xSeries 330 Installation Guide...
Page 75: ......
Page 76: ...IBM Part Number 25P2567 Printed in the United States of America 25P2567...


