background image

iB-WRX150NE

150M Extreme Wireless-N Router 


- 45 - 

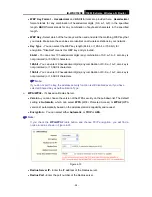
amount of time in minutes and the user will be "leased" this dynamic IP Address. After the 

time is up, the user will be automatically assigned a new dynamic IP address. The range of 

the time is 1 ~ 2880 minutes. The default value is 120 minutes. 


Default Gateway - 

(Optional.) It is suggested to


input the IP address of the LAN port of the 

Router. The default value is 192.168.1.1. 


Default Domain -

 (Optional.) Input the domain name of your network. 


Primary DNS - 

(Optional.) Input the DNS IP address provided by your ISP or consult your 

ISP. 


Secondary DNS - 

(Optional.) Input the IP address of another DNS server if your ISP 

provides two DNS servers. 


Note: 

To use the DHCP server function of the Router, you must configure all computers on the LAN as 
"Obtain an IP Address automatically". 

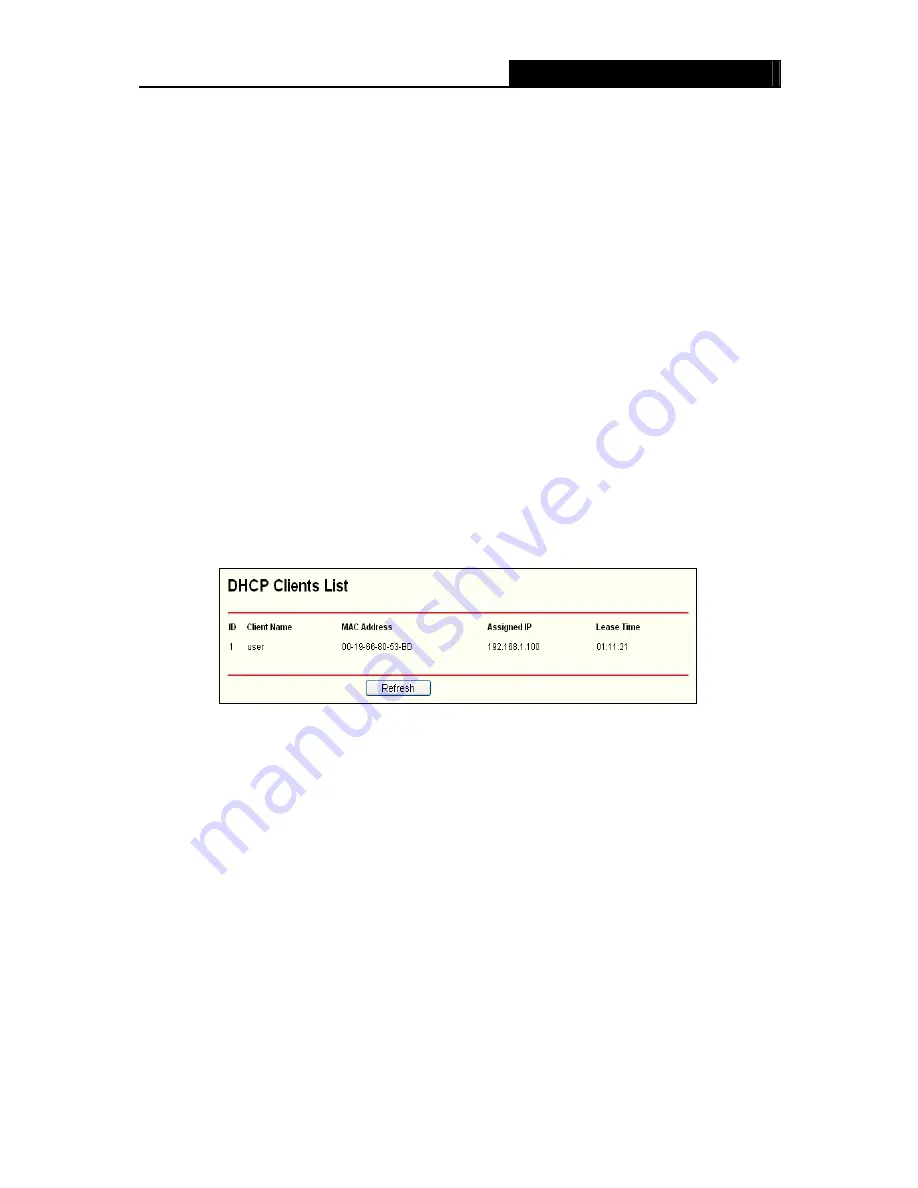
4.8.2  DHCP Clients List 

Choose menu “

DHCP 

 DHCP Clients List

”, you can view the information about the clients 

attached to the Router in the screen as shown in Figure 4-41. 


Figure 4-41 DHCP Clients List 


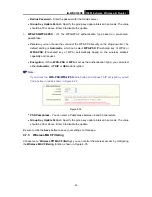
Client Name


The name of the DHCP client   


MAC Address


-

 The MAC address of the DHCP client   


Assigned IP


-

 The IP address that the Router has allocated to the DHCP client 


Lease Time


-

 The time of the DHCP client leased. After the dynamic IP address has expired, 

a new dynamic IP address will be automatically assigned to the user.     

You cannot change any of the values on this page. To update this page and to show the current 

attached devices, click the 

Refresh

 button. 

4.8.3  Address Reservation 

Choose menu “

DHCP 

 Address Reservation

”, you can view and add a reserved address for 

clients via the next screen (shown in Figure 4-42).When you specify a reserved IP address for a 

PC on the LAN, that PC will always receive the same IP address each time when it accesses the 

Summary of Contents for iB-WRX150NE Baton

Page 1: ...150M eXtreme Wireless N Router Model No iB WRX150NE 1910020492 Ver 1 0 0...

Page 2: ...on a circuit different from that to which the receiver is connected Consult the dealer or an experienced radio TV technician for help This device complies with part 15 of the FCC Rules Operation is su...

Page 3: ...II CE Mark Warning This is a class B product In a domestic environment this product may cause radio interference in which case the user may be required to take adequate measures...

Page 4: ...quirements 6 2 3 Connecting the Router 6 Chapter 3 Quick Installation Guide 8 3 1 TCP IP Configuration 8 3 2 Quick Installation Guide 10 Chapter 4 Configuring the Router 15 4 1 Login 15 4 2 Status 15...

Page 5: ...47 4 9 2 Port Triggering 48 4 9 3 DMZ 50 4 9 4 UPnP 51 4 10 Security 52 4 10 1 Basic Security 52 4 10 2 Advanced Security 53 4 10 3 Local Management 54 4 10 4 Remote Management 55 4 11 Parental Contr...

Page 6: ...Settings 74 4 17 2 Diagnostic Tool 75 4 17 3 Firmware Upgrade 76 4 17 4 Factory Defaults 77 4 17 5 Backup Restore 78 4 17 6 Restart 79 4 17 7 Password 79 4 17 8 System log 80 4 17 9 Statistics 81 App...

Page 7: ...eme Wireless N Router iB WRX150NE DC Power Adapter Quick Installation Guide Resource CD for 150M Extreme Wireless N Router including Easy Setup Wizard Other Helpful Information Note Make sure that the...

Page 8: ...oducts Multiple Security Protections With multiple protection measures including SSID broadcast control and wireless LAN 64 128 152 bit WEP encryption WiFi protected Access WPA2 PSK WPA PSK as well as...

Page 9: ...ss Router WISP Mode WISP mode Configure Internet with mobility Broadband Internet PPPoE Static IP Dynamic IP connection type With Multi SSID security feature Supports Firewall security features as Acc...

Page 10: ...is on On The Router is initializing Flashing The Router is working properly System Off The Router has a system error Off The Wireless function is disabled WLAN Flashing The Wireless function is enabl...

Page 11: ...following parts are located on the rear panel View from left to right POWER The Power socket is where you will connect the power adapter Please use the power adapter provided with the iB WRX150NE Rout...

Page 12: ...Humidity 10 90 RH Non condensing 2 3 Connecting the Router Before installing the Router make sure your PC is connected to the Internet through the broadband service successfully If there is any proble...

Page 13: ...7 6 Connect the power adapter to the power socket on the Router and the other end into an electrical outlet The Router will start to work automatically 7 Power on your PC and Cable DSL Modem Figure 2...

Page 14: ...u need instructions as how to configure please refer to Appendix B Configuring the PC 2 Configure the network parameters The IP address is 192 168 1 xxx xxx is any number from 2 to 254 Subnet Mask is...

Page 15: ...ilure result of Ping command Please check the connection following these steps 1 Is the connection between your PC and the Router correct Note The 1 2 3 4 LEDs of LAN ports which you link on the Route...

Page 16: ...92 168 1 1 in the address field of the browser Figure 3 3 Log in the Router After a moment a login window will appear similar to the Figure 3 4 Enter admin for the User Name and Password both in lower...

Page 17: ...6 Figure 3 6 WAN Connection Type The Router supports three popular ways PPPoE Dynamic IP and Static IP to connect to the Internet You can select the connection type your ISP provides and click Next t...

Page 18: ...next screen will appear as shown in Figure 3 8 Figure 3 8 Quick Configuration Static IP IP Address This is the WAN IP address as seen by external users on the Internet including your ISP Enter the IP...

Page 19: ...agency for assistance Channel This field determines which operating frequency will be used The default channel is set to 6 It is not necessary to change the wireless channel unless you notice interfe...

Page 20: ...Change If you chose this option wireless security configuration will not change These settings are only for basic wireless parameters For advanced settings please refer to Section 4 7 Wireless 6 Clic...

Page 21: ...r successful login you will see the fifteen main menus on the left of the Web based utility On the right there are the corresponding explanations and instructions Figure 4 1 the main menu The detailed...

Page 22: ...er 16 Figure 4 2 Router Status 4 3 Quick Configuration Please refer to Section 3 2 Quick Installation Guide 4 4 WPS This section will guide you to add a new wireless device to an existing network quic...

Page 23: ...this button b To add a new device If the wireless adapter supports Wi Fi Protected Setup WPS you can establish a wireless connection between wireless adapter and Router using either Push Button Config...

Page 24: ...can see the welcome screen shown Click Next to continue 1 2 Select Push the button on my access point in the configuration utility of the WPS as shown below in Figure 4 4 and click Next Figure 4 4 WP...

Page 25: ...therwise connection will not be established successfully 2 PBC Method II Step 1 Login the iBall Baton Web based Menu of the Router and click WPS link on the left of the main menu Below displayed figur...

Page 26: ...re 4 8 3 1 Wait for a while until the next screen appears as shown below in Figure 4 9 Click Finish to complete the WPS Configuration Figure 4 9 Note After pressing the Connect button on router menu m...

Page 27: ...e click the icon on the desktop to open the WPS Utility welcome screen as shown below Figure 4 10 will appear Click Next to continue Select the second option Enter a PIN into my access point or a regi...

Page 28: ...own in Figure 4 12 Figure 4 12 Step 4 Message Connect successfully will appear in the WPS Menu Interface as shown in Figure 4 13 Figure 4 13 Step 5 It will display Wireless Configuration Completed in...

Page 29: ...WPS link on the left of the main menu Then Figure 4 15 will appear Write down the Current PIN code available Figure 4 15 Step 2 Click the WPS Utility and select third option Enter the PIN from my acce...

Page 30: ...DSL Cable Modem The wireless port share the same IP to ISP through Ethernet WAN port The Wireless port acts the same as a LAN port while at Wireless Router mode Wireless Client Router In this mode the...

Page 31: ...0 as the subnet mask Note a If you change the IP Address of LAN you must use the new IP Address to log in the Router b If the new LAN IP Address you set is not in the same subnet the IP Address pool...

Page 32: ...ddresses select Use These DNS Servers and enter the primary and secondary addresses into the correct fields Otherwise the DNS servers will be assigned dynamically from your ISP Note If you find error...

Page 33: ...255 255 0 Default Gateway Optional Enter the gateway IP address in dotted decimal notation provided by your ISP MTU Size The normal MTU Maximum Transmission Unit value for most Ethernet networks is 15...

Page 34: ...onnection is disabled by default so there is PPPoE connection only This is recommended Dynamic IP You can check this radio button to use Dynamic IP as the secondary connection to connect to the local...

Page 35: ...ctivity period and re established when you attempt to access the Internet again Click the Connect button to connect immediately Click the Disconnect button to disconnect immediately Caution Sometimes...

Page 36: ...dary DNS If your ISP does not automatically assign DNS addresses to the Router during login please click Use the following DNS servers check box and enter the IP address in dotted decimal notation of...

Page 37: ...omatically after the Router is disconnected To use this option check the radio button Connect Manually You can configure the Router to make it connect or disconnect manually After a specified period o...

Page 38: ...ck the Disconnect button to disconnect immediately Connect on Demand You can configure the Router to disconnect from your Internet connection after a specified period of inactivity Max Idle Time If yo...

Page 39: ...how to choose the appropriate connection type click the Detect button to allow the Router to automatically search your Internet connection for servers and protocols The connection type will be reporte...

Page 40: ...ss will fill in the WAN MAC Address field Click Restore Factory MAC to restore the MAC address of WAN port to the factory default value Click the Save button to save your settings Note Only the PC on...

Page 41: ...down list This field specifies the region where the wireless function of the Router can be used It may be illegal to use the wireless function of the Router in a region other than one of those specif...

Page 42: ...02 11g and 802 11n wireless stations can connect to the Router Channel width Select the channel width from the pull down list The default setting is automatic which can adjust the channel width for yo...

Page 43: ...lowing modes to enable security WEP It is based on the IEEE 802 11 standard If you check this radio button you will find a notice in red as shown below in Figure 4 32 Figure 4 32 Type you can choose t...

Page 44: ...hexadecimal digits any combination of 0 9 a f A F zero key is not promoted or 13 ASCII characters 152 bit You can enter 32 hexadecimal digits any combination of 0 9 a f A F zero key is not promoted o...

Page 45: ...ss station s capability and request Encryption When WPA PSK or WPA is set as the Authentication Type you can select either Automatic or TKIP or AES as Encryption Note If you check the WPA PSK WPA2 PSK...

Page 46: ...reless MAC Address Filtering entry page will appear shown in Figure 4 36 Figure 4 36 Add or Modify Wireless MAC Address Filtering entry To add or modify a MAC Address filtering entry follow these inst...

Page 47: ...C address 00 0A EB 00 07 5F are able to access the Router but all the other wireless stations cannot access the Router you can configure the Wireless MAC Address Filtering list by following these step...

Page 48: ...particular receiving station and negotiate the sending of a data frame The default value is 2346 Fragmentation Threshold This value is the maximum size determining whether packets will be fragmented...

Page 49: ...u Wireless Wireless Statistics you can see the MAC Address Current Status Received Packets and Sent Packets for each connected wireless station Figure 4 38 Wireless Statistics MAC Address The connecte...

Page 50: ...uration for all the PC s that are connected to the Router on the LAN Figure 4 40 DHCP Settings DHCP Server Enable or Disable the DHCP server If you disable the Server you must have another DHCP server...

Page 51: ...IP Address automatically 4 8 2 DHCP Clients List Choose menu DHCP DHCP Clients List you can view the information about the clients attached to the Router in the screen as shown in Figure 4 41 Figure...

Page 52: ...will pop up 2 Enter the MAC address in XX XX XX XX XX XX format and IP address in dotted decimal notation of the computer for which you want to reserve an IP address 3 Click the Save button Figure 4...

Page 53: ...IP Any PC that was used for a virtual server must have a static or reserved IP Address because its IP Address may be changed when using the DHCP function Figure 4 45 Virtual Servers Service Port The...

Page 54: ...te the entry click the Delete 2 Modify the information 3 Click the Save button Click the Enable Disable All button to make all entries enabled disabled Click the Delete All button to delete all entrie...

Page 55: ...by the Router Incoming Ports Range The port or port range used by the remote system when it responds to the outgoing request A response using one of these ports will be forwarded to the PC that trigg...

Page 56: ...ton to delete all entries Note 1 When the trigger connection is released the corresponding opening ports will be closed 2 Each rule is allowed to be used only by one host on LAN synchronously The trig...

Page 57: ...rnet computers to access the local host resources or devices as needed UPnP devices can be automatically discovered by the UPnP service application on the LAN Figure 4 50 UPnP Current UPnP Status UPnP...

Page 58: ...rity you can configure the basic security in the screen as shown Figure 4 52 Figure 4 52 Basic Security VPN VPN Passthrough must be enabled if you want to allow VPN tunnels using IPSec PPTP or L2TP pr...

Page 59: ...etc FTP ALG To allow FTP clients and servers to transfer data across NAT keep the default Enable TFTP ALG To allow TFTP clients and servers to transfer data across NAT keep the default Enable H323 AL...

Page 60: ...r is beyond the set value the Router will startup the blocking function immediately Enable TCP SYN FLOOD Attack Filtering Enable or Disable the TCP SYN FLOOD Attack Filtering TCP SYN FLOOD Packets Thr...

Page 61: ...blocked After click the Add button your PC s MAC Address will be placed in the list above Click the Save button to save your settings Note If your PC is blocked but you want to access the Router again...

Page 62: ...be able to access the Router s web based utility 2 Be sure to change the Router s default password to a very secure password 4 11 Parental Control Choose menu Parental Control you can configure the p...

Page 63: ...website allowed to be accessed in the Website Description field 4 Enter the domain name of the website e g www google com in the Allowed Domain Name field 5 Select from the Effective Time drop down li...

Page 64: ...the MAC Address of Parental PC field 2 Click Access Restriction Schedule on the left to enter the Schedule Settings page Click Add New button to create a new schedule with Schedule Description is Sche...

Page 65: ...triction Figure 4 59 Access Restriction There are four submenus under the Access Restriction menu as shown in Figure 4 59 Rule Host Target and Schedule Click any of them and you will be able to config...

Page 66: ...the steps below 1 Click the Add New button and the next screen will pop up as shown in Figure 4 61 2 Give a name e g Rule_1 for the rule in the Rule Name field 3 Select a host from the Host drop down...

Page 67: ...Click Access Restriction Schedule in the left to enter the Schedule Settings page Add a new entry with the Schedule Description is Schedule_1 Day is Sat and Sun Start Time is 1800 and Stop Time is 20...

Page 68: ...follow the steps below 1 Click the Add New button 2 In the Mode field select IP Address or MAC Address If you select IP Address the screen shown is Figure 4 63 1 In Host Description field create a uni...

Page 69: ...fy a Host Entry page 2 In Mode field select MAC Address from the drop down list 3 In Host Description field create a unique description for the host e g Host_1 4 In MAC Address field enter 00 11 22 33...

Page 70: ...ess of the target 3 Select a common service from Common Service Port drop down list so that the Target Port will be automatically filled If the Common Service Port drop down list don t have the servic...

Page 71: ...ess Target Entry page 2 In Mode field select Domain Name from the drop down list 3 In Target Description field create a unique description for the target e g Target_1 4 In Domain Name field enter www...

Page 72: ...In Day field select the day or days you need 4 In Time field you can select all day 24 hours or you may enter the Start Time and Stop Time in the corresponding field 5 Click Save to complete the setti...

Page 73: ...4 13 Static Routing Choose menu Static Routing and you can configure the static route in the next screen shown in Figure 4 70 A static route is a pre determined path that network information must tra...

Page 74: ...he Enable All button to enable all the entries Click the Disable All button to disable all the entries Click the Delete All button to delete all the entries Click the Previous button to view the infor...

Page 75: ...your Network If you are not clear about that please contact with your ISP for help 3 If no IP QoS item is enabled the Bandwidth Apply won t be effective 4 IP address range for different entries could...

Page 76: ...will go to the next page This page is used for adding or modifying an IP MAC Binding entry shown in Figure 4 75 Figure 4 75 IP MAC Binding Settings 74 IP Address 4 Click the Save button to save it w t...

Page 77: ...e ARP list also This page displays the ARP List it shows all the existing IP MAC Binding entries as shown in Figure 4 77 Figure 4 77 ARP List MAC Address The MAC address of the controlled computer in...

Page 78: ...amic IP address and then your friends can connect to your server by entering your domain name no matter what your IP address is Before using this feature you need to sign up for DDNS service providers...

Page 79: ...ear as shown in Figure 4 79 Figure 4 79 No ip com DDNS Settings To set up for DDNS follow these instructions 1 Type the User Name for your DDNS account 2 Type the Password for your DDNS account 3 Type...

Page 80: ...planations for each submenu are provided below 4 17 1 Time Settings Choose menu System Tools Time Settings you can configure the time on the following screen Figure 4 81 Time settings Time Zone Select...

Page 81: ...onnected to the Internet Note 1 This setting will be used for some time based functions such as firewall You must specify your time zone once you log in to the Router successfully otherwise these func...

Page 82: ...omain name such as www iballbaton com Pings Count The number of Ping packets for a Ping connection Ping Packet Size The size of Ping packet Ping Timeout Set the waiting time for the reply of each Ping...

Page 83: ...posted at www iballbaton com and can be downloaded for free There is no need to upgrade the firmware unless the new firmware has a new feature you want to use However in case of any experience problem...

Page 84: ...Router as a backup file and restore the configuration via a backup file as shown in Figure 4 86 Figure 4 86 Backup Restore Configuration Click the Backup button to save all configuration settings as...

Page 85: ...are of the Router system will restart automatically Restore the Router s settings to factory defaults system will restart automatically Update the configuration with the file system will restart autom...

Page 86: ...all 4 17 8 System log Choose menu System Tools System Log you can view the logs of the Router Figure 4 89 System Log Auto Mail Feature Indicates whether auto mail feature is enabled or not Mail Setti...

Page 87: ...ay or by intervals but only one could be the current effective rule Enter the desired time or intervals in the corresponding field as shown in Figure 4 90 Click Save to keep your settings Click Back t...

Page 88: ...down list to display the corresponding statistics Click Reset All to reset the values of all the entries to zero Click Delete All to delete all entries in the table Statistics Table IP MAC Address Th...

Page 89: ...ansmitted to WAN in the last Packets Statistic interval seconds TCP SYN Tx The total amount of the TCP SYN packets transmitted to WAN in the last Packets Statistic interval seconds There would be 5 en...

Page 90: ...n Type Type user name in the User Name field and password in the Password field finish by clicking Connect Figure A 1 PPPoE Connection Type 5 If your ADSL lease is in pay according time mode select Co...

Page 91: ...ss button and your PC s MAC address will fill in the WAN MAC Address field Or else type the MAC Address into the WAN MAC Address field The format for the MAC Address is XX XX XX XX XX XX Then click th...

Page 92: ...of your browser and click DMZ submenu On the DMZ page click Enable radio button and type your IP address into the DMZ Host IP Address field using 192 168 1 169 as an example remember to click the Sav...

Page 93: ...Remote Management submenu On the Remote Management page type a port number except 80 such as 88 into the Web Management Port field Click Save and restart the Router Figure A 8 Remote Management Note...

Page 94: ...fy a Virtual server Entry 4 The wireless stations cannot connect to the Router 1 Make sure the Enable Wireless Router Radio is checked 2 Make sure that the wireless stations SSID accord with the Route...

Page 95: ...he adapter s manual if necessary 1 Configure TCP IP component 1 On the Windows taskbar click the Start button and then click Control Panel 2 Click the Network and Internet Connections icon and then cl...

Page 96: ...ties window will display and the IP Address tab is open on this window by default Now you have two ways to configure the TCP IP protocol below Setting IP address automatically Select Obtain an IP addr...

Page 97: ...items available 2 If the Router s LAN IP address is 192 168 1 1 specify the IP address as 192 168 1 x x is from 2 to 254 and the Subnet mask as 255 255 255 0 3 Type the Router s LAN IP address the de...

Page 98: ...iB WRX150NE 150M Extreme Wireless N Router 92 Now Click OK to keep your settings...

Page 99: ...WAN LAN 1 4 WPS Safety Emissions FCC CE Wireless Frequency Band 2 4 2 4835GHz Radio Data Rate 11n up to 150Mbps Automatic 11g 54 48 36 24 18 12 9 6M Automatic 11b 11 5 5 2 1M Automatic Channels 13 Fre...

Page 100: ...s Internet gaming or videoconferencing DNS Domain Name System An Internet Service that translates the names of websites into IP addresses Domain Name A descriptive name for an address or group of addr...

Page 101: ...andard Wi Fi A trade name for the 802 11b wireless networking standard given by the Wireless Ethernet Compatibility Alliance WECA see http www wi fi net an industry standards group promoting interoper...

Page 102: ...names are trademarks or registered trademarks of their respective holders No part of the specifications may be reproduced in any form or by any means or used to make any derivative such as translatio...

Reviews: