4--3
19
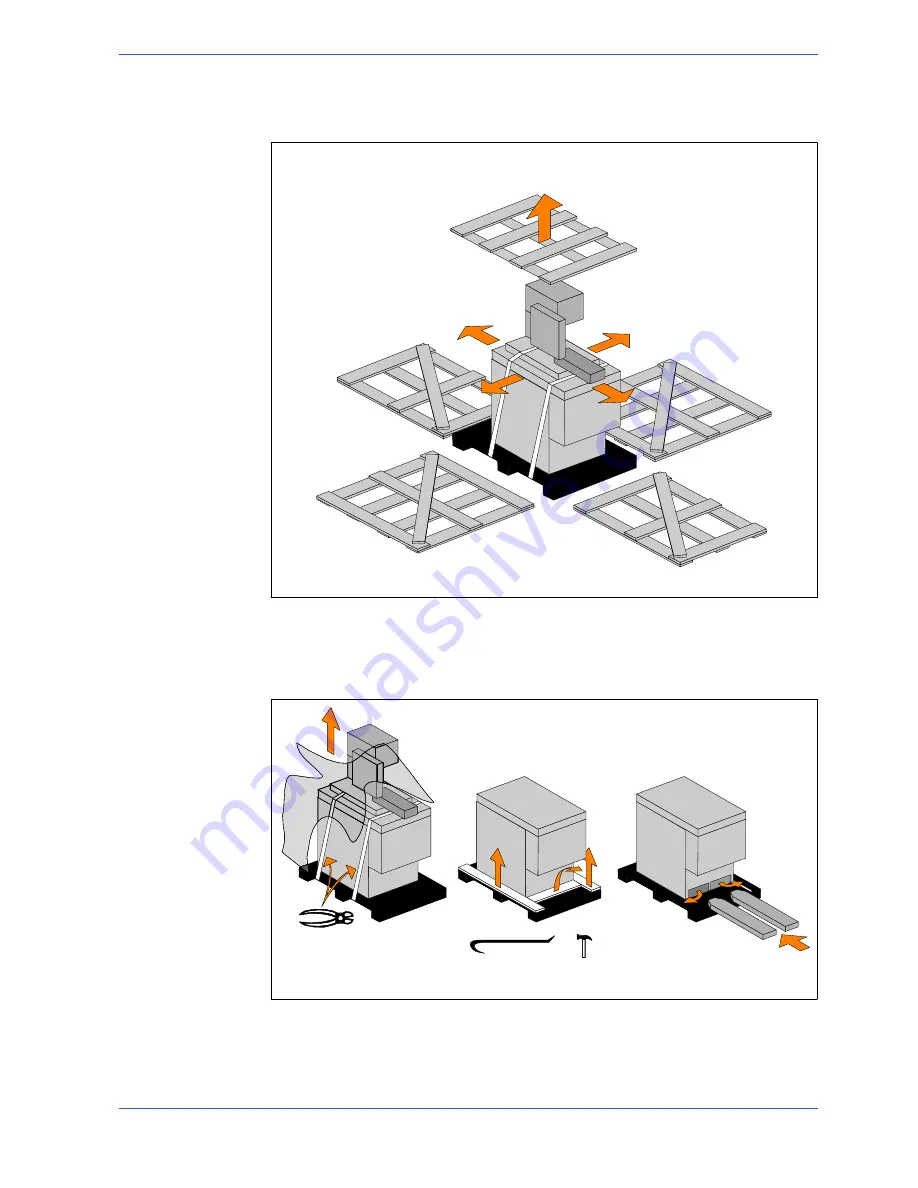
Machine installation
1. remove nails and lift the top of the cage;
2. remove nails and lower walls;
2
2
2
2
1
3. remove heat---shrink covering;
4. remove the straps;
5. remove nails from pallet securing planks and remove planks;
6. remove the front panel and insert fork tines.
3
4
5
6
To locate the machine in the workplace,
the machine dimensions
and necessary
operator working space, including
the spaces laid
down in safety standards,
must
be taken into account.
Summary of Contents for PH 211
Page 1: ...EN YEAR OF MANUFACTURE ______________ PH 211 USE AND MAINTENANCE MANUAL ...
Page 2: ......
Page 6: ......
Page 40: ...6 2 34 Use and maintenance manual PH211 Standardised Wiring Diagrams HB single phase ...
Page 41: ...6 3 35 Diagrams exploded views and replace Standardised Wiring Diagrams three phase ...
Page 44: ...6 6 38 Use and maintenance manual PH211 Motor assembly Handle assembly ...
Page 50: ...6 12 44 Use and maintenance manual PH211 Control panel assembly ...
Page 52: ...6 14 46 Use and maintenance manual PH211 Base assembly ...
Page 54: ...6 16 48 Use and maintenance manual PH211 Vise assembly A Vise assembly B PH 211 ...
Page 56: ...6 18 50 Use and maintenance manual PH211 Stand leg assembly ...
Page 58: ......
Page 72: ......
Page 97: ......
Page 98: ......


