42
43
104 72 57-26
104 72 57-26
Sewing head
Dismounting
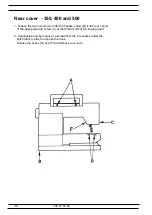
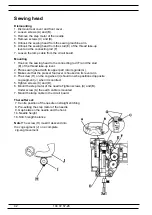
1. Dismount rear cover and front cover .
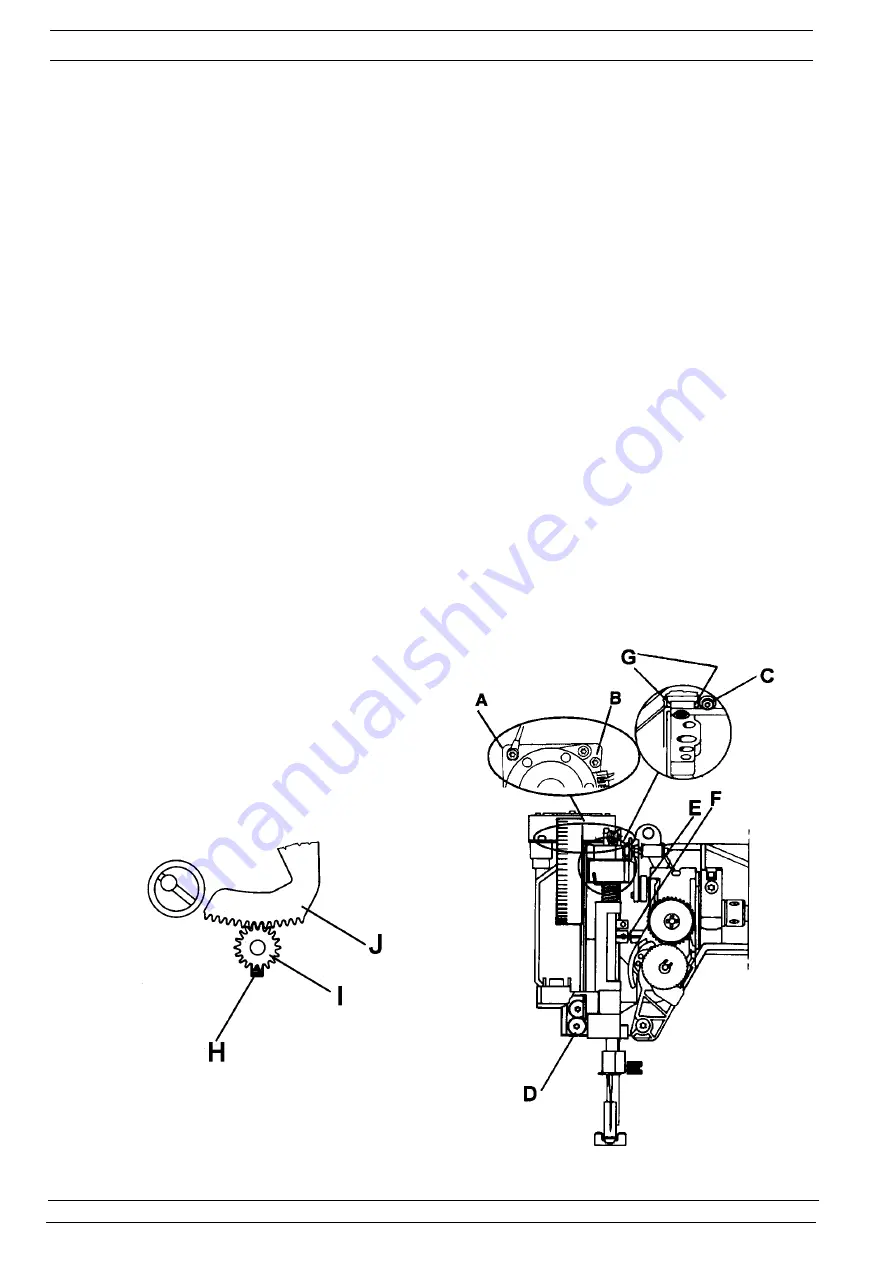
2. Loosen screws (A) and (B).
3. Remove the step motor of the needle.
4. Remove screws (C) and (D).
5. Unhook the sewing head from the sewing machine arm.
6. Unhook the sewing head from the stud (E) of the thread take-up
lever and the connecting rod (F).
7. Loosen the lamp cable from the circuit board.
Mounting
1. Hook on the sewing head to the connecting rod (F) and the stud
(E) of the thread take-up lever.
2. Place sewing head with its upper part into its guide (G).
3. Make sure that the presser foot lever is hooked on its lever arm.
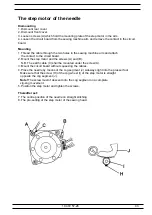
4. The screw (H) on the cog wheel (I) should now be positioned opposite
cog segment (J) when it is centred.
5. Tighten screws (C) and (D).
6. Mount the step motor of the needle.Tighten screws (A) and (B).
Under screw (A) the earth cable is mounted.
7. Mount the lamp cable in the circuit board.
Thereafter set:
7. Centre position of the needle on straight stitching
8. Pre-setting the step motor of the needle
9. Gap between the needle and the hook
14. Needle height
18. Stitch length balance
Note!
The screw (H) mustn’t descend into
the cog segment (J) on a complete
zig-zag movement.


