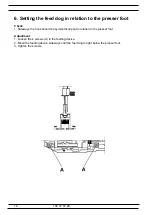


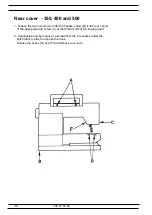


26
27
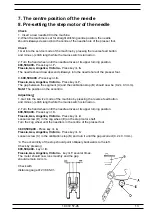
104 72 57-26
104 72 57-26
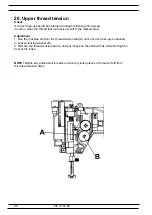
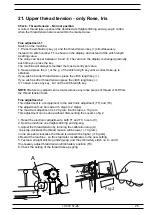
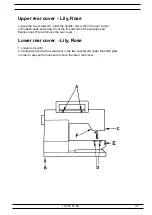
21. Upper thread tension cont. - only Rose, Iris
Coarse adjustment
If a correct take-up is not obtained with the fine adjustments.
Switch on the machine. Press embroidery key (
⇓
) and the thread tension key (+) simultaneously
and zero the fine adjustment.
To save, press any key, but not the stitch length key.
1. Dismount the rack from the stepmotor and the thread tension unit.
See dismounting instruction below.
2. Sew the machine and turn the thread tension dial (A) until a correct take-up is obtained.
3. Loosen locking washer (B).
4. Remove the thread tension dial (A) and put it back on the shaft inbetween 4 and 5 in
front of the index.
5. Mounting according to instruction below.
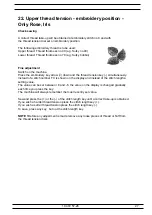
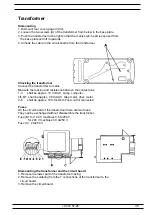
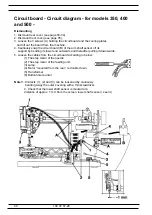
Dismounting instructions
1. Loosen the screws of the circuit board and partley remove it.
2. Remove C-washer (C), washer (D) and cog segment (H).
3. Loosen the screws of the thread tension unit and partley remove it.
4. Loosen the locking washer (I).
5. Remove the cogwheel (J).
Mounting instruction
1. Place the edge of the rack (K) right above the index mark (L) of the thread tension
casing according to fig 3.
2. Mount the cogwheel (J) and the locking washer (I).
3. Mount the thread tension unit.
4. Place the index mark (M) of the rack right in front of the index mark (O) of the step motor.
5. Place the index mark (P) of the cog segment right in front of the index mark (M) of the rack.
6. Mount washer (D) and C-washer (C).
7. Mount the circuit board.
NOTE !
Before any adjustment is made remove any loose pieces of thread or fluff from
the thread tension discs


