29
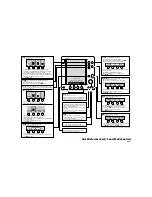
To start recording and adjust detail level (Screen Snapshot must be enabled):
1. Make sure you have installed an optional-purchase MMC/SD card into
the card slot.
2. Press the VIEW key until you see the Snapshot and Recording View.
3. From the Snapshot and Recording View, press the MENU key once to
access the Snapshot and Recording X-Press
™
Menu.
4. Press the UP or DOWN Cursor key to highlight Start Recording, and
then press the RIGHT Cursor key to start recording. Consider the
following:
• When you start a recording, a message will appear to indicate that
a waypoint has been created at the cursor location on the screen.
A waypoint created by a recording shares the same file name and
has a recording icon.
•
An information box will show the file number assigned to the
recording (.SON) that is being created. Recording file names start
with an “R.”
•
The slider bar at the bottom of the screen will show the progress
of the recording as well as how much space is remaining on the
MMC/SD card.
•
While you are recording, press the EXIT key to exit the Snapshot
and Recording X-Press™ Menu and move to a different view.
Recording will continue even if you leave the Snapshot and
Recording View.
•
Pings Per Second: Auto is the default setting for Pings Per Second
and automatically adjusts the ping rate for best recording quality.
If there is limited memory on your MMC/SD card, you can slow the
ping rate by setting the ping per second manually, but the
recording will capture less sonar detail. For maximum
performance, keep the Pings Per Second setting on Auto.
NOTE:
Viewing screen shots and playing back a recording are not available while you
are in recording mode.
Views


