Step 1
Ensure that all configurations are saved.
Step 2
In the system view, run the
disk offline
command. Wait for about 30 seconds. After the
system indicates that the hard disk has stopped working, run the
reset raid
command to delete
the RAID and replace the hard disk.
1.
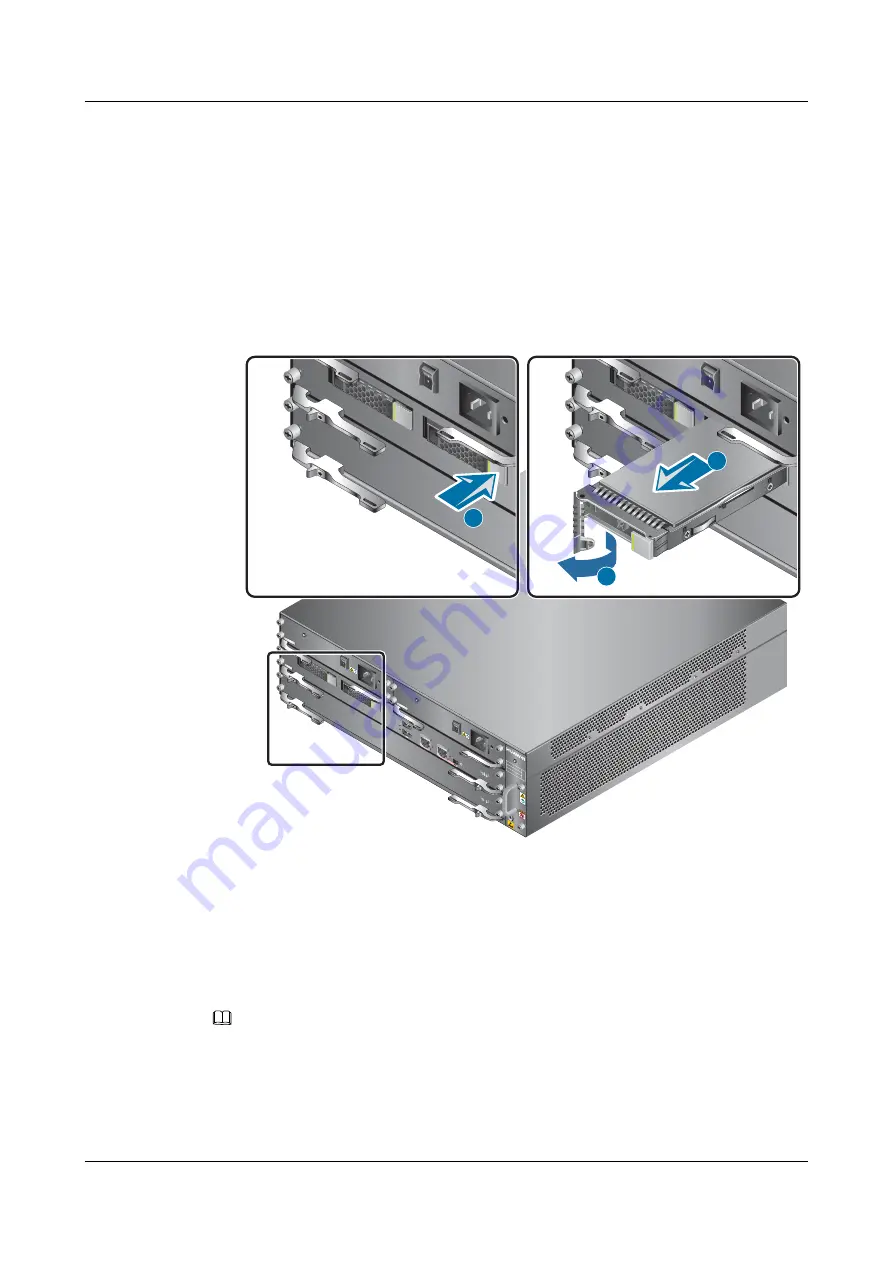
Press the button on the right of the hard disk tray to eject the handler.
2.
Use the handler to pull the hard disk out of the slot.
3.
Put the replaced hard disk into an ESD bag.
Figure 4-5
Removing the hard disk (USG6650/6660/6670/6680)
RUN
ALM
MGMT
CONSOLE
0
HDD0
HDD1
RST
EN
SYS
ALM
MODE
SPUA
EN
~100-240V
;50/60Hz,10A
ON
OFF
PAC-700W
A-L
ST
ATUS
~100-240V
;50/60Hz,10A
ON
OFF
PAC-700W
A-L
ST
ATUS
9 PWR
10 PWR
11
F
A
N
12
SPU
SPU
13
1
2
3
Step 3
Install the new hard disk. For details, see
.
Step 4
Wait for one minute and run the
reset raid
primary-disk
disk-id
command in the system
view to create a RAID group using
disk-id
as the primary disk for data synchronization. In
this example,
disk-id
is the installation slot of the non-faulty hard disk.
Step 5
Wait for four to five hours, run the
display disk information
command, and check whether
Filesystem Status
is
Mounted
. If yes, the hard disk is working properly.
NOTE
Filesystem Status
becomes
Mounted
four to five hours after the
reset raid
command is run. During
this period, you can use other services, but the hard disks do not record real-time logs for these services.
After data synchronization completes, the hard disks automatically start to work. You can run the
display disk information
command in the user view on the next day to check whether
Filesystem
Status
is
Mounted
. If not, contact Huawei technical support personnel.
HUAWEI USG6000 Series
Hardware Guide
4 Maintaining the Hardware
Issue 08 (2017-06-30)
Huawei Proprietary and Confidential
Copyright © Huawei Technologies Co., Ltd.
342


